Overview
Printing a timeline as a poster or on other paper formats different from the default may require a bit of tweaking to get optimal results. More precisely, the slide’s size must match or be proportional to the final output size for the graphic to be displayed properly. The following guide will explain how to customize your PowerPoint slides for printing on the desired paper format.
Steps
Start a blank presentation in PowerPoint and, in the main menu bar, select the Design tab.
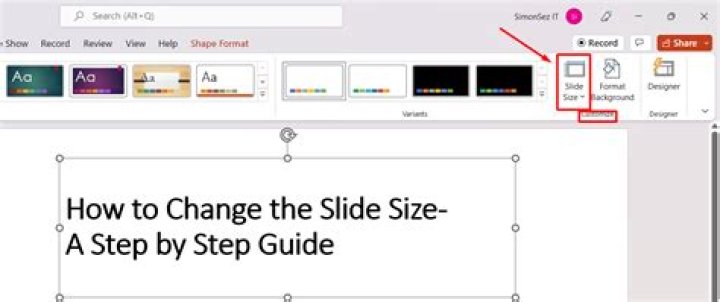
Here, click on the Slide Size button on the right and then select Custom Slide Size.
Note: Some versions of PowerPoint may have a Page Setup option instead of the Slide Size button.
The Slide Size dialogue box that will pop on your screen provides you with multiple options: you can select your preferred paper format from the “Slides sized for” menu, type in your desired height and width into the fields provided, and choose the slide’s orientation too. In our example, we will set the slide to 24” x 36”, Portrait, as we want to create a large timeline with 50+ tasks.
After you choose your preferred format and click OK, you may be prompted with two scaling options: Maximize or Ensure Fit. Since there is no content on your slide yet, choosing one or the other will not make any difference.
Now you can add or import your project data into Office Timeline as usual, and the plug-in will generate your graphic to fit the new page format as well as possible.
Style your timeline and print when ready.
Important:
- Please avoid changing the proportions of the slide after you’ve created the timeline, as PowerPoint may distort the graphics and you may also experience issues when editing or updating the visual. If your graphic is already done and you need to resize the slide, you can start a new presentation, change its page proportions to the desired format, and then copy-paste your timeline as a picture into the new presentation.
- Before printing, don’t forget to check if the printer’s paper size is set to the right format. This can be done from PowerPoint’s Print menu, in Printer Properties.
PowerPoint has a default slide size, but you don’t have to be limited by it. With this trick, you can custom set your PowerPoint slides to be any size you want.
Now, if you were a PowerPoint user from way back, you’re probably used to seeing your slides in a 4:3 aspect ratio, which is very close to square. However, everything has long since changed. Widescreen is now the standard presentation format, and since the 2013 version of PowerPoint, the default slide size has been set to a 16:9 widescreen aspect ratio. However, you can still switch back to the 4:3 setting, or even set your own custom size.
A quick note: Changing the orientation of your slides isn’t really the same thing as changing its size; you’re just rotating them on the page. However, if that’s what you’re looking for, you can do that as well.
- In PowerPoint, click on the View tab and make sure you’re in the Normal view.
- Then, click on the Design tab and choose Slide Size. The basic options are to just flip between the 16:9 or 4:3 aspect ratios, but what we’re really interested in is under the Custom Slide Size, so click on that.
- Here, you’ll see a lot more options. There’s the option to switch your slides from a landscape (which is the default) to a portrait orientation. You’ll also see a dropdown menu, where you can find many more size options for your PowerPoint slides. For instance, the letter paper size might be useful if you’d like people to be able to easily print your slides off following a presentation.
- You can also custom adjust the size using the Width and Height fields. In fact, you can even make this your default size. To do so, click the Design tab, and then head to Themes and click the bottom arrow. Save the theme and give it a name, and then immediately head right back to that arrow. Right-click on it, and click Set as Default Theme. That way, when you start a new presentation, you’ll get your preferred slide size instead of the standard Microsoft default.
Basic steps
To change the slide size:
Select the Design tab of the toolbar ribbon.
Select Slide Size near the far right end of the toolbar.
Select Standard (4:3 aspect ratio) or Widescreen (16:9) or Custom Slide Size.
Tip: Check out these YouTube videos from Microsoft Creators for more help with slide design!
For more about the predefined sizes (including formats like Overhead, A3, A4, Banner, B4, and B5) or your own custom sizing, click a heading below to expand it and see the details.
Detailed steps
On the Design tab of the Ribbon, locate Slide Size in the Customize group, near the far right end of the toolbar.
Select Slide Size, and then select either Standard (4:3) or Widescreen (16:9).
When PowerPoint is unable to automatically scale your content, it prompts you with two options:
Maximize: Select this option to increase the size of your slide content when you are scaling to a larger slide size. Choosing this option could result in your content not fitting on the slide.
Ensure Fit: Select this option to decrease the size of your content when scaling to a smaller slide size. This could make your content appear smaller, but you’ll be able to see all content on your slide.
The 16:9 widescreen setting is the default value for new presentations you create. When you change the slide size for a presentation, the size you choose only applies to that presentation. However, you can make it easy to create a new 4:3 presentation for yourself whenever you want—by defining a custom theme that uses the 4:3 aspect ratio. See the section below named “Make a default size to start from when creating new presentations.”
On the Design tab of the Ribbon, locate Slide Size in the Customize group, near the far right end of the toolbar.
Select Slide Size, and then select Custom Slide Size.
In the Slide Size box, click the down arrow next to Slides sized for and select an option. Their dimensions are listed below:
PowerPoint allows you to format and present the content of your slides in different ways. If you want to print out or display your PowerPoint slides in a bigger or smaller-than-average size, you can change the slide sizes to match.
Changing PowerPoint Slide Sizes
PowerPoint has two common slide sizes. The first, 4:3, is a good option if you’re using older hardware to present your slides. If you’re planning on presenting your PowerPoint presentation using a modern projector or display, then the 16:9 slide size should be your preferred choice.
By default, PowerPoint will default to the 16:9 side slide. To print your slides (full size, one per page), you’ll likely need to use a custom slide size, rather than one of these options.
Switching to another size is thankfully an easy process—open your PowerPoint presentation to begin and then click the “Design” tab on the ribbon bar.
In the “Customize” section of the “Design” tab, select the “Slide Size” button. This will display the two common slide sizes in a drop-down menu.
Click either the “Standard (4:3)” or “Widescreen (16:9)” option to switch all of your PowerPoint slides to that size.
Unfortunately, it isn’t possible to use multiple slide sizes in a PowerPoint presentation. Just as if you were making PowerPoint slides vertical, any changes you make to your PowerPoint slide sizes will apply to all slides.
Changing to a Custom PowerPoint Slide Size
It’s possible to use a custom PowerPoint slide size if the default 4:3 or 16:9 options are unsuitable. You might choose to use a custom slide size if you’re printing full-size PowerPoint slides using a custom page layout, for instance.
To do this, select Design > Slide Size > Custom Slide Size to display the “Slide Size” options menu.
Slide Size > Custom Slide Size.” width=”337″ height=”227″ src=” onload=”pagespeed.lazyLoadImages.loadIfVisibleAndMaybeBeacon(this);” onerror=”this.onerror=null;pagespeed.lazyLoadImages.loadIfVisibleAndMaybeBeacon(this);”/>
Various preset slide sizes, such as A3 or A4 paper sizes, are shown under the “Slides Sized For” drop-down menu.
Select one of these preset options, or set your slide dimensions manually using the “Width” and “Height” option boxes. From there, click the “OK” button to save.
If you’re scaling down to a smaller size, PowerPoint will ask you how it should handle any slide content.
Choose “Maximize” if you want the slide contents to remain at a similar scale, but with the risk that some of the content may be cut. Alternatively, click “Ensure Fit” to scale the slide contents down in size to match the new slide size without losing any content.
Once saved, the custom slide size you selected will be immediately applied to all of your slides, with slide content being resized or cut to match.
Margarete Cotty
2020-12-21 15:05:21 • Filed to: PowerPoint Features • Proven solutions
A well-created PDF presentation speaks to professionalism and attention to detail, two characteristics that can come in handy in any business or professional environment. As such, you don’t want your presentation’s slides to look any less than presentable, and that means that they should be sized appropriately. But we all know that when creating the presentation, it is easy to get all caught up in the process and forget the design aspect of the presentation. In this guide, we will be sharing with you the best way to change slide size in PowerPoint to make sure they are just right.
How to Change Slide Size in PowerPoint
There are various options when changing the size of slides in PowerPoint, and we will take a look at all of them here to give you various options when designing the PDF. Here are the steps to change slide size in PowerPoint.
Step 1. Open the Presentation
Open the presentation whose slides you would like to resize. Click on the “Customize” button group in the “Design” tab and then click “Slide Size.”
Step 2. Change the Slide Size
You can change the aspect ratio of the slides by either choosing the “Widescreen” or “Standard” options from the dropdown menu. You can also choose to select a custom size or change the aspects of the slide by selecting the “Custom Slide Size” option.
Step 3. Select and Apply the Slide Size
To change the orientation of the slides, you can either choose “Portrait” or “Landscape” in the “Orientation” section. Once done, you can click “OK” to apply the changes and then save the document.
How to Reduce PowerPoint File Size with PowerPoint
It is also not uncommon for PowerPoint files to be overly large, making it difficult to share them easily. To reduce the size of the PowerPoint file, you can follow these simple steps.
Step 1. Open the Presentation
Open the PowerPoint presentation and then double-click on one of the images in the presentation. Then click the “Format” > “Compress Pictures” tab.
Step 2. Compress the Pictures
Now, a dialogue box will pop up. To ensure that this applied to all images, uncheck the “Apply only to this picture” option. Besides, you can click on the “Email (96 ppi)” option and finally click “OK.”
This will compress all images to the selected format, effectively reducing the size of the overall presentation.
The Best PDF Software
If you work with PDF documents just as much, you may need a PDF editor that is reliable, effective, and very simple to use. There is only one PDF editor that embodies all these qualities and it is Wondershare PDFelement. Its features perfectly marry effectiveness with ease of use to ensure that even the most basic of beginners can use this tool to create, convert, and edit PDFs with ease. Some of the program’s features include the following:
- It can create a PDF document by converting any format you open in the program without affecting the content or its formatting.
- It can then be used to easily edit all aspects of the PDF, including being able to edit the text, images, and pages. You can change the text size and font style, just as you can easily change the size of the images.
- Once you’ve edited the document, you can then convert the document to a myriad of other formats, including HTML, Excel, Word, PowerPoint, and many more.
- It has powerful annotation features that allow you to annotate a PDF as you go. You can add comments to the document or highlight and underline text or add custom stamps and attachments.
- The OCR feature allows you to very easily edit scanned PDFs as well as image-rich PDFs that may not otherwise be editable.
- You can also be able to use security features like adding a password, watermark, and signatures to keep confidential information from unauthorized persons.
How to Reduce PowerPoint File Size with PDFelement
Step 1. Import PowerPoint into PDFelement
Open PDFelement and then click on “Open File” to select the presentation. You can also simply drag and drop the presentation into the program’s main window to open it. This will convert the PowerPoint to PDF.
Step 2. Optimize PDF
To reduce the overall size of the presentation, click on “File” > “Optimize” and then choose the level of optimization you would like to use.
Step 3. Convert to PowerPoint
Save the changes you have made and then click “Convert” > “To PPT.” Choose the output folder in the dialogue box that opens, and then click “Save.”
Change orientation first so elements don’t drop off the slide
- Tweet
- Share
What To Know
- In Windows: In Normal view, press Design >Slide Size >Custom Slide Size. Under Orientation, select Vertical, and set the Height and Width.
- On the web: Design >Slide Size >Custom Slide Size >Portrait >OK. Then choose how slides fit the screen.
- On a Mac: File >Page Setup. Select Portrait, adjust the size as needed, and press OK.
This article explains how to change the orientation of PowerPoint slides between portrait and landscape. Instructions in this article apply to PowerPoint for Microsoft 365, PowerPoint 2019, PowerPoint 2016, PowerPoint 2013, PowerPoint 2010, PowerPoint 2007, PowerPoint for Mac, and PowerPoint Online.
Change Slide Orientation in PowerPoint for Windows
The steps used to change the page orientation between landscape and portrait are the same in all versions of PowerPoint 2013 for Windows and newer.
In the Normal view, click the Design tab.
Select Slide Size.
Select Custom Slide Size.
Use the buttons in the Orientation section to select a vertical orientation or enter dimensions in the Width and Height fields.
Select OK to apply the changes.
Change Slide Orientation in PowerPoint 2010 and 2007 for Windows
Follow these steps to change from landscape to portrait slide orientation in older versions of PowerPoint for Windows.
Select the Design tab, and in the Page Setup group, click Slide Orientation.
Choose Portrait.
Press OK to save your changes.
Change Slide Orientation in PowerPoint for Mac
To change the page orientation from landscape to portrait in PowerPoint for Mac 2011.
Select the File menu and choose Page Setup.
In the Page Setup dialog box, across from Slides, select the Portrait orientation. As an alternative, select custom dimensions in the Size section, making the height greater than the width.
Choose OK to apply the changes.
Change Slide Orientation in PowerPoint Online
For a long time, PowerPoint Online didn’t offer a portrait orientation slide, but that has changed.
Select the Design tab.
Select Slide Size, then choose Custom Slide Size.
Select the Portrait orientation image.
Select OK to apply the changes.
You have the choice to either choose Maximize, which maximizes the use of the available slide space, or click Ensure fit, which makes sure that the slide content fits on the vertical portrait orientation.
Landscape and Portrait Slides in the Same Presentation
There is no simple way to combine landscape slides and portrait slides in the same presentation. If you’ve worked with slide presentations, you know that this is a basic feature. Without it, some slides won’t present the material effectively, such as with a lengthy vertical list, for example. There is a workaround if you must have this capability.
Are you tired of presentations that don’t adapt well to the screens used in the venue? That’s mostly due to them not being properly suited for conventional (4:3) or widescreen (16:9) formats.
Comparison of standard and widescreen size ratios
Before giving your presentation, it’s important to know which type of screen it’s going to be shown on, so you can optimize it as much as possible. However, have in mind that after changing the original aspect ratio of your presentation, any elements and images already included will probably appear scrambled, so you’ll need to readjust them one by one in the slides or even the master slides.
To change the aspect ratio in PowerPoint, click Slide Size, which is in the Customize group on the Design tab, and choose the desired aspect ratio for your presentation.
Slide Size drop-down menu in PowerPoint
As with Google Slides, you can set your own slide size by clicking Custom Slide Size…
Slide Size options
When scaling the content, PowerPoint asks you to choose between two different options:
Scaling options in PowerPoint
- Maximize: With this option, PowerPoint will increase the size of the content when scaling to a greater size. As a result, the content might get redistributed in the slides.
- Ensure Fit: With this option, the size of the content will be reduced when scaling to a smaller size. As a result, the content will be smaller and you might need to scale it up again where needed.
Now your presentation is ready and adapted for the new aspect ratio. If you want to learn more about PowerPoint and/or Google Slides and how to get the most out of them, stay tuned for more Slidesgo School tutorials. For further information on how to change the aspect ratio of your slides in PowerPoint, please refer to this article of the Microsoft Office support page.
Updated on May 30, 2020 by Swayam Prakash
Powerpoint presentation has always been an integral part of all meetings, projects, conferences. A great presentation always marks a lasting impression. It is important to have a presentation that has slides which are properly visible. Normally, in a meeting, people use a projector to present the slides. In this guide, I will tell you how to change slide size effectively on Powerpoint to fit with the projector monitor.
I’m talking about making changes to the default slide size. You can change slide size literally anytime. But, it’s better to decide the size before you create the presentation. If you make changes later, you have to do it for all slides.
Table of Contents
How to Change Slide Size in PowerPoint
First, let’s understand the role of scaling in Powerpoint slides.
Scaling
When you wish for resizing your slides, you will be presented with two options, Scale and Don’t Scale. If you go for scaling your slide, then the slide content will easily be visible in any size you change them into. However, if you do not scale, content visible in standard slide size will go out of the slide frame upon resizing. It’s the same concept as Facebook asking you to crop-to-resize display pictures. This will give you an idea.
Steps of Changing Slide Size
- Launch MS Powerpoint
- Select A Slide
- Go to Design > In the upper section navigate to Slide Size. Click on it.
- You will see options for three kinds of slides, standard, widescreen, and custom slide size.
Standard Size
This one usually offers a screen ratio of 4:3. It is the most used slide size by presenters all over the globe. Most of the projecting devices easily support the standard slide size.
Widescreen
If you have a projector that is HD oriented or supports modern 4K viewing, then select Widescreen slide size. This slide size has an aspect ratio of 16:9. It is good for online project presentations.
Custom Slide Size
If you are someone who likes to customize the presentation to the slightest bit, then go for this one. You can set the orientation of your presentation as a landscape or regular portrait. Customizing will allow you to set the height, width of your slides.
So, that’s all about how to change slide size on Microsoft Powerpoint. This feature should easily work on the latest and slightly older versions of Powerpoint. Let me know in the comments section, what slide size do you prefer for your presentation.
Makes them much easier to read
Powerpoint presentations are supposed to be engaging. But that’s another story if the audience can’t see what’s in front of them. So, in this article, we’ll discuss how to change the default slide size in Powerpoint.
This will come in handy so you can maximize your slides to the size of the projector or monitor you’ll be using and deliver a better presentation.
Choose One Slide Size First
PowerPoint allows you to change the slide size anytime you like, but it’s a good idea to pick the right size before you start creating your presentation.
If you decide to change the size later, PowerPoint will do its best to give you options on how to shift items around, but it will more than likely result in having to totally redesign your slides.
This is especially true if you move from a widescreen format slide to a smaller 4:3 standard sized slide.
If you choose to scale it down, PowerPoint will try to fit everything as best it can into the smaller slide. If you choose Don’t Scale, the items that are outside the standard size will simply be out of the window. You’ll then have to decide whether to delete those items or move them back into the slide.
Change Slide Size in PowerPoint
Once you know what size will be ideal for your output device, you can adjust the slide size in PowerPoint.
First, go ahead and open PowerPoint and select a slide.
This guide works will work for most modern versions of PowerPoint that have the ribbon interface, including the version in Office 365.
Next, go to the Design tab. It’s where you can find the options that let you tweak your presentation’s design.
There, head over to the far right end — to where you can find the Customize section. Next, choose Slide Size.
Clicking on this option will reveal a menu. It lets you pick the size of the slide that you want. Your choices are Standard, Widescreen, and Custom Slide Size.
Let’s walk through each of the choices. This way, you will have a better understanding of your options. This will also help you adjust your slide’s size as needed – a size that works best for your projector or TV.
If you go with the Standard size, you’ll be going with a 4:3 aspect ratio. This is a safe choice because it works for familiar devices such as older screens with low resolutions.
A Standard slide size is a suggested choice for old school presenters. This means those who will be working with old projectors and SlideShare or other old online presentation platforms.
If you choose Widescreen, you’ll be going with an aspect ratio of 16:9. This is the ideal choice for you if you’re dealing with newer devices and online presentation platforms.
Got a Microsoft Surface device or HD projector? Going with a Widescreen option is the better way to go. The same is true if you’ll be presenting on a HDTV or 4K TV/monitor.
If Standard and Widescreen slide sizes are not for you, you can also go with the Custom Slide Size…
If you select this option, a pop-up window will appear.
Here, you can select from plenty of choices regarding the slide size you want. If you’re about to deliver your Powerpoint presentation on an unfamiliar projector, it’s good to go with this option.
It’s flexible. It can also accommodate your preferred slide dimensions.
Plus this way, you can select the Orientation for your slides and notes. This lets you have control over the Width and Height of your slides, too.
You can also try expanding the Slides sized for menu option. Doing so reveals preset sizes that go beyond the Standard and Widescreen size options.
As you can see, this option allows you to adjust your slide to fit the size of a Letter Paper, 35mm slide, a banner, 16:10 aspect ratio and more.
Christopher Jan Benitez is a freelance writer for hire who provides actionable and useful web content to small businesses and startups. In his spare time, he religiously watches professional wrestling and finds solace in listening to ’80s speed metal. Read Christopher’s Full Bio


