Multiple Wi-Fi signal strength meter tools
- Tweet
- Share
What to Know
- In Windows, go to Network and Internet >Network and Sharing Center. Select the blue Wi-Fi link to see the signal strength.
- On Mac, the Wi-Fi indicator is located in the upper-right corner of the screen in the menu bar.
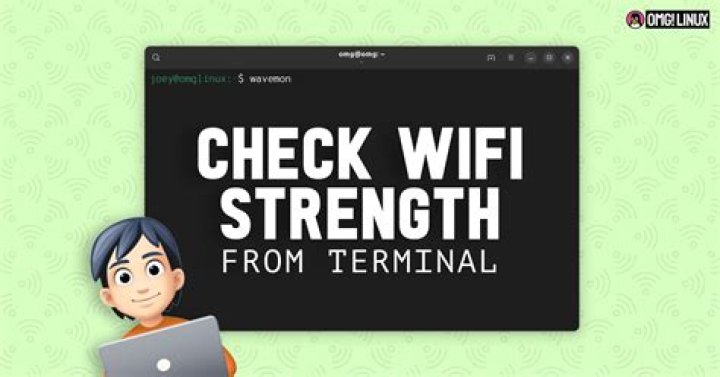
- On Linux systems, use the following command: iwconfig wlan0 | grep -i –color signal.
This guide explains how to check Wi-Fi signal strength on a variety of platforms. These instructions apply to currently supported versions of Windows, Mac, Linux, iOS, and Android.
How to Measure Your Wi-Fi Signal Strength
The performance of a Wi-Fi wireless network connection depends on the radio signal strength. On the path between the wireless access point and a connected device, the signal strength in each direction determines the data rate available on that link.
Use the following methods to determine the signal strength of your Wi-Fi connection and find ways to improve the Wi-Fi range of your connected devices. Different tools may show different results. These variations are caused by differences in how the utilities collect samples and the timing used to report an overall rating.
Network bandwidth isn’t the same as signal strength. Network bandwidth is the speed you get from your ISP. Signal strength determines the functionality of the hardware connected to the Wi-Fi and the range that an access point has throughout an area.
Use a Built-in Operating System Utility
Microsoft Windows and other operating systems contain a built-in utility to monitor wireless network connections. This is the quickest and easiest way to measure Wi-Fi strength.
In newer versions of Windows, select the network icon on the taskbar to see the wireless network you’re connected to. There are five bars that indicate the signal strength of the connection, where one is the poorest connection and five is the best.
To find the network connection in modern versions of Windows, open Control Panel and go to Network and Internet > Network and Sharing Center, and select the blue Wi-Fi link to see the Wi-Fi strength.
On Mac, the Wi-Fi indicator is located in the upper-right corner of the screen in the menu bar.
On Linux systems, use the following command to display the signal level in the terminal window:
iwconfig wlan0 | grep -i –color signal
The output in terminal will be displayed as a dB value. The more negative the value, the worse the signal strength. Anything from -50dBm to -70dBm could be considered great to decent signal strength.
Use a Smartphone or Tablet
Any mobile device that is internet capable has a section in the settings that shows the strength of the Wi-Fi networks in range. For example, on an iPhone, open the Settings app, then go to Wi-Fi to see the Wi-Fi strength of the network you’re on and the signal strength of any network that’s in range.
A similar method can be used on an Android phone or tablet. Look under a Settings, Wi-Fi, or Network menu. For example, in the settings on a Google Pixel running Android 10, select Network & internet, then select the Wi-Fi you’re using, then select the gear icon next to the network you’re connected to. There you can see the signal strength.
Another option is to download a free app such as Wifi Analyzer for Android, which shows the Wi-Fi strength visually in dBm compared to other nearby networks. Similar options are available for other platforms like iOS.
Open Your Wireless Adapter’s Utility Program
Some manufacturers of wireless network hardware or notebook computers provide software applications that monitor wireless signal strength. These applications report signal strength and quality based on a percentage from zero to 100% and additional detail tailored specifically to the hardware.
The operating system utility and the vendor hardware utility may display the same information in different formats. For example, a connection with an excellent 5-bar rating in Windows may show in the vendor software as excellent with a percentage rating anywhere between 80% and 100%. Vendor utilities can often tap into extra hardware instrumentation to precisely calculate radio signal levels as measured in decibels (dB).
Wi-Fi Locators Are Another Option
A Wi-Fi locator device scans radio frequencies in the local area and detects the signal strength of nearby wireless access points. Wi-Fi locators exist in the form of small hardware gadgets that fit on a keychain.
Most Wi-Fi locators use a set of between four and six LEDs to indicate signal strength in units of bars similar to the Windows utility. Unlike the above methods, however, Wi-Fi locator devices do not measure the strength of a connection but instead, only predict the strength of a connection.
Multiple Wi-Fi signal strength meter tools
- Tweet
- Share
What to Know
- In Windows, go to Network and Internet >Network and Sharing Center. Select the blue Wi-Fi link to see the signal strength.
- On Mac, the Wi-Fi indicator is located in the upper-right corner of the screen in the menu bar.
- On Linux systems, use the following command: iwconfig wlan0 | grep -i –color signal.
This guide explains how to check Wi-Fi signal strength on a variety of platforms. These instructions apply to currently supported versions of Windows, Mac, Linux, iOS, and Android.
How to Measure Your Wi-Fi Signal Strength
The performance of a Wi-Fi wireless network connection depends on the radio signal strength. On the path between the wireless access point and a connected device, the signal strength in each direction determines the data rate available on that link.
Use the following methods to determine the signal strength of your Wi-Fi connection and find ways to improve the Wi-Fi range of your connected devices. Different tools may show different results. These variations are caused by differences in how the utilities collect samples and the timing used to report an overall rating.
Network bandwidth isn’t the same as signal strength. Network bandwidth is the speed you get from your ISP. Signal strength determines the functionality of the hardware connected to the Wi-Fi and the range that an access point has throughout an area.
Use a Built-in Operating System Utility
Microsoft Windows and other operating systems contain a built-in utility to monitor wireless network connections. This is the quickest and easiest way to measure Wi-Fi strength.
In newer versions of Windows, select the network icon on the taskbar to see the wireless network you’re connected to. There are five bars that indicate the signal strength of the connection, where one is the poorest connection and five is the best.
To find the network connection in modern versions of Windows, open Control Panel and go to Network and Internet > Network and Sharing Center, and select the blue Wi-Fi link to see the Wi-Fi strength.
On Mac, the Wi-Fi indicator is located in the upper-right corner of the screen in the menu bar.
On Linux systems, use the following command to display the signal level in the terminal window:
iwconfig wlan0 | grep -i –color signal
The output in terminal will be displayed as a dB value. The more negative the value, the worse the signal strength. Anything from -50dBm to -70dBm could be considered great to decent signal strength.
Use a Smartphone or Tablet
Any mobile device that is internet capable has a section in the settings that shows the strength of the Wi-Fi networks in range. For example, on an iPhone, open the Settings app, then go to Wi-Fi to see the Wi-Fi strength of the network you’re on and the signal strength of any network that’s in range.
A similar method can be used on an Android phone or tablet. Look under a Settings, Wi-Fi, or Network menu. For example, in the settings on a Google Pixel running Android 10, select Network & internet, then select the Wi-Fi you’re using, then select the gear icon next to the network you’re connected to. There you can see the signal strength.
Another option is to download a free app such as Wifi Analyzer for Android, which shows the Wi-Fi strength visually in dBm compared to other nearby networks. Similar options are available for other platforms like iOS.
Open Your Wireless Adapter’s Utility Program
Some manufacturers of wireless network hardware or notebook computers provide software applications that monitor wireless signal strength. These applications report signal strength and quality based on a percentage from zero to 100% and additional detail tailored specifically to the hardware.
The operating system utility and the vendor hardware utility may display the same information in different formats. For example, a connection with an excellent 5-bar rating in Windows may show in the vendor software as excellent with a percentage rating anywhere between 80% and 100%. Vendor utilities can often tap into extra hardware instrumentation to precisely calculate radio signal levels as measured in decibels (dB).
Wi-Fi Locators Are Another Option
A Wi-Fi locator device scans radio frequencies in the local area and detects the signal strength of nearby wireless access points. Wi-Fi locators exist in the form of small hardware gadgets that fit on a keychain.
Most Wi-Fi locators use a set of between four and six LEDs to indicate signal strength in units of bars similar to the Windows utility. Unlike the above methods, however, Wi-Fi locator devices do not measure the strength of a connection but instead, only predict the strength of a connection.
Well, an average WiFi user deals with lots of problems like intruders connecting to the network, slow speed, weak wifi signals, etc. Out of all those, the weak WiFi signal is what bothers them most. Whenever the internet seems slow, or web page doesn’t load anymore, we immediately check the WiFi signal strength.
It’s definitely the first thing that you should consider because a stronger WiFi signal means a more reliable connection. WiFi signal strength depends on a wide range of factors like how far you are from the router, whether its a 2.4Ghz or 5Ghz connection, Dead Spots, etc.
How To Measure Your WiFi Signal Strength
Since the performance of the WiFi network depends greatly on the radio signal strength, it’s essential to determine the signal strength. By analyzing the signal strength, one could easily improve the WiFi range of the connected devices. So, in this article, we have shared the best methods to check your WiFi Signal strength in Android and Windows computers.
Check WiFi Signal Strength On Windows
Well, checking the WiFi Signal Strength on Windows is easy. Users need to enter a command on Windows. Before checking the WiFi signal, make sure your laptop or computer is connected to the WiFi network which you want to test. Once connected, open the Command Prompt window and enter the following command:
netsh wlan show interface
Once done, it will provide you the detailed information about the wireless network like the GUID, State, Physical Address, SSID, BSSID, Network type, etc. To check the WiFi signal strength, you need to check the “Signal”. The signal is represented as a percentage value, and it’s always accurate.
Check WiFi Signal Strength On Windows
So, this is how you can check your WiFi signal strength in Windows 10 computer via CMD. You can also use third-party software, but its the easiest method to check the WiFi signal strength on Windows.
Check WiFi Signal Strength On Android
Well, we know, it’s not always possible to check the WiFi signal strength on the computer. Since we use our smartphone more often than our laptop or computer, it’s important to know the method to check WiFi signal strength on Android as well. To check the WiFi signal strength on Android, follow the simple steps given below.
Step 1. First of all, download and install a WiFi analyzer on your Android smartphone.
Install WiFi Analyzer
Step 2. Once installed, open the app and wait until the app scans for the available network. Once done, it will list the WiFi channels.
Step 3. Now swipe left, and you will now see the screen showing details about the WiFi channels. You need to check the ‘dBm’. If the DBM is showing -30, then you have the perfect connection. Similarly, if the dBm shows -90, then its weak connection. The good connection is around -50 dBm.
Step 5. You can also swipe right to see the signal strength meter.
Check WiFi Signal Strength On Android
That’s it; you are done! This is how you can check your WiFi signal strength in Android.
Check WiFi Signal Strength on iPhone
To measure your WiFi Signal strength on iPhone, you need to use an app known as Fing – Network Scanner. It’s basically a network scanner app that lets you identify devices connected to your WiFi network.
Check WiFi Signal Strength on iPhone
Apart from identifying connected devices, Fing – Network Scanner can be used to measure the WiFi signal strength. Not only that, but it also lets you analyze bandwidth usage by devices.
I hope this article helped you! Make sure to share it with your friends as well.
- You can easily check your Wi-Fi signal’s strength, right down to the exact dBm levels, on a Mac or PC computer.
- Signal strength is measured in decibel milliwatts (dBm) and you can install an app on Windows to measure it. You can see this value on a Mac without adding any software.
- If your signal strength is lower than about 50 dBm, there are troubleshooting steps you should take to improve your connection.
When having Wi-Fi connection problems, most of us instinctively look at the bars on our computer or phone screen to see how strong our Wi-Fi connection is. That’s the equivalent of checking the oil level in your car by looking for the warning light on your dashboard – it only tells you about your car’s oil level in the most approximate way. There are much more precise tools available.
You can measure signal strength several different ways. Sometimes, it’s indicated in terms of network speed, as in how many Mbps the network allows you to upload data. But this is only a user-friendly approximation: It’s officially measured in decibel milliwatts (dBm).
How to check Wi-Fi signal strength on a Mac
How to check Wi-Fi signal strength on Windows
There’s no Wi-Fi signal strength meter built into Windows, but there are several apps to choose from – both paid and free – that can do this for you. We recommend inSSIDer because it is free, reliable, and easy to understand. To get started with inSSIDer, follow the direction on the installation page: install the app, create a free account, and use that account to log into the app.
How to interpret your network’s signal strength
In addition, signal strength isn’t linear; it’s logarithmic, which means that every 3 dBm change represents a halving or doubling of the strength of the signal. Moreover, a 10 dBm change adds up to ten times more or less strength.
In a house or apartment, there may be various factors affecting your Wi-Fi signal strength, coverage, and connectivity speeds. If you think your internet connection has slowed down lately, you can check the Wi-Fi signal strength to find out the connection performance.
Before you buy a new router or change the Internet Service Provider (ISP), you should check your Wi-Fi signal strength and determine if the slow performance issue is an issue with the ISP or your router.
In this guide, we’re going to show you the steps to check Wi-Fi signal strength on Windows 10 with Command Prompt, PowerShell, and a Microsoft Store app.
How to check Wi-Fi signal strength using Command Prompt
To check Wi-Fi signal strength on Windows 10 with Command Prompt, follow these steps:
- Open Start menu.
- Type “command” and you’ll see “Command Prompt.”
- Select Command Prompt result.
- Choose “Run as administrator.”
- In Command Prompt window, enter “netsh wlan show interfaces”.
The above interface command displays your network signal strength as a percentage. Every detail about the connected Wi-Fi network and the network adapter is collected and presented in a table.
As you can see in the above screenshot, the “Signal” field contains the percentage of your Wi-Fi router signal quality.
How to check Wi-Fi signal strength using PowerShell
To check Wi-Fi signal strength on Windows 10 with PowerShell, follow these steps:
- Right-click on Start menu icon or press Windows+X.
- Click “Windows PowerShell (Admin).”
- In the PowerShell window, enter the following command.
- (netsh wlan show interfaces) -Match ‘^\s+Signal’ -Replace ‘^\s+Signal\s+:\s+’,”
The above PowerShell command gives you the exact Wi-Fi signal strength of your router.
Use Wi-Fi Analyzer apps from the Microsoft Store
Windows also allow you to determine your Wi-Fi signal strength with third-party apps. In Microsoft Store, there are many free Wi-Fi analyzer apps and they are very easy to use.
Our favourite app is “WiFi Analyzer”, which can be downloaded for free from the Microsoft Store. The app provides a vast range of data for networks and it also allows you to monitor and manage wireless networks in your area.
Based on the Wi-Fi signal, you can troubleshoot network issues.
If your signal strength is consistently below 60%, the Wi-Fi has gotten sluggish and you should consider changing the router placement. For optimal performance, the router should be in the center of your house, if possible.
Or you can also use any Wi-Fi analyzer app from the Microsoft Store apps to see what channels neighbouring Wi-Fi networks are using.
For instance, if your and most of the networks in your area are using channel 11, you are going to encounter signal congestion. This can be fixed if you or the router automatically choose the least congested channel. If your routers choose a predefined channel, you can fix it by manually selecting other available channels such as 1 or 6.
There are many other ways to get a faster wireless network performance at home. You can either knock down a few walls in your house or buy a new set of network hardware such as the router or Wi-Fi 6 adapter for your computer.
Well, an average WiFi user deals with lots of problems like intruders connecting to the network, slow speed, weak wifi signals, etc. Out of all those, the weak WiFi signal is what bothers them most. Whenever the internet seems slow, or web page doesn’t load anymore, we immediately check the WiFi signal strength.
It’s definitely the first thing that you should consider because a stronger WiFi signal means a more reliable connection. WiFi signal strength depends on a wide range of factors like how far you are from the router, whether its a 2.4Ghz or 5Ghz connection, Dead Spots, etc.
How To Measure Your WiFi Signal Strength
Since the performance of the WiFi network depends greatly on the radio signal strength, it’s essential to determine the signal strength. By analyzing the signal strength, one could easily improve the WiFi range of the connected devices. So, in this article, we have shared the best methods to check your WiFi Signal strength in Android and Windows computers.
Check WiFi Signal Strength On Windows
Well, checking the WiFi Signal Strength on Windows is easy. Users need to enter a command on Windows. Before checking the WiFi signal, make sure your laptop or computer is connected to the WiFi network which you want to test. Once connected, open the Command Prompt window and enter the following command:
netsh wlan show interface
Once done, it will provide you the detailed information about the wireless network like the GUID, State, Physical Address, SSID, BSSID, Network type, etc. To check the WiFi signal strength, you need to check the “Signal”. The signal is represented as a percentage value, and it’s always accurate.
Check WiFi Signal Strength On Windows
So, this is how you can check your WiFi signal strength in Windows 10 computer via CMD. You can also use third-party software, but its the easiest method to check the WiFi signal strength on Windows.
Check WiFi Signal Strength On Android
Well, we know, it’s not always possible to check the WiFi signal strength on the computer. Since we use our smartphone more often than our laptop or computer, it’s important to know the method to check WiFi signal strength on Android as well. To check the WiFi signal strength on Android, follow the simple steps given below.
Step 1. First of all, download and install a WiFi analyzer on your Android smartphone.
Install WiFi Analyzer
Step 2. Once installed, open the app and wait until the app scans for the available network. Once done, it will list the WiFi channels.
Step 3. Now swipe left, and you will now see the screen showing details about the WiFi channels. You need to check the ‘dBm’. If the DBM is showing -30, then you have the perfect connection. Similarly, if the dBm shows -90, then its weak connection. The good connection is around -50 dBm.
Step 5. You can also swipe right to see the signal strength meter.
Check WiFi Signal Strength On Android
That’s it; you are done! This is how you can check your WiFi signal strength in Android.
Check WiFi Signal Strength on iPhone
To measure your WiFi Signal strength on iPhone, you need to use an app known as Fing – Network Scanner. It’s basically a network scanner app that lets you identify devices connected to your WiFi network.
Check WiFi Signal Strength on iPhone
Apart from identifying connected devices, Fing – Network Scanner can be used to measure the WiFi signal strength. Not only that, but it also lets you analyze bandwidth usage by devices.
I hope this article helped you! Make sure to share it with your friends as well.
If your internet seems slow and unstable or web pages will not load, the problem could be your WiFi connection. Perhaps you are too far from the source, or thick walls are blocking the signal. Here is how to check your precise WiFi signal strength. Aslo you can check who is using your Wifi Network.
Why Wi-Fi Signal Strength Matters
A stronger WiFi signal means a more reliable connection. It is what enables you to require full advantage of the web speeds available to you. Wi-Fi signal strength depends on a spread of things, like how far you’re from the router, whether it’s a 2.4 or 5ghz connection, and even the materials of the walls around you. The closer you’re to the router, the higher. While 2.4ghz connections broadcast further, they could have interference issues. Thicker walls made from denser materials (like concrete) will block a Wi-Fi signal. On the opposite hand, a weaker signal results in slower speeds, dropouts, and (in some cases) total disconnection.
Not every connection problem may be a result of weak signal strength. If the web on your tablet or phone seems slow, start by rebooting your router if you’ve got access to it. If the matter persists, the subsequent step is to see if Wi-Fi is that the problem. Try using the web with a tool connected through ethernet. If you continue to have issues, the network is that the problem If the ethernet connection is excellent and a router reset didn’t help, it’s time to check its strength. You can check here how to kick off from your WiFi Network.
Checking Wi-Fi Signal Strength the Easy Way
To check the strength of your WiFi, the primary thing to do is check out the device having issues. Whether it’s using iOS, Mac, Android, or Windows, you ought to have a Wi-Fi connection indicator. Usually, four or five curved lines structure the Wi-Fi symbol, and therefore the more that are filled, the more reliable the connection.
Every phone, tablet, & laptop is different and should indicate a unique Wi-Fi strength. But it’s worth consulting a second, or maybe the third device. If you checked a mobile, consider testing a tablet, too. Compare internet performance on both devices & see what they display for WiFi strength. If you’ve got similar results with both, you’ve got a superb baseline to use.
If you have determined your Wi-Fi connection is weak during a particular spot, the subsequent thing to try to do is walk around and concentrate on the Wi-Fi bars on your smartphone or tablet. Please keep track of how far you are from the router, and how many walls there are between you.
Pay attention to when your WiFi bars increase and decrease. It’s a rudimentary check, but in most cases, it will suffice.
The More Advanced Method to Check WiFi Strength
Looking at bars in a symbol will merely tell you so much. If you want to dig deeper into your Wi-Fi strength, you will need to use an app or program (like the AirPort Utility app or WiFi Analyzer) to measure its decibels relative to a milliwatt (dBm).
You can measure a WiFi signal in multiple ways. The first accurate measurement is milliwatts (mW), but it’s also the toughest to read thanks to the amount of decimal places (0.0001 mW). Received Signal Strength Indicator (RSSI) is a choice, but Wi-Fi vendors handle it inconsistently and with varying scales. Decibels relative to a milliwatt (dBm) avoids these problems, and lots of manufacturers convert RSSI to dBm anyway so that we will cover that measurement.
The prime thing to know is measurements of dBm will display in negative numbers. The scale runs from -30 to -90. And if you see -30, you have a “perfect connection,” and are likely standing next to the Wi-Fi router. Although, if you spot a Wi-Fi signal listed at -90, the service is so weak, you probably cannot connect to that network. A good connection is -50 dBm, while -60 dBm is likely best to stream, handle voice calls, etc.
To measure Wi-Fi signal strength on your mobile or tablet, you can use the Airport Utility App for iPhone & iPad or Wi-Fi Analyzer for Android. Both are easy-to-use and show results for any wireless networks in your area or location.
Moreover, for iPhone users, the Airport Utility App does require you to travel into your device settings and switch on the Wi-Fi scanner. Just attend your iPhone or iPad settings (not the app’s settings), tap Airport Utility within the list of settings, then toggle Wi-Fi Scanner. Now, return to the Airport Utility app and begin a scan. You will see dBm measurements expressed as RSSI.
For Android users, Wi-Fi Analyzer may be a step easier. Open the app & search for the networks found. Each entry will list strength as dBm.
Windows 10 does not have a built-in way to view precise signal strength, though the netsh wlan show interface command provides you your signal strength as a percentage.
In the past, we suggested NirSoft’s WifiInfoView examine Wi-Fi channels, and it even gets the nod for checking Wi-Fi strength. The program is free, easy-to-use, and does not require installation. Just unzip and double-tap the EXE file. Like Mac and iOS, you will find dBm measurements listed under the RSSI entry.
On Mac, you don’t get to download any program or app if you want to live the connected network. Hold the option key & click on the Wi-Fi symbol. You will see dBm measurements within the RSSI entry.
How to Improve Wi-Fi Signal Strength
Once you know how secure your network is, you will have a better idea of what to do to improve it. For example, if you can reach the edges of your home & still see a 60 dBm signal (or most of the bars), any issues you are having are not WiFi-strength related. Check for interference, consider changing channels, or upgrade to a router that supports 5 GHz if your current one does not.
If you step an area or two faraway from the router and find you’re quickly losing the signal, it’s time to think about the age of your router and its placement. Your walls are thick and dense, or your router is old and unable to broadcast very far. If you’ve got plaster walls, consider moving the router to the middle of the house.
If your router is older, it’d be time to upgrade. When doing so, search for one that supports both 2.4 & 5 GHz Wi-Fi signals. The 5 GHz signal does not extend as far as a 2.4 GHz, but it’s more options to bypass interference issues.
If you have an outsized home, you would possibly want to think about a mesh router. They’re a simple thanks to boosting the WiFi signal throughout your home and include other best features, such as automatic firmware updates and guest networks. Most people probably do not need a mesh network, though, and you’ll find cheaper routers that also offer firmware updates and guest networks.
If you’re unsure you would like a mesh router, you would possibly want to make a Wi-Fi heatmap Heatmaps are a great way to determine where your wireless is most robust and weakest with an easy-to-understand visual. You create a sketch of your home’s layout, and then you walk around while the program measures the WiFi strength. It then colors in your map to offer you a general idea of WiFi signal strength throughout. If you are at the center of your home & the heatmap shows weak signals everywhere, it probably is time for a mesh router.
Unluckily, there’s not a one-size-fits-all solution for boosting the WiFi signal in every home. Although, if you try each of these methods, you can get the most accurate information to decide what to do next.
Bad wi-fi got you down ? You’ve got a host of hardware options that can help you out, from mesh routers to Wi-Fi repeaters , but before you upgrade any set up, do some detective work—with some carefully chosen apps you can work out where your wi-fi network is failing and come up with better possible solutions.
First of all, check the download and upload speeds you’re getting and compare them with the figures promised to you by your Internet Service Provider. An app like Ookla Speedtest ( Android , iOS ) or Netflix’s Fast Speed Test ( Android , iOS ) can do the job here—the Netflix app is the simplest, but is specifically related to speeds to and from Netflix servers. The Ookla one, besides more broadly testing your internet speeds, gives you a few neat extras, like cellular coverage maps.
Straight away you can do some basic troubleshooting by running separate speed tests in the different rooms of your house and taking an average. It’s a good idea to run at least three tests in each spot, just to make sure you’re getting an accurate average.
For a more detailed look at exactly what’s happening with your Wi-Fi and where, you can take advantage of a whole host of analyzer apps for both Android and iOS. They’ll give you detailed readings of Wi-Fi strength and channel congestion: The different wireless channels being used by local devices, and how busy each one is.
Subscribe for 2 years and get an extra 1-month, 1-year-, or 2-year plan added to your cart at checkout.
Wi-Fi Analyzer ( Android ) is a popular and long-standing option for phones powered by Google’s mobile OS. First, tap the eye icon and choose Signal meter, then hit Tap here to select. and choose your home Wi-Fi network. What you’re seeing here is a strength reading in dBm or decibel-milliwatts —these work in negatives, so a lower negative number means a stronger signal.
For streaming video at any kind of quality, -67 dBm is recommended , though for less data-intensive tasks such as emailing, -70 dBm is fine. -30 dBm is a perfect connection. It’s really when the Wi-Fi Analyzer meter starts to drop into the left-hand edge of the yellow section or the gray section that you need to worry about the signal being too weak.
One way you can try and fix this is to switch to a different Wi-Fi channel on your router, but first delve into the app settings (the wrench icon to the top right). Make sure the available channels on both the 2.4GHz and 5Ghz options are set to match the channels in your part of the world.
If you’ve never come across the concept of channels before, they’re essentially frequencies at which wireless signals are broadcast by your router. Modern-day routers and hardware can usually operate on the same channel without any problems, and will often automatically cross several channels to provide for faster speeds, but in some circumstances switching channels can make a difference, especially if you live in close proximity to your neighbors (and their Wi-Fi).
The newer 5Ghz frequency offers more channels than the older 2.4GHz standard, if your router supports it, so there’s less chance of interference. It doesn’t have the range of 2.4GHz though, so devices further away from the router might suffer. The options available to you will depend on the router you’ve got installed at home.
So, walk around your home using the Wi-Fi Analyzer meter to test signal strength, and in the worst spots, switch to the Channel graph or the Channel rating from the drop-down menu below the eye icon. This shows you which of the available channels (network frequencies) are best to connect to, indicated by fewer curves (the graph) or more stars (the rating screen).
Actually switching channels is done through your router’s settings page—check the router documentation if you’re unsure, but this typically involves typing its IP address into your web browser and logging in. Some routers will handle channel switching automatically for you, and moving to a less congested one can improve the signal strength you get.
Even if you don’t change channels, you can use the scanning tools in Wi-Fi Analyzer or a similar app to reposition your router or the device you’re trying to connect (maybe your laptop would be better on the other side of the study). It takes a lot of the guesswork out of how your Wi-Fi is performing.
As we’ve mentioned, plenty of other apps will do the same job of scanning wireless networks and channels. IP Tools ( Android , iOS ) does the same analysis and a whole lot more besides, and comes highly recommended by the pros, while Wi-Fi Heatmap ( Android ) and Wi-Fi Analyzer and Surveyor ( Android ) actually let you mark your Wi-Fi signal strength on a map of your home once you’ve sketched out a floor plan.
The same screens are available and are easy to navigate—in Wi-Fi Analyzer and Surveyor, for example, tap Channel to see how crowded the available wireless channels are on both the 2.4GHz and 5GHz frequencies. Tap Signal, meanwhile, to see the signal strength of your own router and any other nearby access points. To start mapping signal strength out, tap the menu button (top left) then Surveyor.
Besides shifting around your router and other devices, and switching router channels, you’ve got a few other options when it comes to improving signal strength in the furthest corners of your house, and again the readings you get from your smartphone apps will come in handy when you’re positioning equipment.
Buying a Wi-Fi booster or repeater is one option, and they’re pretty cheap online. They effectively just pass on your existing Wi-Fi signal to more of your home, though the amount of extra oomph they can give the signal varies—they’re a better option for connecting a laptop than a 4K Chromecast.
Faster speeds and more reliable connections can be obtained by investing in powerline networking kit , which connects via a cable to your router then uses your home’s electrical wiring to send the signal around your mains sockets. You’ll pay a bit more for these devices but the extra performance is worth it for gear like games consoles.
Finally, there are a growing number of mesh networking solutions on the market, like packages from Google and Eero . By splitting Wi-Fi duties between multiple devices rather than one central router, you get a stronger signal all around the home, but just be sure they’re going to work with your ISP’s service before you upgrade.
When having Wi-Fi connection problems, most of us instinctively look at the bars on our computer or phone screen to see how strong our Wi-Fi connection is. That’s the equivalent of checking the oil level in your car by looking for the warning light on your dashboard – it only tells you about your car’s oil level in the most approximate way. There are much more precise tools available.
You can measure signal strength several different ways. Sometimes, it’s indicated in terms of network speed, as in how many Mbps the network allows you to upload data. But this is only a user-friendly approximation: It’s officially measured in decibel milliwatts (dBm).
How to check Wi-Fi signal strength on a Mac
If you’re using a Mac, you can see the dBm level of your Wi-Fi network with a simple shortcut. Simply press and hold the option key while clicking the Wi-Fi icon in the menu bar to see the signal strength in decibels.
RSSI, or received signal strength indicator, is the key metric for your Wi-Fi’s signal strength.
How to check Wi-Fi signal strength on Windows
There’s no Wi-Fi signal strength meter built into Windows, but there are several apps to choose from – both paid and free – that can do this for you. We recommend inSSIDer because it is free, reliable, and easy to understand. To get started with inSSIDer, follow the direction on the installation page: install the app, create a free account, and use that account to log into the app.
How to interpret your network’s signal strength
Decibels are expressed as negative numbers, and the closer to zero the number, the stronger the signal. In other words, the larger the absolute value, the weaker the network connection. For example, -80 dBm is a much weaker connection than -30 dBm.
In addition, signal strength isn’t linear; it’s logarithmic, which means that every 3 dBm change represents a halving or doubling of the strength of the signal. Moreover, a 10 dBm change adds up to ten times more or less strength.
Here are some guidelines for assessing your signal strength:
- -30 dBm. This is the maximum signal strength you could achieve, and it probably means you are within a couple feet of the Wi-Fi router.
- -50 dBm. Anything from -30 dBm to -50 dBm is excellent and is often about as high as you can get.
- -67 dBm. This is the lowest value that will deliver acceptable results for most online services.
- -80 dBm. This is the lowest possible value that will make a connection between the router and computer, but it’s too weak to be useful for any online service.
How to improve your Wi-Fi signal
If your Wi-Fi signal is weak, there are a lot of possible causes, and your troubleshooting options are extensive. Some of the simple fixes include:
- Make sure your Wi-Fi router is positioned in a central place in your home or office.
- Ensure the router’s antennae are positioned optimally.
- Move your Wi-Fi transmission to a different, less-crowded channel.
The strength of your WiFi connection is dependent on a lot of variables that include but are not limited to router orientation, coverage area, and even the structure of your home or workplace. Unlike cellular connections, even solid objects such as walls and shelves can sometimes tamper with your WiFi signal strength due to its limited reach and hardware constraints.
On a Windows 10 system, in case of a weak or unstable WiFi connection, you can diagnose whether it’s from the source i.e. your ISP or your router. The signal strength is how you can measure the performance of your internet. This means the higher the bars, the more reliable your connection is for network-intensive tasks such as gaming. Here are five ways that can help you check the signal strength of your WiFi connection on Windows 10.
Using the Taskbar
- This is the most convenient way to check the signal strength of your WiFi as you simply need to click on the WiFi icon on your taskbar and it will open up the connection’s drawer. The currently connected network would display bars just along with the name. Each bar represents roughly 25% of the signal strength so full bars mean 100% whereas three bars mean 75% and so on. In this case, the bars are full that means the signal is reliable and can be used for heavy online tasks such as gaming.
Using the Settings
- Open the Start menu and type network status in the search bar. Click on the Network status option to proceed.
- Now you will be welcomed by the Network and Internet panel in the Settings app. You can view that you’re connected to the Internet, which means that your connection is active and functioning properly. Click on the Wi-Fi tab to continue.
- You can now view your current network listed down in the Wi-Fi menu as the bars alongside the network name again represent the strength as mentioned before.
Using the Control Panel
- Open the Start menu and type control panel in the search bar. Click on the Control Panel app to continue.
- Select View network status and tasks sub-menu to continue.
- Click on your network’s name from the Connections listing as this will open the Wi-Fi Status menu.
- You can now view the network strength from the Signal Quality tab as each bar represents 20% signal strength and full bars mean a 100% signal strength. If there are only two or three bars then your connection is not suitable for heavy workloads but it can still work for web browsing and other light tasks.
The above mentioned methods are ideal for users who just wish to learn more about the signal strength of their Wi-Fi to determine if they need to relocate to receive better WiFi signals. But if you need an actual rounded figure as to how much the signal strength of your WiFi strength is then you need to use Command Prompt and Windows PowerShell as shown below.
Check WiFi strength on Windows 10 using Command Prompt
- Open the Start menu and type cmd in the search bar. Click on the Command Prompt app to continue.
- Type the command netsh wlan show interfaces and press Enter.
- You can now view the Signal strength in percentage as highlighted below.
Checking WiFi strength on Windows 10 using PowerShell
- Open the Start menu and type powershell in the search bar. Click on the Windows PowerShell app to continue.
- Type the command below and press Enter to continue.
(netsh wlan show interfaces) -Match ‘^\s+Signal’ -Replace ‘^\s+Signal\s+:\s+’,”


