T ower fans easily gather dust, pet hair and other allergens, so to keep your tower fan running efficiently, you’ll need to clean it on a regular basis. But dusting the fan’s exterior with a microfiber cloth or vacuuming it with one of our recommended upright vacuums or pet hair vacuums, isn’t enough. You’ll need to open the fan up and clean its interior as well. Fortunately, it’s easy to do, and we show you how to clean a tower fan in this step-by-step guide.
Tower fan cleaning, step by step:
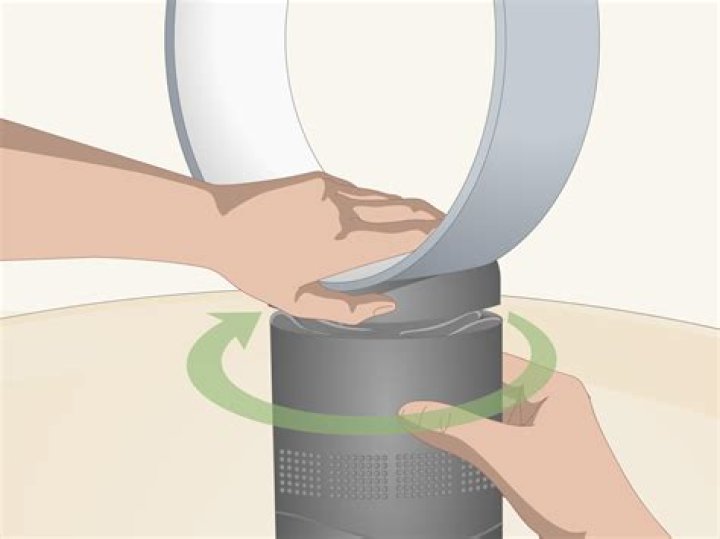
Unless you’ve invested in a Dyson bladeless fan, it’s likely that yours is similar in shape and style to our top pick, the Seville Classics – Ultraslimline. If you’re unsure that your tower fan is a bladeless fan, our article explains in detail how they work.
- The essential first step for cleaning any electrical appliance is unplug it, and put the fan on an elevated surface, such as a countertop or table. Also, cleaning the fan will be easier if you wrap up the cord so it’s not dangling.
- Before opening up the fan, use a vacuum’s brush attachment to vacuum dust or any other particles from the vents. If you don’t have a brush attachment, hold the vacuum hose end to the vents and brush the dust into it with a dry paintbrush.
- Depending on your fan’s brand, locate the two to eight Philips-head screws that hold the casing to the fan’s frame. Use an appropriately sized Philips head screwdriver to unscrew them. Put the screws in a place where you can find them when it’s time to put the fan back together.
- Using a flat head screwdriver, gently pry the casing from the top, working your way down. Be aware that there are usually two tabs in the bottom interior of the casing that can break if you apply to much pressure.
- Lay the fan down on the surface. With a can of compressed air (for example, for cleaning keyboards), spray the fan’s blades to loosen built-up dust and other debris.
- Using the brush attachment, vacuum the fan blades, moving up and down the length of the cylinder and slowly turning it. If you don’t have a brush attachment, apply the vacuum’s hose end to the fan blades, and brush the loosened dust with a dry paintbrush.
- Don’t forget to also vacuum the casing behind the fan blades and the fan’s motor and brackets.
- At the top of the fan-blade column, you’ll see the fan’s bearing, which holds the fan blades to the revolving column. Spray the bearing with WD-40 or other lubricant, and slowly spin the column, so the lubricant lightly coats the bearing.
- You’re now ready to reattach the casing. Insert the casing into the bottom tabs first, and then snap the casing onto the fan’s frame, working your way up. Screw the casing in place. Plug the fan in, and turn it on. Let it run a couple of minutes so any dislodged dust you may have missed in the fan blades can be blown out.
Share this Review
Gene Gerrard , Writer
Gene has written about a wide variety of topics for too many years to count. He’s been a professional chef, cooking-appliance demonstrator, playwright, director, editor of accountancy and bank-rating books, Houdini expert and dog lover (still is). When he’s not writing for Your Best Digs, he’s performing as a magician at the Magic Castle in Hollywood.
Dyson v6 has not been with us for decades. But, the four years of its splendid services to those who the dread cleaning task is worth knowing some DIY aspects about it. Well, you may not be a Dyson fan, but whenever you get a bit unexcited about cleaning the fur from the canine friend, you’ll soon realize the need for it. That is not all.
Once you fall in love with this cool vacuum cleaner, you will obviously want to maintain it. This is the only way to get optimum service worth the price.
Before, you collect a heap of articles convincing you to go for other models, consider the cleaning of your Dyson V6 to maintain its position as the best handheld vacuum cleaner. A clean Dyson V6 simply implies the removal of dust, debris, and clogs that prevent if from better performance.
Table of Contents
Here is how to clean Dyson V6 As an initial step, empty the Dyson V6.
This requires that you move to the nearby trash can and empty the clear bin.
Step 1: The Filter
Dyson v6 is fitted with a post-motor HEPA filter that purifies the air to the tune of 99.97%. Meanwhile, a dirty filter will greatly compromise this feature. To clean the filter, follow the steps below:
- Unplug the device from the socket and make it sit upright
- Twist the knob at the center of the cyclone in the anticlockwise direction
- When it becomes sufficiently loose, pull it out.
Now you have the filter, how do you wish it?
- You will need cold running water, and a hard surface
- First tap the filter against the hard surface gently to remove the debris
- Hold the filter and allow the cold running water to freely flow through it
- Rotate the filter gently to ensure water reaches the pleats
- Repeat the gentle tapping of the filter on the hard surface and then running cold water several times.
So, you have the clean filter. A few steps will still count. The drying process is important in getting your filter the best treatment. It is simple, put it upside down and let it dry for 24 hours.
When cleaning the filter, please remember the following-
- Don’t subject your filter to an open flame
- Don’t dry the filter in a tumble dryer
- Don’t use a washing machine to clean or dry the filter
- Don’t use the oven or microwave to dry the filter.
The filter is the most sensitive part of the vacuum cleaner that makes it stand out among its peers in the market. Subjecting it to any of the above will destroy it or compromise its functionality.
Step 2: The Clear Bin
Well, Dyson V6 is known for its easy-to-empty clear bin. It is only during the cleaning process will you be required to do some slight disassemble.
- First, remove the bin from the cyclone.
- Open the bin case and push the red button to detach it.
- Secondly, remove it carefully without applying any significant force.
- To clean the clear bin you will only need a damp cloth.
- Wipe the inside of the clear bin to remove the debris.
- Repeat the process until it’s clean.
Things to avoid when cleaning this part are -Detergents-Air Fresheners-Using a dishwasher to clean it.
Step 3: The Cyclone Shroud
The cyclone shroud is the force behind the vacuum cleaner’s suction capabilities. Simply put, it helps in the optimization of the airflow. Use a soft brush to remove dust from the cyclone shroud. Unlike the rest of its parts, the cyclone shroud not is dipped in water.
Once you are done with the external parts, it is time to take on a bit complex disassemble to touch up the internal parts of your vacuum cleaner. While, the inner parts may seem to be less complex, Do not completely disassemble if you are not confident in re-assembling.
Step 4: The inner parts
Detach the cyclone from the main body-Use your Tory T8 Screwdriver to remove the screws-Separate the pre-filter.
The inner parts of the machine require dusting. Therefore, do not clean using a running water. Instead, use a dusting cloth to clean the reachable parts. Also, find a can containing compressed air to help you blow out the dust. Simply, blow the compressed air into these parts and watch the dust rush out.
During the brushing, take note of the following; Dust can be irritating. So, if you are allergic or asthmatic, keep off the flying dust while using a can containing the compressed air in cleaning the inner parts.
Step 5: The Attachments
While you allow the clean parts of the vacuum cleaner to dry up, Focus on the attachments. Both the brush and the Crevice tools come into contact with dirt. This makes your cleaning process incomplete if you don’t touch up the attachments.
Their cleaning process requires:- Water-Detergents (soap) and, A dry cloth Wash the attachments without wiring in a soapy water rinse in cold running water Dry it with the clothe and, allow the parts to dry.
The attachments containing wiring should not be cleaned using water to avoid electric shock and short-circuiting. Simply brush off the dust. To this point, the Dyson V6 is clean and you are ready to reassemble the machine.
Ensure that all the parts beginning with the inner ones click into place. Then carefully fix the outer parts. You are set to let the vacuum cleaner do its duties and relieve you of the dragging.
In sum, regular cleaning means improved efficiency. The 20 minutes cleaning power that lacks in most of the vacuum cleaners are largely attributed to how well you clean it on regular basis. The maximum pressure that results during touch up throws dust and debris into the inner parts of your machine.
When this is left to pile into significant levels, they soon render the Dyson V6 less effective. Here, are the secret on how to clean the Dyson V6.
Most important aspects to remember before cleaning is that:
- Some parts should not be cleaned using water
- Cleaning the Dyson V6 improves its effectiveness
- Observe the dos and don’ts when touching up your Dyson V6
- Clean it regularly
- Be careful to avoid injuries when cleaning the Dyson V6
Whenever the talk is about vacuum cleaners, little is yet to change the top position of Dyson V6!
TOWER FANS are being pulled out of lofts and cupboards across Britain as temperatures soar as high as 36C this week.
We will use your email address only for sending you newsletters. Please see our Privacy Notice for details of your data protection rights.
Tower fans are favoured over other types of fans for many reasons.
They are affordable, powerful, and the easiest type of fan to keep clean.
Tower fans don’t require a lot of maintenance, and you can clean them in a few simple steps.
To keep your fan working at its optimum level you will need to do this process at least once or twice a year.
Trending
How to clean a tower fan
Step one
Turn your fan off and unplug it at the socket.
This will prevent the blades from moving while you clean it.
Also, it will prevent dust from getting inside the machine.
Put on protective eyewear and a mask to keep the dust out of your eyes and lungs.
How to clean a tower fan: A tower fan needs to be cleaned at least once or twice a year (Image: Getty/Wikimedia)
How to clean a tower fan: A dusty fan will worsen allergies (Image: Getty)
READ MORE
Step two
Use a hoover with the brush attachment to remove dust from the exterior.
This will get the job done without scratching the casing.
If you don’t have a brush attachment, try using a dust brush or microfibre duster.
Pay particular attention to the vents, since this is where air enters and exits the fan.
The aim is to remove as much dust, lint and other debris as possible.
How to clean a tower fan: Use a hoover with the brush attachment to remove dust (Image: Getty)
Step three
Next you will need an air compressor or can of compressed air– you can get these from many home improvement stores.
If you are using an air compressor, apply the blower nozzle and turn the compressor on.
The instructions will tell you how long to wait for the compressor to build up pressure.
If you are using compressed air in a can, shake the can thoroughly for 30 seconds.
Last Updated: 21st January, 2020
Then, how do you use the Dyson Hot Cool fan?
How to assemble and use your new Dyson AM09 Hot + Cool fan heater. Adjust the power and oscillation, choose between diffused or focused modes, set the target temperature and sleep timer, and store the remote. The sleep timer can be set between 15 minutes and nine hours.
Beside above, does the Dyson fan really cool? They’re excellent at cooling the air – some will heat or purify your room too. Dyson fans are also acoustically engineered to be quieter than most other fans, and they are certainly more attractive than most fans.
Thereof, how do I use my Dyson Hot and Cool fan without a remote?
Control without the remote
- Press the standby button on the appliance to turn ON/OFF.
- Press and hold the standby button on the appliance to adjust the target temperature.
- The target temperature will increase to a maximum before decreasing.
- If the target temperature is set at 0°C it will switch from heating to cool mode.
Is Dyson Hot and Cool worth it?
The Dyson Pure Hot + Cool Link, with its oscillation and long-range projection, doesn’t have that issue. The awkward maze of rooms all feel evenly heated. For us, this made the Link worth the extra money. The Link also has a night mode, wi-fi connectivity, app controls, and a handy remote, too.
Have you any idea of how a Dyson fan works? The following article will cover some information related to the Dyson bladeless fan, how it works, as well as cover some brief reviews about this innovative invention.
Have you any idea of how a Dyson fan works? The following article will cover some information related to the Dyson bladeless fan, how it works, as well as cover some brief reviews about this innovative invention.
Most consumers have heard of the Dyson’s consumer electronics company. They are famous for their products related to vacuum cleaners. They have come up with a new kind of fan, called the Dyson Air Multiplier. It is a bladeless fan. Yes, no blades to throw air towards you. This fan looks like a circular hollow tube. This tube is mounted on a pedestal.
Working
If you have been able to catch a glimpse of this device, you may have noticed that it looks totally different from a conventional fan. There are no visible moving parts and no blades that you normally notice in your fans. There is just a big ‘O’ attached to a long cylindrical tube that is in turn attached to the base. So, how is the bladeless fan able to push air towards you? Thus arises the question about Dyson Airfoil fan: how does it work?
Would you like to write for us? Well, we’re looking for good writers who want to spread the word. Get in touch with us and we’ll talk.
A new advanced technology is based behind the working. It works just like the way airplane wings work. It uses an airfoil shaped ramp that is placed in a cross-section. There are blades in this fan too. However, these blades are placed in the base of the fan, thus remain invisible. It uses about 5.28 gallons of air per second. It draws in the air using a very efficient brushless motor.
Applying a few scientific principles used in jet engines and turbochargers, the fan is made to work efficiently. With the help of an annular aperture, the airflow of the fan is accelerated. When the air passes over the airfoil shaped ramp, it is channeled towards a specific direction. A process called inducement takes place, in which the air behind the Dyson Air Multiplier is drawn into the airflow. Entrainment is another process that takes place where air from around the machine is also drawn into the airflow.
The airflow comes in contact with a circular shaped part of the fan called the mixed flow impeller. It is placed in the cylindrical structure. This impeller works like an air pump and blows the air upwards. This upward directed air reaches the ring, from where it creates a negative pressure. This negative pressure occurs above the ring and cylinder joint. The air that is present behind the ring is pushed forward due to the negative pressure. This leads to development of a negative pressure behind the ring. Thus, the air starts flowing from the back to the front. This process is called the Coanda effect. The direction of the air flow is forward in a circular cross-section. The air present around the air flow also begins to move due to viscous shearing. Thus, the airflow is amplified about 15 times.
Reviews
The reviews are very positive, as this fan has many advantages. The first and foremost advantage is the safety factor. You no longer have to worry about kids poking their fingers or getting their hands caught in blades when the fan is switched on. As there are no blades attached to the fan, it proves to be a safe option for families with kids and pets. The second advantage of this fan is that it is extremely easy to clean. It has a very easy-to-clean, simple design that can be cleaned by almost anyone.
When compared to other fans, it has the ability to oscillate the airflow upwards as well as downwards. This is because the center of gravity is very far from the base of the fan. The air from ordinary fans is usually chopped off due to the blades, thus making the airflow a bit rough. Here though, this problem is corrected, as there are no blades thus making the air flow very smooth. The third positive is the noise level. The fan is rather silent and is not louder than your conventional fans. You can have a peaceful sleep while it is switched on.
Price
The price of this fan is thought to be a bit expensive as compared to other conventional fans. It costs about USD 299. However, if you go through the advantages, you will find that the cost is worth the bargain.
There are lot of advanced scientific principles applied for working of this appliance. Hope you have been able to understand more about the Dyson Air Multiplier fan and made up your mind for investing in this unique and ascetically beautiful fan.


