It’s easy to make a vlog to share your videos with others
- Tweet
- Share
A video blog, or vlog, is a collection of videos—your own or your favorites—posted on a website. It’s easy to create a free video blog, and it’s a great way to reach out to audiences and show off your work.
With a camcorder, editing software, and a high-speed internet connection, you’re well on your way to producing a successful video blog. However, there are a handful of things to think about before you fully commit.
Find a Purpose
The most important part of any vlog is the content. You’ve surely stumbled on a video blog that quickly became one of your favorites despite it having low-quality video or poor clip transitions. The primary reason you keep coming back is that the content is golden.
Find a reason or theme for your blog. Video blogs can have many different applications and can be created for various personal and professional reasons, so you can choose anything—there aren’t any rules here.
An important thing to keep in mind when choosing what your vlog will be about is whether you’re passionate enough about it to go on video to show it. Or, at the very least, even if you’re not truly passionate about the topic, make sure you have enough interest to talk about it many times over because at the heart of a good blog is fresh content.
Choose a Host
A host for your video blog is simply the website that will retain your video files and provide a way for people to find your blog content. There are many free web services that will do this.
We generally, recommend YouTube or Vimeo for hosting videos. You can then use the channel page on the video site as your vlog, or you can create a separate blog—like with WordPress or Blogger—to embed your videos and add text content.
Picking a site to host your blog videos is important because oftentimes the platform itself has some great sharing features and is already really popular. Just think of all the video bloggers on YouTube that are super easy to find through recommended videos and a quick search.
Name Your Vlog
The content of your video blog is much more important than the name, but having a catchy yet easy-to-remember title can attract more viewers and keep them coming back. Don’t get overwhelmed thinking of a name, but do spend some time picking what seems right to you.
For example, if your vlog is about traveling, it’s best to name it something like WeblogTravel, GoTravel, TravelWithMe, iTravel, etc. If you pick something completely irrelevant like iLoveDogs, anyone looking for videos on traveling who just sees your website name will probably jump right over it in their search for the best travel vlog.
If you need some inspiration, use a blog name generator like Cool Name Ideas or Domain Wheel.
Prepare Some Content
If you’re fortunate enough to generate a lot of interest from your audience right out of the gate, good for you! However, you can’t stop there. It’s tempting to just let the views come in and quit producing more content, but you need to add new content regularly or your viewers will lose interest and stop checking in.
Another way of thinking that might get you wrapped up in the idea that you can hold off on new content for a while is if you’ve made a few really popular vlog posts. Again, while it’s great to get all those views immediately if you quit making new videos, even new visitors will see that you don’t update your blog often and will be much less likely to subscribe to your channel, follow your updates, keep tabs on your social media accounts, etc.
Before you go live with your video blog, make sure you have enough content to keep it going for a little while. Create a week’s or month’s worth of content as quickly as you can, and release them on a solid schedule. You want enough content to show visitors that you’re serious about your blog.
Post Your Videos
Once you’ve chosen a topic, picked a hosting website, determined a name for your blog, and made some content, it’s time to actually upload those videos to the blogging platform. You can improve the visibility of your videos by adding good titles, tags, and description—whatever is supported by your blogging or hosting site.
If you’re not dealing with your own videos, or want to mix videos from other people with your own content, video curation is the easiest way to put together a great video blog. All you have to do is find videos that other people have produced that will be of interest to your audience and post them on your vlog.
Promote Your Vlog
Most people, at least at first, will not just randomly land on your blog. To gain an audience for your vlog, you’ll need to let the world know that it exists!
You can promote your blog through other websites if you know the owner or they respond kindly to your suggestion to post a link to your blog. They might even request you do the same so that you both have backlinks to each other’s sites.
Search engine optimization is another popular and efficient way to gather an audience. When your blog posts are designed well based on popular searches regarding your blog, you will make it easier for search engines like Google to show your blog.
Another self-promotion technique is to just send an email out to all of your contacts—just don’t spam them with too many messages. You can also post something on your social media profiles for your friends or the public to see.
Make Money From Your Vlog
Depending on the content, and where you choose to host your video blog, you may be able to make some money from your videos. The top vloggers in the world are able to make a killing from their video blogs, and you are fully capable of doing the same using similar tools.
Earning money from your blog probably shouldn’t be your first aim while making a blog, since you should focus on content first and foremost, but consider it a nice side project for when you’ve got a good following.
Update to Stay Relevant
Your blog won’t stay fresh by itself—you have to keep posting new content to garner new visitors. Keep making new content and post the videos as often as you can while being mindful to avoid spamming your followers with too much to consume at once.
If you’re creating videos about a topic that you love, keeping an up-to-date video blog should be a joy and not a chore. If you can’t make enough videos for your blog because you’re not enjoying it, you might consider shifting your focus.
Easy Step-By-Step Instructions to Get You Vlogging
- Tweet
- Share
Creating a vlog is easy once you dive in and give it a try. Vlogging can also be a lot of fun. Follow the 10 easy steps below to create a vlog and join the world of video blogging.
Difficulty
Time Required:
Here’s How
Get a Microphone – To record a video, you need to have a microphone that is compatible with your computer.
Get a Webcam – Once you have a microphone, you need to get a webcam that allows you to record video and save it on your computer’s hard drive.
Prepare Your Vlog Content – Take some time to think about what you’re going to say or do during your vlog.
Record Your Vlog – Turn on your microphone, start your webcam and begin recording. Save the file when you’re done.
Upload Your Vlog File to YouTube or Google Video – Upload your vlog file to a site like YouTube or Google Video where you can store it online. Note: See the Tips below to learn an alternate method to insert your video into a blog post.
Get the Embedding Code of Your Uploaded Vlog File – Once you upload your vlog file to YouTube or Google Video, copy the embedding code and keep it handy.
Create a New Blog Post – Open your blogging application and create a new blog post. Give it a title and add any text you’d like to introduce your vlog.
Paste the Embedding Code for Your Vlog File Into Your New Blog Post – Using the embedding code you copied earlier for your uploaded vlog file, paste that information into the code of your new blog post.
Publish Your New Blog Post – Select the publish button in your blogging application to send your new blog post with your vlog in it live online.
Test Your Vlog – Open your new live blog post and view your vlog entry to ensure it’s working correctly.
Требования
Описание
If you want to create a video blog to promote your existing videos, or if you’d like to start vlogging and build an audience, this is the course for you.
We’ll build an actual video blog website step by step, from start to finish. You’ll learn how to get your website live on the internet and how to customize it with WordPress. No experience and no coding is required.
- The website we’ll build will have the following features:
- Parallax header with custom image, site title, and tagline
- Pinterest style, grid layout
- Embedded YouTube videos
- Social share buttons
- Comment forms
- Custom footer
- Beautiful hover animations
- Customizable colors with unlimited options
- ‘Follow Us’ widget with icons and links to profiles for Facebook, Twitter, Google Plus, Instagram, Dribble, Vimeo, Linkedin, Youtube, Flickr, Pinterest, Tumblr, Foursquare, Behance
- Custom favicon (site icon)
- Custom domain name
- Unlimited bandwidth web hosting
- Responsive web design, so it will look good on any screen size, tablet, or mobile phone
- Custom Navigation bar
- Page/post featured images
- Categorized posts
- Blog sidebar widgets with search bar, recent posts, and categories
Don’t have a programming background? No worries, we’ll start from scratch. You’ll learn how to register a domain name, set up web hosting, and install WordPress (in other words, everything you need to get your site live on the internet). Then we’ll start customizing the site with WordPress. You’ll be able to quickly and easily add content and customize the design. All without writing code.
We’ll be using the Alizee WordPress theme, which is well designed, easy to use, and completely free. This theme is also very flexible, so it can be used for just about any type of blog or portfolio website.
We’ve cut out the fluff so that you can get your website online as quickly as possible and grow your audience. Now go get started!
Starting a video blog can be a great hobby (or profession) no matter what your interests. With the huge success of YouTube and smartphones, video content is available to stream instantly all around the world.
If you would like to share your passions or experiences with the world and want to know how to make a good video blog then you’ve come to the right place, I’ve put together a step-by-step guide on how to start a vlog.
These days the most successful vloggers have learned the vlogging trade so well that they have built brand empires on the back of their success and the influence of video blogging as a platform is undeniable.
Here’s how to start a vlog video blog
1. Start vlogging with a good quality camera
Viewers are more likely to engage with and enjoy high definition video vlogs, so try and get your hands on a good camera if at all possible.
This should ensure good image quality as well as an audio recording to help you upload a polished video.
If you don’t have a handheld digital camera then using your laptop’s camera is a a good secondary option.
Try to ensure that the camera is at eye level, this will help your videos look more natural and feel more like a real conversation with your viewers.
If you’d rather use your smartphone for recording and editing videos then it’s still possible to film good quality vlogs, check out this video guide which explains how to make a vlog on your phone.
You might also like:
Did you know that there is more carbon dioxide in our atmosphere today than any time in history?
We take pride in reducing our carbon footprint with the #1 Green Hosting Platform
GREENGEEKS
Their servers operate on 100% Wind Energy, so you can help the climate for a super affordable price (through us) while benefiting from the best features a hosting platform has to offer.
You’ll even get a FREE domain name with them!
Help save the planet. Get your web hosting with GreenGeeks now.
2. Pick a theme and title
Your subject matter might already be obvious to you, or it might require some careful consideration. The most important thing is to pick something that you have a genuine interest in and can speak about confidently.
There is an ocean of vloggers uploading videos online so when you consider vlogging, take some time to look at what other people are doing.
While this might give you tips on technique, try to establish what you can do differently to stand out and make your theme unique.
Once you have a theme, you also need a name. Many YouTubers opt for a quirky and fun name to help people remember them.
It can include your own name, refer to your theme or be completely random. Names that give a brief insight into your video subjects are a good way to attract suitable subscribers.
Spend some time choosing the right title for your channel, if possible then try something witty or have fun with wordplay, puns or rhyme.
3. Practice 101 before vlogging 101
A good idea before you film your first full-length video is to do one or two short test runs. While you don’t want to appear over-rehearsed and scripted, you do want to get an idea of how you come across on camera.
Try filming just a brief section of a video and make some notes on how to improve your output. This might be as simple as remembering to fidget less, or not mumble your words.
You can also adjust things such as lighting and remove background objects that might be distracting. Remember that no one is perfect while they’re learning how to create a vlog, it takes time to get it right and your videos will improve as you do.
As you get more experienced you can also play with your editing techniques to add different elements to your videos. This guide provides a great advice to get started with video editing.
4. Learn how to time video blogging right
Before you make your video, have an idea in your mind of how long you want to speak for. Research has shown that the videos most likely to be watched all the way through are no longer than 2 minutes in length.
However, that’s not a lot of screen time so if you want to talk for longer than that then a good length to aim for in your vlogs is between 6 and 12 minutes. This is when your viewers are more stable and there’s not much drop off of in figures.
To make sure you don’t get stuck for things to say or ramble on for over an hour, aim to write down a brief overview of what you want to talk about and for roughly how long.
A loose structure to your videos will help keep them interesting and worthwhile for your viewers. If you’ve got a lot to say on a particular subject, try breaking down your videos into more bite-size parts and upload them in a series.
5. Create a vlogging schedule
While you don’t necessarily need to plan months in advance, having a rough outline of upcoming content will help you feel prepared and avoid rushed videos, or filler-content when you’re lacking inspiration.
Each time you have a great idea for a new vlog, make a note and schedule it in. You can always shuffle topics around as and when you wish to help keep the videos relevant.
6. Vloggers must remember the audience
When you’re filming and talking to a camera, it’s easy to forget that someone will eventually be watching at the other end.
Before you get started with making your vlog, take some time to think about who might like to watch your videos and subscribe to your channel.
A key piece of advice on how to make a good video blog is to know your audience, this will help you tailor your content and build a following.
What’s more, try to build a relationship with your viewers by asking them questions and for their opinion in the comments.
Getting them to interact with you is a great way to build up loyal fans who, one day, might be purchasing your merchandise. It’s also a great way to seek ideas and inspiration for future content that you can add to your schedule.
Many videos on the Internet are based on a good concept, but the result is often unsatisfactory. Here are 10 valuable tips for creating a successful video blog, aimed at everyone who would like to start their own video blog and stand out from the masses.
Important things to keep in mind for your video blog:
1. Structure your video
The key to every good presentation is an introduction and a conclusion. Right at the beginning, tell your viewers in one sentence what the topic of your video blog is and finish it up with a short summary of the content. With this simple structure, you can show your audience that you’ll keep to what you say you’re going to do. In this way, you can also structure your video, while at the same time preparing your viewers for what they can expect in the next few minutes.
2. Quality is better than quantity
Pay attention to the number of words you use, relevance is more important than the sheer amount you say. Excessive speeches will quickly become boring for your viewers, so as a basic principle, limit yourself to what’s essential and don’t start rambling! You should generally avoid using complex concepts or technical terms that the majority of users might not understand. In order to reach out to as many viewers as possible with your vlog, your comments and remarks should be easily understandable, allowing you to entertain all your viewers equally and to deliver informative content.
3. Pay attention to the time
Keep your video blog as short as possible. Aim for entries that are no longer than 10 minutes. This doesn’t mean that video blogs can’t sometimes be longer, but if you can get your message across in less than 10 minutes, you should definitely try to do so.
4. Use cuts for more variation
Intro. Cut. Talking. Cut. Something happens. Cut.
A suitable Video editing is especially important with a video blog. A longer and more static one-take shot can definitely look impressive at times, but this is normally rather tedious and might even push potential viewers and subscribers away. So keep your picture moving and play with the camera perspectives! Movie Edit Pro is the perfect partner for getting started in video editing. With this comprehensive software, you can edit your video quickly and easily and design it creatively using numerous effects.
5. Bring light into the darkness
An essential point for vlogs is to use the correct lighting. You might have prepared your video in a gripping way, but this won’t mean much if half of it is hard to recognize due to bad lighting. If you don’t have any suitable equipment to light up the video area appropriately, the best thing to do is just record your video by daylight.
6. Don’t have HD yet? Switch now!
You will generally have to dig a bit deeper into your pocket for a HD camcorder or webcam. However there are still cheaper alternatives that are perfectly sufficient. If you haven’t already switched to HD, you should do this as quickly as possible, since this is already the norm for the most video bloggers and is even expected by many users. What’s more, HD videos will be ranked higher on YouTube than lousy 480p videos.
Tip: Consider using an external microphone. The built-in microphones in cameras are often not good enough. If you’re looking for microphone tips, you can find them here [Mikrofonarten-Artikel hier verlinken].
7. Musical background
If you want especially impressive video recordings, you can try this out on your viewers and see how they respond. Just select the appropriate music for the specific scenes and accentuate your video with musical elements. But watch out that you don’t infringe any copyrights!
8. Upload videos regularly
You should make sure to maintain a certain regularity with your video uploads. If you announce your video blog as weekly or daily, you should follow through with it. If you don’t, your audience will lose trust. What’s more: The more videos you upload, the higher the traffic to your channel will be.
9. Involve the community
Your viewers are the ones who will contribute in the most part to your success, so you should treat them and respect them accordingly. Respond to their feedback and questions and take a bit of time to answer a few questions. Contact with your viewers is extremely important and should not be overlooked.
10. A positive end
Always finish your video blog on a positive note. For example, you could include the audience or give them something that they can look forward to in the next video – since the time after a blog is the time before the next. If you have funny bloops or outtakes, you can also share these with your viewers at the end.
Want to get started now with your own video blog?
MAGIX Movie Edit Pro not only allows you to easily and efficiently edit your videos, but also to upload them directly to Vimeo or Youtube.
Do you want to try out Movie Edit Pro for free first? Download the free 30-day free trial and try it out yourself!
If you’re already familiar with the video blog business and know your way around video editing, but are looking for the right software, check out MAGIX Video Pro X.
Are you looking for a little inspiration for your vlog? We’ve put together a small selection of successful video bloggers that are worth taking a look at: PewDiePie (focused on games – suitable for Gamescom), Casey Neistat (New York, Travel, Action) und Paola Maria (Beauty, lifestyle).
Why learn how to use video in blog posts? Widespread adoption of smartphones and high-speed wireless have made video one of the most accessible — and popular — forms of online content. In fact, online video is expected to make up more than 82% of all online consumer traffic. And modern video marketing isn’t just about YouTube. 500 million people watch video on Facebook every day. Snapchatters watch 10 billion videos per day. People spend 2.6x as much time on pages with video as they do on pages without.
In other words, if you aren’t using video in your marketing strategy, you’re missing a golden opportunity to deepen your connection with your customers.
You’re also missing an opportunity if all your video content is entirely separate from your other marketing efforts. The best way to capitalize on video is by integrating it with your other marketing channels, and your blog is one of the best places to start. Here’s why and how to use video in blog posts:
When to add video to your WordPress blog
There are several great ways to incorporate videos on your WordPress blog:
1. Create video tutorials
65% of the population are visual learners, making video tutorials extremely effective.
They’re also some of the easiest video content to make. This is particularly true for software tutorials, thanks to a plethora of simple and affordable screencasting tools.
Video tutorials can either be posted by themselves – as standalone WordPress posts, or accompanied by a text tutorial, like we did in some other posts on this blog. Example:
2. Video summaries and/or vlogs
Anything worth writing a blog post about is probably worth creating a video about. Summarize the main points of your WordPress article in a video, then expand on those points in writing.
This approach works particularly well because short videos get the most engagement, and you can post your summary on YouTube and link to the expanded version.
Or you can simply post a transcript, like science and activism blogger Rebecca Watson.
If you’re short on time you can also switch to a vlog-only format for some or all of your blog posts. If you take this route, consider breaking up articles into several short vlogs to maximize engagement.
3. “About Us” video
The “About Us” page is usually the most visited page on any website, directly after your home page. A short video sharing who you are and what you do is a great way to give it some personality. These videos should be under two minutes long and focused on the story behind your brand. A great example of how to use video in blog posts is the Hubspot’s “Our Story” video from their about page:
You can also use a background video to add to the story your words are telling. Cultivated Wit is a media company that has done this particularly well, showing their sense of humor and dedication to tech through a series of short clips in the background.
4. Share video reviews
There are video reviews for almost every product imaginable, and in the beauty and health industries video reviews are the lifeblood of many businesses.
You should already be thanking video reviewers, and now you might want to take it to the next level: share their reviews on your website. You can either share them as blog posts or add a couple video reviews to your “About Us” page. If your product has been reviewed by a well known YouTube channel you can also add this to your “Press” page and media kit.
Don’t have any video reviews? Many reviewers accept free products and some are also willing to participate in extended media campaigns. There are also services like FameBit that connect business owners and social media influencers.
If you run a service based business you can do something similar with video testimonials. These don’t need to be high-production videos, and they can be posted on both your “About” page and your “Testimonials” page.
How to use video in blog posts
There are two main options for adding videos to your blog: hosting them yourself, and embedding YouTube videos on your website. Nine times out of ten, you’re better off hosting videos on YouTube. Self hosting gets expensive fast, and YouTube gives you access to several SEO and analytics tools.
Hosting all your videos on YouTube also gives you a presence in the social world of YouTube. Built right, your channel will take on a life of its own and bring thousands, even millions, of new customers to your business.
Last but certainly not least, it’s incredibly simple to embed YouTube videos in blog posts. You can do it in three easy steps:
Step 1:
Go to the page of the YouTube video you want to embed.
- If it’s your own video you can do this either by searching for it in the YouTube search function or by going to your “Creator Studio” and clicking on the appropriate video in your dashboard.
- If it’s someone else’s video then you can find it easily via the YouTube search bar at the top.
Either way, you should end up with a video URL like this one:
Step 2:
What’s cool about WordPress is that you can embed a video quite easily. All you need is that raw URL of a video.
You just take it, paste it right where you want to have the video embedded in your blog post, and see it magically converted into a live video block. Like so:
And that’s it. All you need to do now is save the post.
Note; this method works not only with YouTube but also other popular platforms. You can also use it with videos from CollegeHumor, DailyMotion, Facebook, Flickr, Hulu, TED, Vimeo, and more. All you need is a direct URL.
Final advice on how to use video in blog posts
Whatever video strategy you choose, the most important thing is to know your goals and consistently work towards them. If your main goal is to spruce up your website, come up with a few key videos you can create to share your story and vision with your customers, then shoot them all in a similar style.
To build a large YouTube presence, you can experiment more and get away with lower production value on individual videos, but you need to upload something at least once a week.
Not sure what approach you want to take? Research what other businesses in your industry are doing, and figure out how you can improve it and how to use video in blog posts of your own. Meet with your team to gather ideas. In fact, do this research even if you think you know what to create. You might be surprised by what actually works in your industry.
Read this article to learn about five of the best inbound marketing activities to build a stronger relationship with your audience.
Learn how to leverage templates to create more videos faster as a non-video person from this blog post!
Easily upload and share videos online with online video hosting. Learn more about what to look for while choosing a paid or free video hosting site.
Wondering how to make a professional video without putting too much effort into it? This article will walk you through the most useful tips and tricks. Read on!
Find everything you need to know about embedding video on your website in this ultimate guide.
Create the perfect video landing page with these top 10 free video landing page makers.
video marketing today!
Try now
Videoblog
[Webinar Recap] 5 Most Effective Video Repurposing Techniques
Rethink Your Social Video Strategy with Donna Moritz
Create Content at Scale: 40+ Pieces Every Week from 1 Core Idea With Salma Jafri
How To Craft A Video-First Content Strategy. Webinar with Salma Jafri
Most shared
Wondering how to make a professional video without putting too much effort into it? This article will walk you through the most useful tips and tricks. Read on!
Looking for fresh YouTube video ideas? These 67 excellent videos got you covered.
Join our newsletter — it’s free!
We only post the good stuff
Wondering how to create compelling Instagram videos that would actually convert? In this post, Jenn Herman, the leading Instagram expert, shares her secret tips and advice.
How does one come up with a strategy for making and sharing videos that people genuinely want to watch on social? Chris Savage, the CEO of Wistia, shares 3 great ways to do just that.
Must reads
These 29 amazing sites provide free stock footage for your next video
Looking for an easy way to create Facebook cover videos for your page? Here’s a short and helpful guide.
What is a storyboard and why it is important for your videos? Find out in this article, along with helpful tips for making your own business videos.
In case you missed it
How to effectively create consistent and original social content without repeating yourself? Read this blog post to find out how to plan out your social media content in advance.
A loved one passing away is a terrible experience. Working on creative ways to commemorate their life and times can help us process grief and heal. A tribute video is a fantastic way to remember a friend or family member that is no longer with us.
Today we’ll show you how fast and easy it can be to create a tribute video, who knows – you may even end up enjoying the process…
Think of were your tribute video will be shown
Will it be shown in the funeral itself? In a smaller memorial gathering, wake or shiva? Are you planning to post it to social media or share it via email?
Choose the right tone
A funeral video can be solemn or humorous, uplifting or sad. Think about the subject of your tribute video as well as the potential audience – and make sure the tone of the video is appropriate. You don’t want to offend people.
Choose a theme
Think about things that the deceased loved in real life and incorporate them into your creation. It can be their line of work, their favorite pastime activities, their favorite sports of their family.
Choose a platform
There are plenty of platforms out there you can use in order to create your tribute video. The more technically-inclined can use professional video editing software like Premiere, others can use generic editing tools like Microsoft Video Editor. Online slideshow makers are also an option – slideshows are basically videos made out of still photos.
Pick photos / footage
Go through all the photos and video footage you have of the deceased. Try to source more material from friends and family – this curation process can be a great opportunity to remember and cherish your loved one. Pick only the photos and videos that best exemplify the life and times of the person you lost. These should be the images you want to remember them by.
Nail down the right music
Music is a huge part of your tribute video. If you already know what the general tone of your creation is, it will be easy to nail the tone of the music. Think about bands, singers and genres that the deceased loved in his life, or songs with lyrics that have something to do with them and their lives.
Creating a tribute video with Smilebox
Creating a tribute video is fast and easy with Smilebox. Anyone can do it. All you need to do is browse through our huge selection of slideshow designs, pick the one you like, customize it to suit your needs and add photos and music. You can download it as a video to your computer or mobile, or you can share it with friends and family via social media or email.
Technically speaking, adding a voice-over to your video clips isn’t that big of a deal. There is a large volume of applications that have this functionality built-in.
How to add my voice to a video on Windows 10?
1. Prepare your video and tools.
The video editing software.
Take Animotica, one of the best-reviewed video editing applications on the Microsoft Store as an example. It allows you to add a voiceover in as little as 5 super-simple steps.
Launch the app, create your first project and add video or photo files you want to add voice over to.
Create a new project in Animotica
The Mic
Have you ever heard the phrase there’s more than one way to skin a cat? Well, it’s probably the most applicable idiom ever when it comes to deciding on your soon to be voice over microphone.
To kick things off, mics come into two groups: condenser, and dynamic microphones. The condensers boast a superior sound but they pick up much more noise pollution than their counterparts.
Dynamic mics are better fitted for recording in noisier rooms but they have a noticeable drawback. Cheaper models force you to lean in closer and then pick up the sound of your breath.
That said, if you were to pair an average mic with a decent pop filter and a solid piece of recording software, you’ll avoid almost every challenge with flying colors.
If you’re shooting a video by yourself, this guide might be helpful to start with.
3. Click on the VoiceOver button.
Allow Animotica to access your microphone.
4. Start recording a voice.
An automatic countdown will give you 3 seconds to make final preparations before recording starts.
The recording will start in 3 seconds
The app will pick up your mic by default so all there’s really left for you to do is to let your voice rip!
5. Finish.
You can use the ‘Stop’ button to stop recording, otherwise, it will stop automatically once you reach the duration of your video.
Click ‘Stop’ after you finish recording yourself
If you wish to make a voice over longer, then you need to increase the duration of a whole video or any particular frame.
In the first case, from the main project screen navigate to Project settings -> Photo and set up the duration for the slides (it will be the same for each).
In the second case, select a particular clip, for which you want to change speed and click ‘Duration’, set up the one you need.
You might need also to split your video into a few frames to record a separate voice over for each.
In case if you’re all set, click ‘Save’, select the video settings and wait for a few moments to finish video rendering.
Voila! You are now a YouTube/Instagram star! All thanks to a handy video voice over app.
That said, achieving professional quality of sound expected from up-to-date videos is a little bit more complicated. And no, it’s not about the mic. At least not entirely…
How to record voice-over audio in your video?
1. Create a new project and upload your files.
Create a new project in Animotica and upload the video file you want to add a voice-over to.
2. Mute audio in your video.
Click on your clip and select ‘Sound’ from the bottom menu of the screen.
Put the volume of your video to zero.
3. Record voiceover.
Now you can start recording your voice over muted video.
For more details, navigate to the first section of this guide.
Composition
Your audio track needs to follow certain rules of composition, exposition, and pacing if you wish to match the tone and voice of the visuals on the screen.
Yes, they do have a voice of their own. Figuratively speaking.
When it comes to voice over video editing, it is obnoxiously hard to achieve the sense of absolute Zen – the state when you don’t hate the sound of your voice. These precious moments are the ones you should be capturing.
How to prepare yourself for recording?
- Watch out for your surroundings: Finding a quiet place to work when you are trying to add voice to a video is essential as meditating in silence. Yes, your mic probably won’t pick up the noise, but your ears will. Not only will you fail to concentrate, but you’ll also twitch and move in undesirable ways. Every movement will be reflected in your voice going higher or lower than intended.
- Be clear and adequately toned: Why are some channels flying off the ground at light speeds while others gather dust while producing content that’s equally good? In 9 cases out of 10, the reason hides in the voice of a YouTuber. Some are simply much more pleasant to hear than others. This doesn’t mean that they have a superior voice though. What they do have is a way of communicating clearly, in their own words and tone. You can do the same if you stop for a second and think about which intonation fits which frame.
- There’s no rush: What’s the most important element of the story? It’s pacing. Nuff’ said.
- Words are hard.Make them sound simpler: What can we say other than you should think about reading the script out loud in front of a mirror a few times before actually recording your voice over? This way you’ll settle on both the pronunciation and enunciation.
PS: there’s more shame with proceeding with an awful scene in a clip than in reshooting it or re-recording the voice over. Just saying.
Frequently Asked Questions
Can I do multi-recording in Animotica?
Yes, you can. Do your voice-over and simply repeat the process.
So, what will it be? Are you ready to conquer the realm of professional video content creators with your super slick-sounding videos?
Give us a shout out on social media and share your experience so far!
Чтобы создать свой собственный блог, потребуется лишь несколько минут. И это совершенно бесплатно.
Подберите дизайн
Ваш блог должен стать отражением вашего стиля. Просто выберите один из настраиваемых шаблонов и понравившееся фоновое изображение или придумайте собственный неповторимый дизайн.
Получите бесплатный домен
У каждого блога должен быть свой собственный адрес. Получите его бесплатно в домене blogspot.com или купите персональный домен.
Зарабатывайте
Хотите, чтобы ваше увлечение приносило доход? Зарабатывайте с помощью Google AdSense, показывая посетителям релевантные рекламные объявления в своем блоге.
Познакомьтесь с читателями
Встроенные средства аналитики Blogger помогут лучше понять пристрастия ваших читателей и узнать, в каких странах вас читают. Чтобы получить дополнительную информацию, можно связать свой блог с сервисом Google Analytics.
Храните яркие впечатления
Не дайте воспоминаниям потускнеть. Вы можете бесплатно хранить в Blogger тысячи записей, фотографии и многое другое.
Присоединяйтесь к миллионам блогеров
В Blogger можно писать о чем угодно, например о погоде, последних новостях или интересных идеях. Зарегистрируйтесь – и вы узнаете, почему огромное число пользователей выбрали этот сервис.
Ryan Taylor
May 5, 2020
Rev › Blog › Education › How to Make a Video on Google Classroom
Share
As technology improves, we’re continually learning new ways we can use it for education. Increasingly, educators are being asked to make use of speedy internet connections and cloud-based storage systems to make classroom materials available to kids at home.
While this can help improve access to some classes, and allow each student work at an individual pace, it also puts a lot of pressure for teachers. Luckily, Google Classroom offers lots of options to make communication and sharing files simple.
Learning all the tools each program has to offer will open up the possibilities for how you can run daily lessons. Video can be a great way to add to your students’ learning experiences, and to save time in writing instructions all out by making a video of yourself explaining the assignment. It could also make those instructions more easily understandable.
Even if you explain your assignments on a video, you’ll likely want to add closed captions to make the videos accessible for all students.
You can learn how to make a video on Google Classroom pretty easily. Traditionally, Google Classroom has focused on the ability to add videos from other programs, such as YouTube or files from Google Drive. Now you can also record a video directly into Google Classroom via the mobile app. This is the fastest and easiest way to add videos for your students.
How to attach a video to Google Classroom
Adding video can encourage engagement and connection between teachers and students, and now it’s easier than ever to create, edit, add subtitles, and upload videos onto Google Classroom.
To add a video you created in YouTube to an assignment that appears your Google Classroom classwork, start by clicking “create” in the Classwork tab. Click on “Assignment” and enter all the details, including name and due date.
You can add the video file by clicking on the paper clip. Select “YouTube,” to search for your content, then click “add.” If you already have a video link, click URL and then paste the address in and click “add.”
The process is similar for a video stored elsewhere: when you click on the paper clip, you can instead click “File,” “Drive,” or “Link,” depending on where your content is stored to upload the videos.
Adding the file to an assignment to provide instructions is just as easy – just click the paper clip to attach from the assignment page, then follow the same directions as above to find your video.
How to make a video on the Google Classroom app
Creating a video right inside Google Classroom is now possible via the mobile app. It’s a super-simple way to add content from right within the platform.
To record video to an assignment, tap the paper clip icon to add an attachment. There you’ll see the option to “Record video.” The video you make will still be stored in Google Drive, since that’s where content on Classroom is kept, but it will insert the video directly into your assignment for you.
Adding subtitles to your videos
Recording a video will help many students understand the assignment better – just by hearing your description and your inflection while you give it will clarify in ways the written word can’t always do.
However, some other students will have trouble viewing video, either because of technology problems, because they’re deaf or hard of hearing, or they’re just not aural learners. For this set, closed captioning for your videos will help immensely.
Want captions added directly to your videos? Rev now offers burned-in captions (open captions). Just check the “burned-in captions” box at checkout and you’ll receive a video with permanent, hard-coded captions added straight to your videos. Also available for foreign language subtitles!
Adding closed captions to YouTube videos
If you’re adding a video from YouTube, you can add closed captions the file before you link or upload it into Google Classroom. When you sign into YouTube Studio, click on the left menu and select “Subtitles.”
Click the video you’d like to edit, then enter your captions manually. You can also upload a completed closed caption file by selecting the video you’d like to caption, clicking “More options,” and “Upload subtitles/cc.” Follow the prompts to upload your file and save.
You can have this whole process done for you by professionals, too. A caption service like Rev will do the whole thing for you. Do this by going to Rev’s “Captions” page, and clicking on the YouTube icon. You’ll need to give rev.com access to your YouTube account, select the videos you want captioned, and click “Add Selected to Cart.”
You can also click “Paste a URL” to paste the YouTube URL of the video you want captioned.
From here, you can select the option to automatically deliver captions back to YouTube when they’re captioned. Rev will return your captioned video to you within 24 hours, with a 99% accuracy rate.
Adding closed captions straight to your videos
Adobe Premiere Pro lets you create or import closed captions, too. Select File, New, and Captions, then follow the prompts, and the program will create a caption file in the project panel.
In Final Cut Pro X, you can add captions in the timeline, too.
If you have a video and a caption file from a site like Rev, you can use a free tool like Handbrake to put the captions onto the video file. Videos in file formats like mp4 can be embedded with .SRT caption files. Click “Open source” and find your video. Then, click on the Subtitles tab, open the “Tracks” dropdown menu, and select the option to add an external SRT to find your captions file.
Adding closed captions to videos already on Google Drive
For videos you created via Google Classroom or have updated onto Google Drive, you can add completed captions files by selecting the video you want to add captions to, clicking “More,” “Manage caption tracks,” and “Add new caption tracks.” Then you can select your file and click “Upload.”
As we wind down the school year, we are left with uncertainty. Top of mind for most teachers is how to get ready for next year when it’s unclear what school will even look like. How are you supposed to prepare?
In my own work with educational organizations all over the US, the general consensus is to implement flipped classroom structures for the kids and for teacher professional learning. And I’m seeing this solution echoed from other expert practitioners in the field, like Doug Lemov, of Teach Like a Champion fame. The flipped classroom model relies heavily on video content. And of all the tools currently on the market, Prezi Video offers a unique and easy video-making experience that leads to a very professional-looking product. Read on to learn how to create video lessons on Prezi Video, perfect for first-timers and teachers prepping for the next year.
In this Prezi presentation, I tackle how to get started with Prezi Video and illustrate how to develop increasingly more customized Prezi templates for your videos. Use this Prezi presentation as your guide, and read on for my quick tips for getting started with using video to support your online teaching and learning.
Get started making video lessons
Two of the easiest ways to get started are:
- Using one of Prezi Video’s simple templates
- Importing a PowerPoint presentation
First log in to your Prezi account (or create one — it’s free for educators and students), and choose “Videos,” then select “Create new video” in the top navigation. The templates will come up and your camera will become activated. The wizard will guide you through the process, but basically, you first pick your template, add your content, and then record.
This video shows you how:
The second option, importing a PowerPoint file, is equally easy, but it requires you to first download the Prezi Video desktop app (which you access from within your Prezi dashboard). Again, just follow the wizard to import a PowerPoint presentation you’ve used with your class, select your favorite template, add the content from the file, and click record to show yourself speaking right alongside your content on screen.
This video takes you through the steps:
Level up
The “Advanced create” feature provides you with another easy method for making videos as well as access to slightly more complex templates. Simply select “Advanced create,” pick your template, add your content, activate your camera, and record. There are lots of templates to choose from, and some are specially designed for use in your online classroom, including templates for creating a new assignment, sending video messages home for students or parents, and running a fun test review game. And any template can be easily modified. Here are more details on how to get started with Advanced create.
Create your own look
If you want to customize your Prezi video with your own brand, look, or school mascot, either take one of your Prezi presentations and convert it to a video format or start fresh and build your own video template as a presentation. Starting with a presentation first and then turning it into a video template will give you the ultimate flexibility.
The key to making a good video template out of a presentation is to craft your template with your face in the editor, so you can see the placement of your visual elements as you create. When you’re ready, just start recording.
Share your video with your students
After you’ve made your video, edit as needed, add a proper title, add relevant tags, finalize your description so your students know what the video is about, and then share your creation. Some teachers are simply sending the videos to their students via the share link; others are putting the file into their learning management systems (LMS). We’ve seen other teachers aggregate their videos on a website where their students can access a library of videos to choose from. For instance, Jamie Ewing, who teaches in a PreK-5 school in the Bronx, established his own site, Mr. Ewing’s Location for Educational Mind Explosions, that directs students (and parents) to at-home literacy and STEM projects.
Other teachers are embedding their Prezi videos into a Prezi presentation that acts as a central hub for their assets, including videos, relevant documents, images, helpful URLs, and directions. Whatever method you decide for distribution, consider what’s the easiest way for your students to access it. Also think about how to best organize your content in ways that allow your students to easily make sense of your various video and textual assets, like readings and instructions.
With time and practice, you’ll be flipping your classroom with creativity and vigor. Check out how these teachers are using Prezi Video — you’ll be surprised how easy it is and how it can further your connection with students.
Paul Teske, Teacher in Residence @ Prezi
by Scott Chow | July 4, 2016
In Step #3 of the tutorial I show you how to easily add an image to a WordPress post (or page). But what if you want to add a video?
This is really easy to do as well, but the process is a bit different. Adding a video to a post is known as “embedding” a video. For the purposes of this tutorial I am going to show you how to embed a YouTube video in your WordPress blog, but the process is similar for other videos as well (Vimeo, Facebook videos, etc.).
Option #1: The Easy Way
The easiest way to add a YouTube video is to simply copy and paste the URL of the video into the blog post editor.
First, you will need to login to your WordPress dashboard and either create a new post or edit an existing one. Once you are on the post editor screen make sure the “Visual” tab on the top right is selected (circled in the image below).
Then you just need to find the video that you want to embed and copy the URL from your address bar. It should look something like this:
When you do that, the video should appear in your post editor screen immediately. Just click “Publish” and the video will be added to your post!
Option #2: The Personalized Way
While the first option is very easy to use, it doesn’t let you customize the way the video is embedded into your post.
To have access to the customization options we need use a slightly different process. We need to get the “embed code” for the video instead of the URL. To do that, go to the YouTube video you want to embed and click on the “Share” button below the video.
Then you are going to want to click “Embed” and copy the link.
Then you need to go to the post editor of your blog and click the “Text” tab at the top right.
You are then going to paste this link into the text editor of your WordPress blog post. It should look something like this:
In that code that are attributes called “width” and “height”. You can change those numbers to resize the video. For example, width=”280″ height=”157″
If you want to add a border around the video you can do that by changing the number next to “frameborder” in the code.
If you want to make your video centered you will need to do a little HTML coding. Before the embed code add this:
And after the embed code add this:
When you’re done it will look something like this:
That’s it! Two ways to add a video to your blog post!
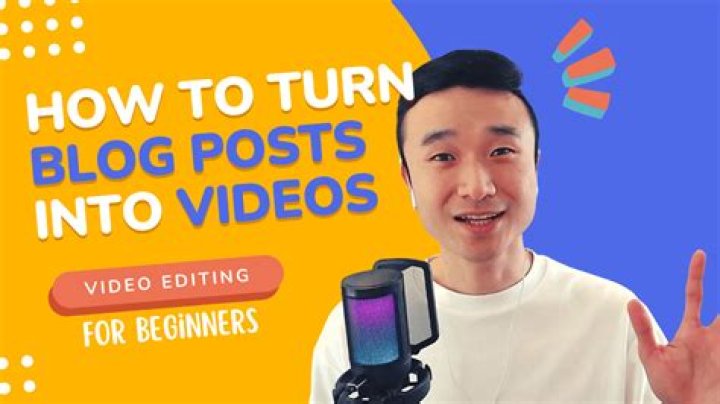
As a blogger and content marketer, people face the biggest challenges in these questions:
- How do I create more video content?
- Where do I get new video ideas from?
Well, the answer is right under your nose.
Convert your existing articles into videos!
Now, this could be done in any form, but the one that I’m sharing is one of the fastest and elegant ways to convert existing articles into videos. You can further use these videos on your social media platform, YouTube or other video hosting websites to gain links or drive more traffic.
I have been testing this with Lumen5 which is by far the most popular and the fastest way to convert your blog articles into a video. There are a few other articles to video software, but on my experience and the simplicity of the process is what makes Lumen5 the numero uno choice in the blog to video converter category.
- You can create videos manually from any blog post
- Lumen 5 will convert your blog post into videos automatically using the RSS feed.
I usually prefer creating videos manually as it makes videos more meaningful. Auto RSS video creation speeds up the process, but it’s far from perfect.
So without further delay, let me show you how to create videos quickly with existing articles:
Step-by-step guide to convert blog posts into videos
- Create a Lumen5 account
- Click on create a video link
- You can select either of the three options.
In this case, I have selected the first option and added a blog post link to convert it into the video. Click on Go will take you to the main video creation dashboard where all the magic happens.
The first time when I used this to convert one of the articles into a video, I was surprised by the simplicity it offered.
You should start by editing the first slide on the right, and then you can quickly select the text to be added for the next slide. Lumen5 scans the content of the slide and adds an image automatically.
However, you have the option to search millions of copyright images and videos from the Lumen5 dashboard and add it to the slide with a single click. You can also upload your own image to the slide which is what I use most of the time. However, this depends entirely upon your style.
The media files that you upload can be reused for future videos too. I would recommend you to upload images that you are more likely to use repeatedly and take advantage of the free image catalog of Lumen5 to make your videos unique and brandable.
There are more branding settings offered by Lumen5 that you must take advantage of.
I have converted over 50 blog posts into videos and shared them on social media in drip feed setting. It was great for branding, and even the engagement in the form of likes and shares was high. However, I did not get much success on YouTube with such videos. I believe that could be because videos were too short (
Do you want a quick and easy way to promote your blog posts on social media? Video is one of the best ways to capture people’s attention as they scroll through their feed. Using a Placeit template, you can easily create a blog post teaser video to promote your content. In this article, we will go through the steps of creating your own blog post teaser video.
1. Choose a Video Template
Placeit has video teasers templates in a variety of styles and presets to suit a range of blog content—including countdowns, tip lists, how-tos, and much more.
These templates are set up with presets that can serve as an instant-download blog post teaser video. You can also go deeper in the video editing process, as every element in each template is editable, from text, font types, video and audio selections. It is up to you.
One of my secret dreams is to be a travel writer, so I’m going to use the Top 3 Travel Hacks Template as my starting point.
2. Pick Your Slides
This template is pre-set to show three travel hack slides sandwiched between an intro slide and a closer slide.
In this template, the video slides are made up of a background image, editable text boxes, and graphic animation overlays. The slides at the bottom of the screen already contain these three elements, and for most slides, each element can be edited to suit your purposes.
Have a look at the slide panel located at the bottom of the screen, below the video player. Using this panel, you can, add, remove, or duplicate slides. To remove or duplicate slides, simply hover over a slide to reveal a menu and then select Duplicate Slide or Remove Slide.
To add more slides, click the Add Slide button to the right of the slide panel. A content library will appear with hundreds of slide options to choose from. Hover over the images to see how the slide graphic effects will look. When you find a slide you would like to use in your content teaser video, click on it and it will be added to your slide panel.
I’m going to keep it simple with my blog teaser video: I like the default video as-is, but I’ll sub in my own text for a quick and easy video. You can get really creative with this template, as it is basically a video editor with hundreds of built-in video clips, animation, and audio options to mix-and-match.
3. Replace the Default Text With Your Own
To change the text, click on the text editor box and type or paste in your own text. Do this for each slide. And make sure to include your social media and website at some point in the video, so that your viewers know where to find you. With this template, the closer slide is set up as the default location for your social information.
4. Select Fonts, Font Colors, and Text Box Colors
Beneath each text box, there are two drop down font option menus: one for fonts, and one for font colors. To change either element, just click on its drop down menu and make your selection.
A note about font color: if you decide to change the default font colors, keep an eye on the Text Box Title Color and Text Boxes Color drop down menus to the bottom right of the template screen, just above the slide panel. The text box colors are intended to provide consistent contrast for your text, no matter what background image appears in your video. These boxes should be a different color from your font to ensure your text is read easily.
Once you have made changes to any element of a slide, including text, you can click Preview Slide button at the top of the screen to see how it looks and go back to make any changes as needed.
5. Choose an Audio Track
Placeit includes an extensive Audio Library. Audio is an important part of every video—60% of Instagram stories are watched with the sound on, and videos with audio perform better in feed ranking.
To browse the Audio Library and pick a track, click on the pencil button beside the audio player on the top right side of the screen. Listen to a few tracks and find one that fits with the theme and style of your blog. There are many genres to choose from—you can narrow down the tracks by genre by clicking tags to the left of the Audio Library. Once you have found you like, click Select to add it to your video.
6. Preview and Download Your Video
If you are happy with the default video settings, click the Preview Full Video button above the video player. Watch your video, and if there is anything you want to change, go back and make those change now.
Once you are happy with your video, click Download Full Video for an instant blog teaser to use for online promotion.
7. Optional But Fun: Play With Video, Background, and Animation Options
If you want to go deeper with this template, do it. Add more slides. Change Background and Effects options by selecting options from the libraries to the right and left side of the screen. Play around with Text Alignment and Text Position. Or upload your own Custom Image or Video content. This is a simple-to-use but powerful template that is as versatile as you want it to be.
Conclusion
I hope this article has shown you how easy video editing can be with Placeit. Since all the blog post teaser video templates follow the same format, the learning curve of this platform is very gentle. If you want to experiment, this is a great place to do it. Or if you want a professionally-designed teaser instantly, you can do that, too.
I’ve recently noticed that video backgrounds are becoming very popular among new websites. Images can be a great draw, but videos have that extra factor, an original, unexpected element, that makes them stand out. It’s a good alternative to image sliders, and one short video may be more valuable and engaging than several images. Not to mention that quite a lot of our users in the forum have been wondering if a video background is possible in our themes. So, in today’s article I’ll be doing my best to explain how you can get a nice video header without too much hassle.
Introduction
For our example I’ll be using our Steakhouse theme; it’s relatively new, very popular, and it seems to have been the subject of more video header requests than others, so we’ll save people a trip to our forum or support ticket system! In the basic setup of the theme the header displays an image as decided via the Theme Customizer; you can use random images here, or rotate your header images slider in real time, but it’s not possible to add video here by default. So, let’s code ourselves a solution!
Methods for adding a video background
If you’re looking to have a video background across your website and not just limited to the frontpage header, then re-coding things by hand is not really worth it since there are some great plugins for just this purpose, such as YT Player for background videos. Configuration of this plugin is easy, but it can’t be used with all our themes. For simpler background videos there are a few methods we can use.
Use an iframe to display video from popular services
Services like Youtube, Vimeo etc…allow their videos to be displayed in an iframe. (Please remember to check the license of the movie clip you wish to use; avoid copyrighted material and ensure you have permission from the uploader if necessary). Once you’ve found a video you should click on the “share” button to get the iframe code ready to add to our own site. For the video to work, we’ll need to add this code into our Steakhouse/header-frontpage.php file inside the header, after this line:
Our added code should look like this:
We can additionally add these parameters to the embedded code to play the video automatically, disable video controls and enable playing the video in the loop; all very important if you want an uninterrupted background video.
Once we refresh our site you’ll see that video is visible, but only in a small container before the header. If we’re going to make this into a seamless video background we’ll need to do some CSS styling.
We can use the Steakhouse/css/override.css file or the method discussed here to add our own CSS code to the theme.
First we have to set background of our #gk-header and #gk-bg to transparent – This will make our video visible. Then we have to position our video container absolutely with the proper (negative) z index property for best effect.
Upload and use your own video.
If you have your own video to use, rather than a video from a service like Youtube, then the first thing you’ll need to do is upload it to your media library. After that you can edit this video to check and copy the full path to the uploaded file. Now, find the place where our header is displayed. Navigate to your Steakhouse/header-frontpage.php file and add your video into the header – the same place as in the method above, but with a different bit of code:
We can also upload an image and specify the poster attribute which will be shown while the video is downloading, or until the user hits the play button. If this is not included, the first frame of the video will be used instead.
Now our video will be visible but only in the small container before the header (just like after adding the iframe in the previous section), if we want to have this video as a background we’ll have to do the CSS thing again like before.
First we have to set background of our #gk-header and #gk-bg to transparent to give the video some space to breathe and let your users see it, then we have to position our video container absolutely with a (negative) z index property.
Now the effect should look like this:
And that’s your lot for today; go forth and add video backgrounds till your heart’s content! I hope this article was helpful, and if you’ve got any interesting suggestions, why not let us know in the comments below?
Blogs, or Web logs, are online journals that are updated frequently, sometimes even daily. An update, (also called an entry or a post) is usually quite short, perhaps just a few sentences, and readers can often respond to an entry online. People who write blogs are commonly called bloggers. Bloggers, tongue in cheek, call themselves and their blogs the blogosphere.
Blogs are a great way to keep everyone in a family abreast of the latest family news without running up the phone bill — you can simply read back over important updates to find out the latest news. In addition, many blogs are being used to host photographs, and their chronological structure can be a great way to keep track of a baby’s growth, a trip, or the process of planning a wedding.
Professional writers often look down on bloggers, because their informal online writing rarely benefits from a good editor. Blogs are known for their casual writing and unpredictable subject material, but the best blogs have proven that — regardless of punctuation and spelling — even “novice” writers can be entertaining enough to attract a broad audience.
Bloggers with an especially engaging subject, such as chronicling a trip around the world, have the advantage of inherently interesting material, but even mundane material can attract an audience if you have an engaging style and voice.
Here are three guiding principles to writing a successful blog:
Develop a writing style and tone appropriate to your subject material.
Post often, even if your posts are short.
Allow your readers to comment on your posts.
Develop a writing style and voice
A great site design and technical gimmicks are no replacement for developing an interesting, readable writing style. Most of us don’t do much personal writing in our everyday lives or even keep a diary. Writing about yourself is never easy, and you may find yourself freezing up in front of the computer screen or becoming stilted and unnecessarily verbose.
Here are a few suggestions you can use to develop your own voice and style for your blog. First, remember that a blog is a conversation. Try to write the way you speak. Avoid jargon and clichés and don’t overuse the thesaurus. It may be helpful to speak your entry out loud before trying to type it or to read it aloud after you’ve written it. If you find yourself struggling as you read aloud or speaking unnaturally, think about what you might have said if you were talking to a friend rather than writing.
Second, write your blog with a specific friend or family member in mind. Thinking of someone you know well and who might want to read your blog will help you relax your writing style. That’s why it’s become popular for many people to start personal journal entries with Dear Diary. The goal is to get your writing to sound more like you and less like a lofty essay.
Always consider your audience. If you’re writing for only close friends and family, you don’t need to explain that Sarah is your 8-year-old daughter every time you mention her. But if your blog attracts a wider audience, you may want to create references or glossaries to help new readers follow along.
Finally, before you start blogging, spend some time visiting other blogs that are like the one you’re thinking of starting. Read one or two for a few weeks and pay attention to things like the length of posts, frequency, writing style, and subject material. You can get some great ideas for your own blog by noting what you find interesting and compelling in other people’s blogs.
Update, update, update
The blogs that attract the most readers are the ones with frequent updates. If you start a blog, be prepared to spend some time working on it every day or two. If you’re going to be a blogger, you have to blog! It takes discipline for most of us to write, even conversationally, every day. If you find yourself dreading posting to your blog, maybe a blog isn’t for you.
As you go about your day, keep the blog in the back of your mind. You may even want to carry a notebook where you can jot down reminders for topics you want to blog about later. Start paying attention to the parts of your life that are most interesting to you; those will likely be the areas your friends and family are most interested in as well. Don’t be afraid to write about everyday activities — parking tickets and car repairs — but don’t neglect to talk about what you’re thinking and feeling. All these areas will make it possible for you to update frequently.
Having a co-blogger can take some of the pressure off, especially if all authors contribute regularly. If you’re going to be working with several people on one blog, talk over how often you expect each other to post so that you can keep some focus and cohesion to your blog.
If you will be updating your blog on a weekly, biweekly, or monthly basis, try to be consistent about when you add new posts so that your readers know when to catch up. For example, you may choose to update your site every Sunday evening.
Invite comments
An important aspect of blogs is that they feature the writing of the blogger as well as the comments of readers. When you visit a blog, you often find a comment link under the text of each blog posting. Clicking that link enables you to read comments from other people and submit your own. Usually bloggers make their own comments in the posts on their site, but sometimes a blogger adds a response in the comment section because it’s a more direct way to address someone else’s comment.
Not all bloggers choose to implement the comment feature, but if you want to develop a dialogue with your audience, comments are the best way to do so. The comment feature is an easy way to involve your audience and get valuable feedback about what you’re doing with your blog.
If you do decide to allow comments on your blog, be sure to keep an eye on them. The comment feature makes it possible for anyone to add comments to your blog and you may not always like what they have to say. For example, spammers sometimes take advantage of inattentive bloggers to do some marketing that you may not want on your blog. All good blogging software makes it easy for the author to remove comments.
Whether you’re offering a physical product, your coaching, services, or digital training, you have to sell, even if you hate it! This is exactly why I get my videos to do the selling for me.
You’re probably wondering: what exactly do I do in a sales video and how long should it even be? To answer these questions we will be taking a look at one of the greatest sales videos to ever be created… The Squatty Potty®. Combining the power of effective marketing, the right sales sequence, and a dash of unicorn poop the Squatty Potty® was able to transform itself from a simple plastic footstool into a bathroom essential! Let’s break down the method of the Squatty Potty® so you too can use this simple formula to create your next sales video!
Warning: Bathroom talk and inappropriate language ahead! Do not continue reading unless your maturity level has not surpassed that of a seven year-old or you enjoy some good poop jokes! This could get a little messy…
Step 1: Get Attention
There are several ways to “get attention” at the start of your video. Squatty Potty® uses a little humor with a dash of shock and awe by showing a mystic unicorn pooping rainbow soft serve into ice cream cones. This first step is absolutely crucial! If you don’t hook your audience and capture their attention, chances are they will click away for good. Don’t worry, a dessert-pooping fictional character isn’t the only way to do this; a simple question, interesting statistic, or a big promise is actually all you need.
Step 2: Identify the Problem
Everything you sell must solve a problem. The bigger the problem, the bigger the demand to solve it, and the more your product will sell. Squatty Potty® identifies the “health hazard” of sitting normally on toilets, which can cause a “kink in your hose,” or in the unicorn’s case, a lack of ice cream. But Squatty Potty® didn’t stop there….
Step 3: Agitate the Problem
It’s not always enough to just identify the problem you will be solving, you have to twist the knife and go deeper. What happens if this problem goes unchecked? What are the worst case scenarios? Squatty Potty® agitates its problem by explaining how the angle you sit on your toilet could cause hemorrhoids or constipation!
Step 4: Identify the Solution
Just when the pain becomes unbearable, it’s time to relieve your viewers with the solution. Keep in mind the solution is not you or your product. If you want your audience to buy your product, they first have to agree with your solution. Squatty Potty® suggests the solution of changing the way you sit on your toilet, leaving viewers to wonder how they might actually sit differently. The solution you present should create an inherent problem which compels your viewers to desire that new solution.
Step 5: Introduce the Product
“Introducing the Squatty Potty®,” the answer is actually your product! Notice that this process follows the simple sequence of problem, solution, problem, solution. The problem of a “kink in your hose” which puts you at risk for hemorrhoids was solved by switching the way you sit on your toilet, this caused the problem of how you’re actually supposed to sit differently which is then solved by the Squatty Potty®. Immediately after you introduce your product, hit your viewers with a big, fat promise. An example of this would be: “It will give you the best poop of your life, guaranteed!” You can only imagine what one of their customers’ email refund requests looks like….
Step 6: Results and Benefits
Now it’s time to share all the wonderful qualities your product possesses, such as what it can do and how it can benefit its users. What can your product do for its customers? “Squatty Potty® makes you go twice as fast or your money back!” How can you demonstrate any other unique features or selling points? Squatty Potty® “sneaks neatly out of sight thanks to its innovative patented design!” Most importantly, if you really want to put your selling on hyperdrive, make sure you clearly state the benefits. The best way to do this is to ask “so what?” after every feature you share.
Step 7: Your Call to Action
Now that you have created enough desire for your product that your viewers are literally racing to their wallets and breaking their piggy banks, it’s time to tell them what to do next. This is your call to action. “If you are a human being who poops from their butt, click here to order your Squatty Potty® today at squattypotty.com.” Notice Squatty Potty® uses a simple “if, then” statement: If you’re struggling with this problem, then click here to purchase. You must be able to tell people what to do next, that is your call to action.
Step 8: Social Proof
Step inside your viewers’ shoes for a moment… they have just been introduced to your great product but still haven’t made the purchase. Usually this is because of one huge reason: they don’t believe your product will work for them. This is where social proof comes in. Social Proof includes endorsements, testimonials, case studies, and reviews. “They are all crazy about the Squatty Potty®, not to mention the 2,000 Amazon users who gave the Squatty Potty® five stars!” If this still doesn’t work, well, maybe some people actually like having hemorrhoids!
There you have it, a simple break down of an incredibly well done sales video, all condensed into eight simple steps you can use to sell your product.
While poop jokes and potty talk are fun and interesting, they are not the secret to making a product sell. The real keys are the sequence and formula, and now, you have them both! So go forth and create your next sales video, and rest assured, it won’t be crappy!


