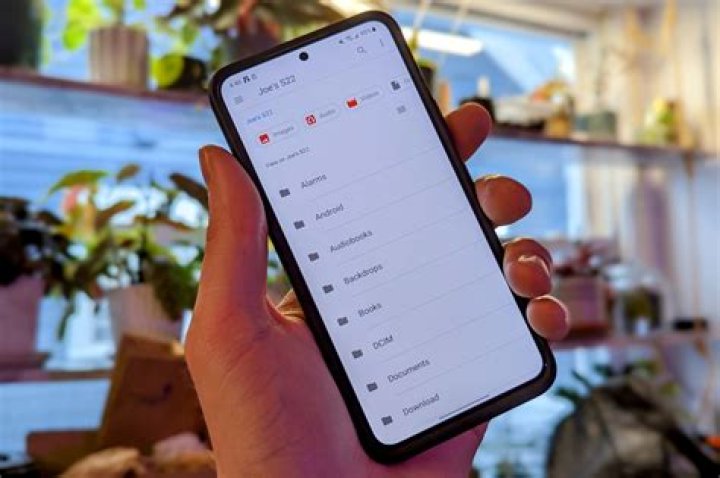
Mobile security is a big deal, probably now more than ever. Most of us live on our phones, with financial information, calendar appointments, family photos, and more stored on our devices. Here’s how to keep your Android phone secure.
Enable Two-Factor Authentication On Your Google Account
A secure Android phone starts with a secure Google account, because that’s where all your synced data is stored—and the more Google services you use, the more crucial this step is.
If you haven’t already, start by enabling two-factor authentication (2FA) on your Google account. There are several options for that second factor, be it a simple text message (which is inherently the least secure of all 2FA methods, but still better than nothing) to adding a U2F key like Google’s Titan Key bundle.
You can find Google’s 2FA settings in My Account > 2-Step Verification (and you’ll have to sign in, of course). We also have a step-by-step guide on enabling the feature if you hit any snags.
But seriously, do that now if you haven’t already.
Also, while you’re poking around in your Google account settings, it’s probably a good idea to go ahead and run a security check. This lets you add or modify recovery phone numbers or email addresses, check recent security events, see what other devices are logged in (and remove them if necessary), and a lot more.
Use a Secure Lock Screen
If you’re not using a secure lock screen, it’s time to change that. This is your absolute first line of defense when it comes to keeping your phone safe.
While the process varies slightly between Android manufacturers and their various flavors of Android, the general gist is Settings > Security > Screen Lock. As I said, the details might vary slightly here, but that will get you in the ballpark. We also have a more detailed guide available should you need that.
And don’t forget to add your fingerprint if your phone has a scanner, too—here are a few tips to make it as accurate as possible.
Make Sure Find My Phone is On
Losing your phone is a gut-wrenching feeling, so you also want to make sure you have a way to track it and, worse case scenario, remotely reset your phone if there’s no chance of getting it back.
Fortunately, Google has a tracking system in place for Android phones. It’s called Find My Phone, and it should be enabled by default on all modern Android phones. To double check, jump into Settings > Google > Security > Find My Phone.
If you ever lose your phone or it gets stolen, you can fire up the closest web browser and search Google for “Find My Phone” and remotely locate your lost device. We have a closer look at everything you can do with Find My Phone if you’re interested in that, too.
Disable “Unknown Sources” and Developer Mode
If you’ve tinkered with your phone in the past, you might have enabled something called “Unknown Sources” (or “Install Unknown Apps” on newer versions of Android). This setting allows you to install apps that are not from the Google Play Store—a process called “sideloading.” And while Oreo made strides to make this a more secure feature, it can still be inherently dangerous to leave enabled.
To improve security, you should disable this feature. On pre-Oreo (8.0) versions of Android, you can do this easily in Settings > Security > Unknown Sources. On Oreo (8.0) and Pie (9.0) you’ll need to disable this feature on a per-app basis, but you can find everything that has access to the feature in Settings > Apps > Special Access > Install Unknown Apps.
Similarly, if you’ve ever enabled Developer Mode for any reason but don’t actively rely on any features, go ahead and disable it. Jump into Settings > Developer Option and slide the toggle at the top to the off position.
Note: On Android Pie (9.0), you can find Developer Options at Settings > System > Developer Options.
Things Google Already Does to Make Sure Your Phone is Secure
It’s not just your responsibility to make sure your phone is secure—Google also does some things to make sure that its system is buttoned up tight.
Google Play Protect
Starting with Android 8.0 (Oreo), Google baked in a feature named Play Protect. This is an always-on, always-scanning cloud-based security system that keeps an eye on apps in the Play Store and on your device. It aims to keep malicious apps at bay—including fake apps—and can even scan apps that you sideload.
To see Play Protect’s settings, head to Settings > Google > Security > Play Protect. You can make sure it’s turned on (and it should be), as well as enable app scanning for side-loaded applications.
On-Device Encryption
In the earliest days of Android, encryption wasn’t even an option. Google added it later, though you had to enable it manually, and that was a hassle. These days, Android is encrypted by default on all modern devices, and you can’t turn it off.
This means that all the sensitive data on your phone is stored in an unreadable, scrambled state upon boot and isn’t decrypted until you enter your password, PIN, or passcode.
Keeping your phone secure isn’t difficult—take a few minutes to check and enable a few settings, and you’ll always have the peace of mind that your phone is as secure as it can be should it ever get lost or stolen.
Securely wiping an Android device isn’t difficult, but there are some critical steps you don’t want to overlook.
Contributing Editor, Computerworld |
It’s an inevitable moment in the smartphone-owning cycle, the point at which a newer, shinier model comes along and your trusty old device is no longer needed.
Maybe your company bought you a new Android phone. Maybe your old one was getting too slow. Or maybe you just love electronics and couldn’t resist the lure of whatever sexy new Android device your favorite manufacturer started selling.
Whatever the case, it’s common nowadays to find yourself with an extra phone. And while there are plenty of practical uses for an old Android device, there’s also a time when the best choice is to sell, donate, or otherwise pass it along.
Before you do so, though, you’ll want to be sure you’ve securely erased it and removed any traces of your past — because the last thing you’d want is for your phone’s new owner to resurface your personal or corporate data.
Follow the four steps below and you can let your Android device go without worry.
1. Make sure your Android device is encrypted
The biggest fear with wiping an Android device is the improbable but not impossible prospect of someone later using data recovery tools to find and assemble lingering bits of data.
That’s why the first and most important step in securely erasing your Android device is to make sure its local storage is encrypted. That way, even if your phone makes its way into the hands of a shady character — and even if said scoundrel is able to recover the data you’ve erased — your sensitive info will remain virtually unreadable.
If your phone is reasonably recent, it should almost certainly be encrypted by default. But if you’re getting rid of an older Android phone, it might not be. Either way, it’s worth double-checking to make sure.
Head to the Security section of Android’s system settings and look for the option labeled “Encryption” or “Encryption & credentials” — or just use the search function within your settings to look for the word “encrypt.” The exact wording and placement may vary depending on your device’s manufacturer and Android version, and some recent phones, such as those made by Samsung, may not even show the option at all (simply because it’s considered a given that encryption is in place, and there’s nothing you can do to change that).
The only reason to worry is if you find an encryption setting and see that the device isn’t already encrypted. In that case, you’ll want to follow the steps in that same area to encrypt it and make sure your data is properly protected.
The visuals will vary from one Android version to another, but most older Android phones will either show you that they’re encrypted or give you an option to enable encryption.
Be warned that the actual encryption process may take a while, and you won’t be able to use your device while the process is underway. Once it’s done, though, you can rest easy knowing your data has a powerful layer of protection from prying eyes in the unlikely event that it’s even recovered.
2. Remove your SIM card and any storage cards
Now that your data is secure, take a moment to confirm that your carrier-issued SIM card and any external memory cards are removed from your device. (Not many devices have SD card slots these days — and some phones are even now using virtual SIM setups, without any physical SIM cards present — so don’t fret if you don’t find either item.)
Both cards can be tied to your identity and filled with private data, and there’s no reason to keep either of them in a device that’s leaving your possession.
3. Perform a factory reset to fully erase your device
This part is the actual wipe of your Android phone: Go back into your phone’s settings and look for a section called “Backup & reset.” If you don’t see that, open the System section of the settings and then look for “Backup & reset,” “Reset,” or “Reset options” — or, on Samsung devices, open the General Management section and then look for the “Reset” option there. In some cases, you might have to tap a line labeled “Advanced” before any reset-related options will show up.
Find and select the command to perform a full factory data reset and select any subsequent options to erase all types of data and accounts. The system will likely give you a confirmation screen or two and then ask you to input your PIN, pattern, or password for protection. Complete all those tasks, then sit back and wait while Android does its work.
4. Remove any remaining account associations
Last but not least, take a moment to manually remove the phone from your Google account and any other accounts that might be associated with it.
For Google, visit the Your Devices section of the web-based account manager. Find your phone in the list, click it, and then click the “Sign out” button that appears. That’ll ensure your Google account has no lingering connection to the phone.
Severing the connection between a phone and your accounts is a smart final step to take.
Think through any other services that might have similar options — Android password managers like LastPass, for instance, or Android security apps like Authy — and sign into their respective websites to sever any remaining connections.
And with that, you’re all set: Your Android phone is securely erased and ready to move on to its new life.
This article was originally published in December 2017 and updated in July 2020.
Contributing Editor JR Raphael serves up tasty morsels about the human side of technology. Hungry for more? Join him on Twitter or sign up for his weekly newsletter to get fresh tips and insight in your inbox every Friday.
iPhone security tips to make your Phone hack-proof
- Tweet
- Share
iPhone security plays an important part in the life of your phone. Even though the iPhone is more secure than Android, there are essential security tips you need to follow.
Traditional security protocols for electronics might include antivirus software or encryption tools, but when it comes to your iPhone, physical theft is probably the most realistic danger. There’s a lot you can do to make sure your iPhone is safe from thieves.
Theft is a major concern when it comes to iPhone security, but there are other things you should care about, too. Every iOS user should follow these security tips, whether you use an iPhone, iPad, or iPod touch, and even if you don’t have a modern iOS version.
Tips to Prevent iPhone Theft
There are several anti-theft tips you can employ to make sure your iPhone doesn’t get stolen:
- Do the obvious: Keep your iPhone close to you. Don’t leave it unattended or exposed in your car when you’re away.
- Ditch your earbuds: The trademark white Apple earbuds are well-known indicators that the headphone cord snaking into your bag is connected to an iPhone. Try a different set of earbuds to throw them off.
- Don’t use belt clips: Belt clips aren’t great for keeping your iPhone safe in public. Since your phone is exposed on your body and potentially easy to pull off a belt clip, keep the clips at home.
- Be aware of your surroundings: When you’re focused on your phone instead of what’s going on around you, you put yourself at a disadvantage, and thieves have greater control over access to your phone. If you’re going to bury your face in your iPhone or clock out of the real world for a while with your earbuds in, occasionally open your eyes and look around.
Create an iPhone Passcode
Putting your phone behind a physical lock and key would be ideal, but the best thing you can do in that regard is to set up a passcode. If your iPhone is stolen, the thief needs to know the password before they can get inside it.
You can set a passcode after your phone is stolen, using Find My iPhone, but it’s better to implement this security habit ahead of time.
Use Touch ID or Face ID on iPhone
If your device sports the Apple Touch ID fingerprint scanner, you should use it. The same is true of Face ID on the iPhone X.
Requiring your fingerprint or face scan to unlock your iPhone is stronger security than a passcode that you might forget or that can be guessed by a computer with enough time.
Enable Find My iPhone
If your iPhone is stolen, Find My iPhone may be one way to get it back. This free iCloud feature uses the phone’s built-in GPS to pinpoint its location on a map so that you (or the authorities) can track it. It’s a great tool for finding lost devices, too.
Control Your iPhone Privacy Settings
Controlling the security of your private data is as important as the physical security of your device. These days, there are more threats than ever to data, including from apps installed on your phone. iOS has powerful, built-in privacy controls.
Don’t Jailbreak Your iPhone
Many people advocate jailbreaking your iPhone because it lets you customize a phone in ways that aren’t officially approved by Apple, like install apps that have been rejected from the App Store, and download paid apps for free. However, if you want your iPhone to be as secure as possible, stay far away from jailbreaking.
Apple has designed iOS with security in mind, so iPhones aren’t as easily subjected to viruses, malware, and other software-based security threats that are common to PCs and Android phones.
The exception is for jailbroken phones. The only viruses that have struck iPhones have targeted jailbroken devices because, by nature, the only way to jailbreak a phone is to lower its security.
While the lure of jailbreaking may be strong, if security is important to you, don’t do it.
Make Encrypted iPhone Backups
If you sync your iPhone with your computer, the data from your phone is also stored on your desktop or laptop. This means that the information is potentially accessible to anyone who can get on your computer.
Secure your data by encrypting backups. To do it, plug your phone into your computer, open iTunes, select the Encrypt iPhone backup check box, and set a password.
With an encrypted iPhone backup, you force potential thieves to know the password you chose. Couple that with an iPhone passcode, and you’re less likely to have your data stolen.
Use Security Apps on Your iPhone
There are several iPhone apps with a primary focus on security and privacy. Most are free, and some have paid options if you want more capabilities.
- One popular and useful method for securing your iPhone web browsing habits is with a VPN. You can set up VPN access on iPhone either manually through the settings or with a VPN app. There are many VPN service providers.
- If you’re concerned about your iPhone security to the point that you want to stop government spying, you have other options in addition to a VPN. For example, to secure your text messages, use an encrypted messaging app.
- If you browse the web on your phone, bolster your iPhone security with a private web browser. There are lots of internet browsers.
- Password security is also important. Should someone gain access to your phone, the last thing you want them to find is a list of passwords to your banks and other accounts. Use a password manager to make sure nobody can see passwords stored on your iPhone.
Do You Need iPhone Antivirus Software?
Antivirus software is a core part of how desktop and laptop computers are secured, but you don’t hear too much about iPhones getting viruses. Does that mean it’s safe to skip using antivirus on an iPhone?
Because of how iOS is structured and the permissions Apple lets apps have, you don’t need to worry about viruses on your iPhone.
Concerned about the wrong person snagging unauthorized access to your Google account? You can run a security check to make sure it’s as safe and secure as possible.
Like a lot of people, your online life is probably heavily tied to Google, from search and Gmail to Google Calendar and YouTube. Your PC, phone, and tablet may connect to your Google account. You might even own a Pixel or other Android phone that requires access to Google sites and services.
As a Google user, how can you keep all the information from your account in check so no one else can access it? Google itself tries to help with Security Checkup, a site that displays your security settings and connected devices so you can review them and make any necessary changes.
Let’s see how this works on the PC and mobile.
How to Run a Google Security Check
There is more than one way to view Google’s Security Checkup site. Using any browser, surf to a Google website, such as Google’s search page, Gmail, Google Calendar, Google Docs, or Google Play. Sign in with your Google account if prompted. Click your profile photo or icon in the upper right and select the button for Google Account. Alternatively, you can take a more direct route by just opening your Google Account site .
You’re now at the home page for your Google account. If Google has detected any potential security issues, the Security section says: “Security issues found.” In that case, click the link to Secure account. If no issues were discovered, the section instead says: “We keep your account protected.” In that case, click the Get Started link if you want to review the settings anyway.
Google breaks down the possible security issues and items into specific categories: Your devices, Recent security events, Third-party access, and Sign-in & recovery. A yellow exclamation point next to a category indicates one or more possible issues; a Green checkmark is a sign of a clean bill of health. However, you should still review all the categories. Let’s look at each one.
Check Connected Devices
Select the category called Your devices. This category displays any devices currently signed in as well as devices that you haven’t used in a long time, such as an old Android phone or tablet that you may no longer own. To remove a device you no longer use, click the Remove button next to it.
To check on a device signed into your Google account, click the ellipsis button ( ) next to it. If you’re unfamiliar with that device, click the entry for “Don’t recognize this device?” Google then prompts you to change your password. You can also simply remove the device from this menu.
If you change your password, you will have to sign back into all of your devices. As inconvenient as this may sound, it is an option you’ll want to take if you think that a device or password may have fallen into the wrong hands.
Inspect Security Events
Back on the Security Checkup page, select the category for Recent security events. This category shows recorded events, if any, such as sign-ins with your Google Account on specific devices and changed passwords. Google will flag events that take place on different devices and will ask you to confirm whether or not this action was taken by you.
Respond to the question of whether or not you took these actions. If yes, Google will view the action as approved. If you don’t recognize a device or recent event, let Google know about it. You will then be prompted to change your password.
View every recent security event concerning your Google account and devices by clicking Show others at the bottom of the Recent security events section. If one or more events don’t look familiar, click the link at the bottom for “Don’t recognize an event?” In that case, Google will again prompt you to change your password.
Maintain Third-Party Services
Back on the Security Checkup page, select the category for Third-party access. This category raises a flag if you’ve enabled any third-party services to access your Google account. For example, if you set up access to Gmail through your email software, then that would be flagged as third-party access.
If you know for certain that you don’t use any Google services through a third-party app or account, click the Turn off button to disable that type of access.
Otherwise, select the entry to Show others to review each specific type of access. Click the Remove access button to disable access for any items you no longer use with a Google site or service.
Recommended by Our Editors
Verify Sign-in and Recovery
Back on the Security Checkup page, choose Sign-in & recovery. If you have two-factor authentication enabled, you’ll likely see “2-Step Verification” instead.
Sign-in & recovery displays any recovery methods you’ve set up in case you’re ever locked out of your account. It may also show you all the trusted mobile devices you can use to verify your identity.
To set or change your recovery phone number, click the pencil icon next to that entry. You then need to enter your Google password to change the number. Do the same with your recovery email if necessary.
If you see any trusted mobile devices that you want to remove, click the Info icon for this entry. At the window, click the link for “recently used devices.”
At the page for Recently used devices, review each device to make sure you recognize it. If a device seems unfamiliar, click it to see more details, such as the version of Chrome and the last location used. If you can’t locate the device or are concerned about suspicious activity with it, click the link for Lost this device? You can also remove the phone immediately by clicking Remove.
Google asks for your password and then takes you to a page with events and other details related to that device. Scroll down the page. If everything looks okay, click the Looks Good button. Otherwise, click the link for Something Looks Wrong. You can then change your Google password or explore other options such as trying to call the phone, signing out of it, or contacting your carrier.
When you’re done, return to your Google Account page. You’ll find more settings by clicking the entry for Security on the left side of the screen. But the ones we’ve covered here are the core settings and should help you better protect your Google account and devices.
Anti-Virus Feature with 99.9% Detection Rate
- At specific times, when I’m not using my phone, or
- When I plugged in my smartphone for charging
Anti-Theft (Remote Lock / Remote Wipe / Locate)
- Set a trusted SIM card within the app.
- Provide a trusted number in case of emergency
Device Monitoring and Application Audit:
Anti-Phishing and SMS/MMS/Call Blocker
In short, I found ESET Mobile Security a package of security and privacy tools bundled into a single app.
The app is fast, provides a user-friendly interface, keeps you safe from malware, protects against phishing attacks, with numerous other tools to keep your smartphone safe even when it’s out of your hands.
However, ESET Mobile Security app doesn’t provide any Encrypted Cloud-based Backups, device encryption, which I will like to see in-built in the future.
Overall, ESET Mobile Security for Android is a solid choice for protecting your smartphone or tablet with its top-notch malware protection and huge array of anti-theft and privacy-protection features.
You can download and install ESET Mobile Security app for FREE for a lifetime from the Google Play Store if you are seeking for basic protection capabilities.
Hotspots make checking email, working, and shopping easier
- Tweet
- Share
Your mobile hotspot device lets you take the internet with you wherever you go. You can’t beat the convenience, but that convenience comes with some security concerns. Fight back by selecting strong encryption for your hotspot and protect it with a robust password that you change frequently. These and other precautions will keep your hotspot unassailable on the internet.
Mobile Hotspot Security Concerns
Whenever you connect to the internet in public, you have some risks — no matter whether you’re using a laptop, phone, or tablet. When you use a mobile hotspot in public, you may encounter travelers you don’t know or hackers who use your mobile internet access without your permission. If you and everyone who shares access to the internet using your mobile hotspot (including strangers) exceed the data limit in your plan, you’re the one who gets the bill for the excess data usage. Avoid this scenario by bolstering the security of your mobile hotspot.
Enable Strong Encryption on Your Hotspot
Most new portable hotspots come with some security turned on by default. Usually, the manufacturer enables WPA-PSK encryption and places a sticker on the unit with the default SSID and network key that was set at the factory.
The main problem with most default portable hotspot security setups is that sometimes the default encryption strength may be set to either an outdated encryption standard, such as WEP, or it might not have the most secure form of encryption enabled, even though it is available as a configuration choice. Some manufacturers opt not to enable the latest and strongest security standard in an attempt to balance security with compatibility for older devices that might not support the latest encryption standards.
Enable WPA2 as the encryption type on your mobile hotspot. It is the most secure of the available choices for most mobile hotspot providers.
Change Your Hotspot’s SSID
As another security measure, change the default SSID—the wireless hotspot’s network name—to something random, avoiding dictionary words.
The reason for changing the SSID is that hackers have precomputed hash tables for the preshared keys of the 1,000 most common SSIDs against 1 million common pass-phrases. This type of hack is not limited to WEP-based networks. Hackers are using rainbow table attacks successfully against WPA and WPA2 secured networks as well.
Create a Strong Wireless Network Password (Preshared Key)
Due to the possibility of rainbow table attacks, you should make your wireless network password (known as the preshared key) as long and as random as possible. Avoid using dictionary words as they may be found in the password cracking tables used with brute-force cracking tools.
Enable Your Hotspot’s Port-Filtering and Blocking Features
Some hotspots allow you to enable port filtering as a security mechanism. You can allow or prevent access to FTP, HTTP, email traffic, and other ports or services based on what you want your hotspot to be used for. For example, if you never plan on using FTP, you can disable it in the port-filtering configuration page.
Turning off unnecessary ports and services on your hotspot reduces the number of threat vectors—which are paths in and out of your network used by attackers—and reduces your security risks. A Wi-Fi app that lets you scan for open ports is a great way to instantly see if you even need to worry about open ports.
Don’t Give Out Your Network Password and Change It Often
Your friends may cozy up to you so that they can borrow some of your bandwidth. You might let them on your hotspot, and they might end up being responsible about using it on a limited basis. Then there are those friends who give the network password to their cubicle-mate who decides to stream four seasons of “Breaking Bad” on Netflix, and you end up footing the bill.
If you’re in doubt about who might be using your hotspot, change the network password as soon as possible.
About Smartphone Mobile Hotspots
If you don’t want a standalone mobile hotspot but you have a smartphone, you have the beginnings of what you need to carry your own mobile hotspot everywhere you go. It is built into the phone; you just need to talk to your cellular provider to activate it, find out the monthly fee, and negotiate data rates (unless you have an unlimited data plan, which has become hard to find).
Most smartphone mobile hotspots support up to 10 devices at a time on a 4G or 5G connection, but confirm this with your provider. With multiple connections, you can let nearby friends and family share the mobile connection while you are using it.
Take the same security protections with your smartphone hotspot as you would with a standalone unit.
Log in with your social account
Data science student at Georgetown University
- bookmark article
- share on whatsapp
- share on facebook
- share on twitter
- share on Flipboard
- share on Linkedin
- share on whatsapp
- share on email
share this article
follow Us
If you think about the many security concerns that public Wi-Fi presents, you will realize that connecting your computer to your own mobile phone Wi-Fi hotspot is far much safer. (Shutterstock/File)
- bookmark article
- share on whatsapp
- share on facebook
- share on twitter
- share on Flipboard
- share on Linkedin
- share on whatsapp
- share on email
share this article
follow Us
Do you need portable Wi-Fi wherever you go? Is your Wi-Fi at home malfunctioning and you need a backup? Lucky for you, you don’t have to look any further than your smartphone.
It is possible to create a portable Wi-Fi hotspot with your phone and connect other browsing devices to the phone’s network. Your phone, in this case, acts as your router.
It is really easy and convenient. If you think about the many security concerns that public Wi-Fi presents, you will realize that connecting your computer to your own mobile phone Wi-Fi hotspot is far much safer.
But portable Wi-Fi hotspots aren’t entirely safe. One significant security concern that plagues this convenient android feature is that its network is “open access” by default. What this means is that when you create a hotspot on your Android smartphone, Android doesn’t create a password to the hotspot and, as a result, anyone can connect to the network at will. If you are in a public place, someone can choose to use your expensive bandwidth and unapologetically use it up.
That is not all. A password-less mobile hotspot is bread and butter for hackers and data thieves. You never really know who is snooping on you in public places. So, apart from worrying about exceeding your data plan due to unauthorized access to your Wi-Fi, you have data thieves to worry about as well. You can avoid all of this by encrypting your hotspot.
This is how you can protect your smartphone’s Wi-Fi hotspot:
1. Create a strong wireless network password
To bolster your data security when using a mobile hotspot, ensure that you assign a strong password to the hotspot’s access point. A password that is long enough, unique, hard to guess and that you change frequently will make your data unassailable online. Just ensure that the password you choose isn’t your name or any of your identification numbers; make it as random as possible.
With a password in place, you have the control of who does and who doesn’t use your internet bandwidth. A browsing device can only connect to your network using a password that only you can disclose – or not.
In the same breath, ensure that you secure the password by selecting WPA2 hotspot security. There are other security options such as WEP and WPA, but they aren’t as strong as WPA2.
2. Enter a unique SSID for your hotspot
Your Android phone will automatically assign a default SSID (service set identifier) name to your hotspot. These wireless hotspot’s network names are easy to guess, especially because hackers understand how precomputed names are generated and the passphrases that go with such names.
Before testing your hotspot in a public setting, first ensure that you have renamed your SSID to a name that only you understand its meaning and origin.
3. Use VPN
Install a VPN on your smartphone as well as other connected devices in your home. If you live in a smart home where almost all devices are connected to the internet, you may need to invest in a VPN router that will keep data spies at bay.
What’s more, a premium VPN service will enable you to connect up to 5 devices to your portable hotspot without jeopardizing data security in any one of them.
4. Update your phone’s antivirus software
Updating your phone’s antivirus software periodically is of paramount importance, provided that you use it to browse the internet. Antivirus software isn’t only for PCs and desktops as many people assume. Hackers have found a weak link in smartphones’ nonexistent security protocols, so they are gradually shifting their focus from computers to phones.
In that light, ensure that your antivirus software is up to date before creating a Wi-Fi hotspot on your iPhone or Android phone.
In conclusion
Here’s a bonus tip: If you provide Wi-Fi services to other people, say customers at your store, it is safe to have all your coding done in Java programming.
“Java programming is the most secure of all coding languages, and luckily there are many professional companies that do Java outsourcing services which can assure you that data thieves will have a hard time breaking into your systems,” say experts of Tactica.
Note that Java’s security model is tailor-made to protect users across your network through the Java Runtime Environment. (kes)
Andin is a data science student at Georgetown University. Has a passion for cybersecurity and is a regular writer on topics related to internet security and privacy.
Your premium period will expire in 0 day(s)
Here’s a simple guide to increasing privacy and security on your Android-based mobile phone or tablet.
Android comes with some privacy tools built-in. However, depending on your device and its manufacturer, Android’s privacy features may not be enabled by default. Plus, there are additional tools you can install to make your device more secure and private.
These actions will help make Android more private:
- Turn on the lock screen and enable a password to prevent unauthorized access. These steps are so basic that they can be easy to overlook — but they’re vital for privacy.
- Install an anti-theft app. We recommend Prey. With a tool like Prey, you can lock your device remotely and recover information if it is lost or stolen.
- Encrypt your phone calls and texts with apps like RedPhone and Signal.
- Uninstall any apps you don’t use. This keeps your device more secure by reducing the opportunity hackers have to break into your system. It also gets rid of apps that might try to collect information about you — like the Google ones that usually come installed by default with Android (which is a Google platform, and therefore designed to help Google collect information).
- Install a VPN. Here’s a list of ones we like. A VPN will encrypt all of your online traffic, which is especially important if you are connected to an open wifi network while on the go. It also gives you access to blocked Web content.
- Consider using a fake identity to register your device. You can use a site like Fake Name Generator to get one.


