As of the date of this tip, OS X Yosemite is kind of a mess, filled with many bugs and frustrating design choices that Apple has yet to fix. As a result, many Mac owners are choosing to stay with OS X Mavericks or earlier until Apple can patch Yosemite to an acceptable level. As has been the practice for the last few OS X releases, however, users who haven’t yet upgraded to OS X Yosemite are bombarded by large Mac App Store banners urging them to do so. If you don’t plan to upgrade to Yosemite soon, you shouldn’t have to be prodded about it every time you launch the Mac App Store. Here’s how to hide the OS X Yosemite update banner in the Mac App Store, and what to do in the future when Yosemite is ready for prime time.
If you’re still running OS X Lion, Mountain Lion, or Mavericks on a Mac that supports Yosemite, you’ll see this large banner in the Mac App Store Software Update section. To get rid of it, right-click (or Control-click) on the Yosemite banner and select Hide Update.
The large OS X Yosemite update banner will disappear immediately, leaving you only with updates for the apps you want on your Mac. But what happens if Apple gets its act together and makes Yosemite reliable again in a few months? Fortunately, the process of obtaining Yosemite after hiding the banner is simple: just search for it from the Mac App Store search box, or find it in the “Featured” section of the store (the latest version of OS X is always prominently featured or listed on this page, even for those already running it).
When Apple decided to make OS X free starting with Mavericks in 2013, the company didn’t do it out of the kindness of its heart; there are many advantages for Apple when the largest possible portion of its customer base is running the latest version of its mobile and desktop operating systems. It’s therefore not surprising that Apple would prominently feature the newest edition of OS X in the Mac App Store.
But, as we’ve seen with Yosemite, “free” doesn’t necessarily mean “wise,” and many users, especially those who rely on their Macs for critical work, would do well to wait a bit longer for Apple to clean things up. By hiding the prominent Yosemite update banner in the Mac App Store, you won’t be reminded — or tempted — to upgrade before the time is right.
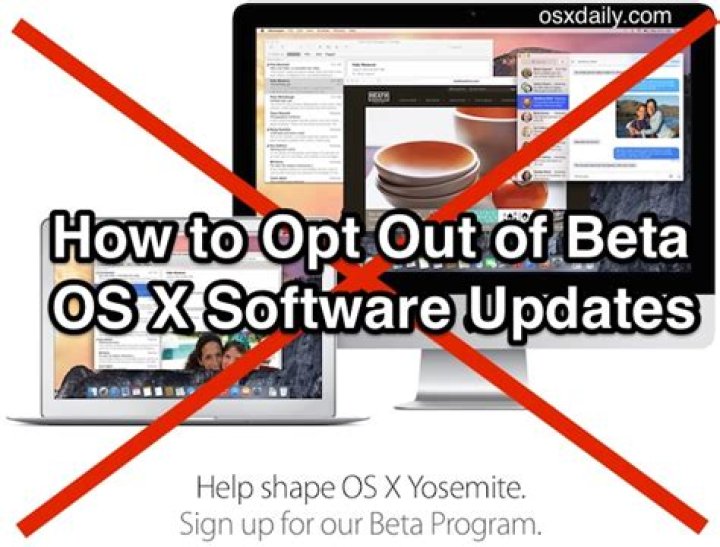
Jei tam tikru momentu užsiregistravote OS X beta versijoje, kad išbandytumėte naujausią versiją, kol ji nebus viešai prieinama, jums gali būti įdomu, kaip išeiti įdiegti kiekvieną beta versiją. Arba ne. Bet kuriuo atveju, štai kaip lengvai išeiti.
Išeikite iš beta versijos programos
Atidarykite Sistemos nuostatas ir pasirinkite “App Store”.
Tada skyriuje, kuriame rašoma: “Jūsų kompiuteris pasiruošęs gauti -leisk “Programinės įrangos atnaujinimo sėklos”, spustelėkite mygtuką Keisti. Tada spustelėkite “Nerodyti atnaujinimų prieš išleidimą”.
Tai beveik visa tai. Bet koks laukiamas beta versijos atnaujinimas išnyks iš “App Store” atnaujinimų skilties.
Plėtinių diegimas žiniatinklio naršyklėse gali suteikti labai naudingų funkcijų. Tačiau jei įdiegsite daugybę plėtinių keliuose naršyklėse, galite pamiršti, kuriai programai įdiegėte. Jei naudojate “Chrome”, “Firefox” ir / arba “Internet Explorer”, turime paprastą sprendimą. SUSIJUSIOS: Kaip iš naujo nustatyti savo naršyklę numatytuosius nustatymus BrowserAddonsView yra nemokamas “Nirsoft” įrankis, kuriame pateikiama išsami informacija visų priedų, plėtinių ir papildinių, įdiegtų “Chrome”, “Firefox” ir “Internet Explorer” (IE).
Dauguma žmonių naudoja savo operacinės sistemos failų tvarkytuvą, tačiau daugelis geeks teikia pirmenybę trečiųjų šalių failų tvarkytuvams. Galų gale “Windows Explorer” nesiūlo skirtukų, dvigubo sluoksnio sąsajos, paketinio failo pervadinimo įrankių ir papildomų funkcijų. Jei esate patenkintas numatytuoju failų tvarkytuvu, viskas gerai.
Apple gives users the opportunity to run pre-release desktop software
The OS X Beta Seed Program is officially open to the public, allowing anyone with a Mac (not just developers) to try out pre-release versions of OS X and help Apple make its desktop OS even better by reporting bugs and quality and usability issues.
“The OS X Beta Seed Program gives users the opportunity to run pre-release software. Test-drive beta software and provide quality and usability feedback that will help make OS X even better,” Apple says.
“Join the OS X Beta Seed Program and accept the Beta Seed and Confidentiality Agreement. Apple will provide a Beta Access Utility for your Mac, which gives you access to pre-release versions of OS X in the Mac App Store Updates panel,” the company confirmed today.
Regular users can now access the OS X Beta Seed Program page and enroll in the program. Apple recommends that users back up their Macs using Time Machine before attempting to download anything new.
The Cupertino giant offers the Beta Access Utility, which is essentially an installer that enables pre-release updates to pop up in the Mac App Store’s Updates pane.
“Once you have installed pre-release software on your Mac, you can report issues to Apple using the Feedback Assistant, which will be located in your Dock,” the Mac maker adds.
The program is available to users who are 18 or older and have their own Apple ID to use. Testers must also accept the OS X Beta Seed and Confidentiality Agreement, which states that you shouldn’t make too much public fuss about your testing. Here’s Apple’s exact wording, from the official FAQ.
“Yes, the pre-release software is Apple confidential information. For example, don’t install the pre-release Apple software on any systems you don’t directly control or that you share with others, don’t blog, post screen shots, tweet or publicly post information about the pre-release Apple software, and don’t discuss the pre-release Apple software with or demonstrate it to others who are not in the OS X Beta Seed Program.”
To leave the program, customers can simply visit the Leave Program page and follow the instructions offered there to have Apple remove their ID and Mac(s) from the list of available testers.
According to the company, “This will stop pre-release updates from appearing in the Mac App Store on your computers.”
With WWDC14 less than two months away, there’s a very good chance all users will be offered a preview of OS X 10.10 shortly after the software is unveiled. Unfortunately, the beta seeding program doesn’t extend to iOS updates.
Account Information
Share with Your Friends
How to fix five known issues affecting OS X El Capitan
How to fix five known issues affecting OS X El Capitan
Latest OS X got you down? Jesus Vigo reviews five of the known issues affecting El Capitan and discusses how to go about fixing these problems.
On September 30th, Apple made its latest version of OS X–El Capitan–available for download from the Mac App Store. In the week that it’s been available, the adoption rate numbers have yet to come out, but the overall consensus is that this latest OS is more stable and refined than the previous OS X Yosemite was at its release.
OS X 10.11 is less about whiz-bang new features and more of a maintenance release. Apple chose to fill in the gaps, so to speak, and make the necessary modifications to make this release rock-solid, resolving many of the known issues that affected some Yosemite users, such as Wi-Fi and Bluetooth.
However, there are still a few issues that have come up in El Capitan. While they’re not as glaring, per se, they can still be quite annoying! So, let’s take a look at some known issues and how to resolve them.
1. Upgrade installation error messages
Symptoms: After downloading the OS X El Capitan Installer from the Mac App Store and executing to launch it, the install encounters an error and prevents it from proceeding with the installation.
Causes: System files or processes currently in use by the OS are the likely culprits. Also, check the vendor’s website for applications installed and verify they are 10.11 compliant. Some apps have yet to make the upgrade to supporting 10.11 and may be affected by new technologies in El Capitan, such as System Integrity Protection (SIP).
Solution: A simple reboot (or shutdown) may be required when it comes to hanging system files or processes. The action will clear out any task requiring the use of those files/services. Another possibility is to power down and then power up holding the [Shift] key. This will enable Safe Mode, which loads the OS without extensions. If the upgrade proceeds, then an unsupported app is probably the cause.
2. Spotlight performance trouble
Symptoms: Spotlight has gained even deeper integration with OS X and web services, which helps make searches that are nimble and informative–until their not. Spotlight is supposed to report back information from dozens of sources, but when it doesn’t or it’s limited in scope, that’s a problem.
Causes: Spotlight maintains an index (database) of information that it catalogs. If the index becomes corrupt (possible, but not uncommon) or if the system is still indexing due to the upgrade (most common), then Spotlight will appear to be slow to respond.
Solution: The first thing to check is what exactly Spotlight is set to index by going to the Search Results tab under System Preferences | Spotlight. Only checked boxes are used by Spotlight–all others are ignored.
Once the settings have been verified, check to ensure Spotlight isn’t currently indexing by clicking on the Spotlight magnifying glass in the menu bar. During this time, it’s best to let the computer complete the task.
If the issue still persists, the database may be corrupt and require a reindexing. To perform this, launch Terminal and enter the following commands, one at a time:
mdutil -Ea
mdutil -ai off
mdutil -ai on
The first command will effectively delete the current index, while the second the third commands turn off Spotlight and turn the service back on again. Immediately after the third command is executed, Spotlight will create a new database and begin indexing it. Please remember this process takes time (as in hours) to complete and that it’s best to not interrupt it until it’s done.
3. Microsoft Office 2016 for Mac crashes repeatedly
Symptoms: When opening Word, PowerPoint, Excel, or Outlook 2016, the app crashes and/or the system freezes.
Causes: According to Microsoft, there’s a bug (or series of bugs) preventing Office 2016 from launching on Apple computers running El Capitan. Regardless of whether the computer was upgraded or clean installed, the results are the same for Office 2016 users and some Outlook 2011 for Mac users.
Solution: As of this writing, Microsoft has issued a statement regarding the issues experienced by users of Office 2016 for Mac. It’s currently working on a solution to fix these problems.
Office 2011 for Mac seems to be working well, apart from Outlook 2011, so that may be a possibility for users who are able to downgrade. Additionally, users may be able to continue working temporarily by using Google Apps or Apache Open Office, as both are free and OS X-compliant.
4. “Application” is not working properly
Symptoms: “Application X” was working perfectly prior to the upgrade. Post-upgrade, it does not function properly or even load at all.
Causes: The causes for a particular application not loading or working correctly are nearly limitless and beyond the scope of this article. However, some of the more prevalent reasons for application failure in this case would be system file handling trouble, application compatibility, and/or OS limitation/feature changes.
Solution: The best way to go about resolving an issue with a specific application not working in El Capitan is to first visit the vendor’s website to verify compatibility. Many vendors have taken the time between beta and public releases to test and properly vet their apps for compatability with the latest version of OS X. Updating applications to their latest versions will typically resolve any outstanding trouble.
5. Setup user account login prompt
Symptoms: After the final reboot of the upgrade process, the user is brought to the logon screen with an account listed as “Setup user” and prompted for a password to authenticate. Regardless of the password entered, the password box shakes “no,” and the user is not able to login.
Causes: This is a mysterious occurrence that has been happening very infrequently. While no clear explanation exists as to why it affects so few or the seemingly random nature of the occurrence, it does appear to be some sort of configuration pass that does not fully complete.
Solution: Reboot your Mac or, better yet, shut it down. Power on your Mac and, after going through the boot process (progress bar), it should load the login with your correct user account listed.
This is not an exhaustive list of the issues affecting Apple OS X El Capitan, but it is a good collection of the more well known issues and their respective fixes.
Thankfully, little has been reported regarding system-level issues affecting the usability of the latest OS. Much of it stems from incompatibility issues between outdated apps and the way in which OS X 10.11 handles systems calls and functions. However, if you’re finding an excessive number of issues plaguing your El Capitan upgrade, it may be a good idea to backup your data and perform a clean install of El Capitan from scratch. This would definitely maximize your chances at achieving a stable environment by starting with a good, clean foundation for your apps.
After a period of testing that has seen five pre-release seeds issued to registered developers and those enrolled on Apple’s public Beta Software program, OS X El Capitan 10.11.6 has now been released in a final public capacity.
This year’s Worldwide Developers Conference (WWDC 2016) keynote may have revealed the future of OS X, or macOS as it will be known from here on in, but that doesn’t mean that existing versions of Apple’s desktop OS will stop being supported. Today’s OS X El Capitan 10.11.6 release comes after approximately eight weeks of testing.
And while macOS Sierra 10.12 will hit the public domain this coming fall, and of course, is already in testing with developers and public testers who are currently putting beta 3 of Sierra through its paces, the general Mac-owning public can now download and interact with the sixth major update to OS X El Capitan, which will ultimately set the scene and pave the way for macOS Sierra to make its grand entrance in September.
Like a number of the point updates that have come before it, OS X El Capitan 10.11.6 isn’t a release that will bring a plethora of user-facing changes or features additions into existence. OS X 10.11.6 is instead focuses on security and performance enhancements under-the-hood.
And of course, as we’ve found out in the past, concentrating on user-experience and stability isn’t always a bad thing as it provides a more pleasurable environment to work in, and more often than not, also includes a number of critical bug fixes and security patches.
Full official changelog of OS X 10.11.6 is as follows:
The OS X El Capitan v10.11.6 Update improves the stability, compatibility, and security of your Mac, and is recommended for all users.
This update:
-Resolves an issue that may prevent settings from being saved in accounts with parental controls enabled.
-Resolves an issue that prevented some network devices, such as speakers and multifunction printers, from accessing SMB share points.
Enterprise content:
-Improves startup time when connecting to a NetBoot server.
-Resolves an issue that may prevent startup from a NetBoot image created with an OS X v10.11.4 or OS X v10.11.5 installer.
-Resolves an issue that may cause Active Directory authentication to take longer than expected.
The final public version of OS X El Capitan 10.11.6 is live and available to download for all compatible MacBooks and iMacs right now. The upgrade itself should be showing up via the software update mechanism on the Mac App Store, and can be downloaded and installed as an over-the-air update on any compatible Mac.
You may also like to check out:
You can follow us on Twitter, add us to your circle on Google+ or like our Facebook page to keep yourself updated on all the latest from Microsoft, Google, Apple and the Web.
- Forums
- Macs
- macOS
- Older OS X Versions
- OS X El Capitan (10.11)
Notafanboyyet
macrumors member
- Feb 15, 2016
fisherking
macrumors G3
- Feb 15, 2016
realistically. just as you adapted to mavericks, you’ll adapt to el capitan. and whatever comes next. we move forward, things change. you either go with it, or hold back.
just seems futile to make a newer OS look like an older OS. at least, try 10.11, live with it a while. you may wake up one morning realizing it’s perfectly fine.
just my thoughts of course.
Ulenspiegel
macrumors 68040
- Feb 15, 2016
Riwam
macrumors 65816
- Feb 16, 2016
*******
Although fisherking says true things, regarding taste there is no absolute truth valid for everybody.
I share your taste, but honestly are simply afraid of using the 2 tools mentioned by ulenspiegel because the changes involved might be quite deep inside the system.
Probably it would be wise to do it in a clone of your system.
Upgrade the clone and perform the changes of cdock and classic folders on the clone.
If everything works for a while OK, then use it on your main system.
I have learned in the hard way how useful clones are regarding any experiment, allowing to restore easely to a previous working condition if the change causes problems.
One can never be too cautious with computer systems.
Ed
MacGizmo
macrumors 68020
- Feb 16, 2016
b0fh666
macrumors 6502a
- Feb 16, 2016
jbarley
macrumors 601
- Feb 16, 2016
KALLT
macrumors 603
- Feb 16, 2016
In addition to cDock and and folders, you can also swap the Dock icons and change the system typeface. There used to be a program called Flavours that allowed you do change the overall theme (windows, menubar), but El Capitan will not be supported (I don’t know whether it works with SIP turned off). Ultimately though, this will just not be the same. I have never been satisfied with such visual tweaks.
Perhaps in reverse: what are you looking forward to in El Capitan? Perhaps you can use some tweaks to incorporate those features into Mavericks? As for stability, or whatever that means, El Capitan has its fair share of problems. Is there a particular issue you are having problems with?
[email protected]
macrumors newbie
- Feb 16, 2016
I have used original icons from Mavericks for this. It is a bit of work, but I like it
BradHatter
macrumors regular
- Feb 16, 2016
I used cDock to change the dock and then I copied the folder icons from my Mavericks partition (which I’m on now) to the El Capitan partition. I had to do this with rootless disabled. I absolutely cannot stand those butt-ugly, obnoxious turquoise folder icons that come with El Capitan and Yosemite. I then modified the contrast.
What I’ve ended up with is tolerable, but not likable. I remember someone on the App Store posted a comment calling the appearance of Yosemite “Kindergarten looks” and I couldn’t agree more. El Capitan is better looking than Yosemite because of font changes and re-introduction of some very subtle 3-D effects, but it still suffers from the “Kindergarten looks” as far as I’m concerned. I also think the excessive translucency is idiotic.
If I were you I’d split my partition and use Mavericks or earlier for most work and go to El Capitan or Yosemite when you need the newer features.
I am trying to install the Public Beta version of El Capitan and after about 10-15 mins of trying to install, a message pops up that says “no packages were eligible for install” and the installation fails. Here’s what I’ve tried so far:
Rebooting with CMD + R:
- I do not have a Time Machine backup.
- Disk Utility: I have my internal Mac HD listed, “Apple disk image” with “OS X Base System”, and then about 10 or so “untitled” disk images. I ran First Aid and everything checks out.
- Reinstall OS X: my only option here is to proceed with the installation of El Capitan. When I try from this screen a message pops up saying it needs to verify my computer’s eligibility. When I click Continue an error occurs: “An error occurred while preparing the installation. Try running this application again.”
I’m on a mid (or late) 2009 MacBook Pro 15″. I don’t think Internet Recovery is available in my model—CMD + ALT + R brings up the same OS X Disk Utilities app that CMD + R brings up.
Here’s what I’m thinking:
- Is there a correlation between the “no packages were eligible for install” error and the error that occurs when it’s trying to verify my computer’s eligibility? If so, is this something on Apple’s end that could be fixed?
- If the above is a ‘no’ and there’s no way to move forward with the El Capitan install.
- Could I insert an OS install disk that comes with Macs and install that OS and still keep all of my files? (Or will this be a clean install?)
- If not, is there a way to revert back to Yosemite while still keeping my files?
- If not, is there a way to backup my files to an external HD from Terminal, then do a clean install of an OS?
Apple is putting the finishing touches on the OS
Apple on Monday seeded the sixth beta of OS X 10.10 to select testers from a pool of regular users, while tomorrow we can expect the final bits to be released to everyone else as part of the company’s planned event in Cupertino, California.
Scheduled to make its debut this fall, Yosemite is the eleventh major release of Apple’s Mac operating system delivering an all-new flat look with improved typography, iconography, and integration with other devices in the Apple ecosystem.
Sixth public beta
The Cupertino company used to employ the AppleSeed program to select individuals from the Mac customer base and hand them beta builds of an upcoming version of OS X for ironing out bugs, as well as to receive feedback on potential usability issues.
The initiative started a few years ago and continued with OS X Yosemite. However, with Yosemite Apple decided to not discriminate and allow a million random users join the testing initiative. People basically just had to hurry up and download the software. There were no specific requirements to be a tester, aside from the system specs.
Testers are now receiving the sixth beta which they can effortlessly download through the Mac App Store. Registered developers are working with a nearly-identical Yosemite build that differs by a few increments (when comparing build numbers).
Not too late to join
Apparently there is still time to hop on the Yosemite Beta Seed Program and download your own beta copy of OS X 10.10.
“The OS X Beta Seed Program gives users the opportunity to run pre-release software. Test-drive beta software and provide quality and usability feedback that will help make OS X even better,” according to Apple.
“Join the OS X Beta Seed Program and accept the Beta Seed and Confidentiality Agreement. Apple will provide a Beta Access Utility for your Mac, which gives you access to pre-release versions of OS X in the Mac App Store Updates panel,” says the Mac maker.
While the text could simply be out of date, there’s a good chance there still are a few spots left. To verify, visit Apple at this address:
Admittedly, it’s kind of pointless to download a beta of Yosemite with the final build waiting to launch tomorrow (most likely), but if your hands are itching to get an early start, by all means go ahead and install the beta. Just make sure you back up your old system first. Beta software is what it is.
tonymacx86
Administrator
- Jul 1, 2021
Here’s a quick guide to create a macOS 12 Monterey Public Beta Installation USB. Please note, this guide is not universal, and may not work for all systems.
STEP 1: Download macOS Monterey Public Beta
1. Enroll in the Free Apple Beta Software Program
2. Download Public Beta Access Utility
3. Run installer. System Preferences / Software Update will then open.
4. Choose Upgrade Now to download the 12 GB installation Application.
The Application Install macOS Monterey Beta will appear in /Applications.
STEP 2: Prepare Bootable USB Drive
This step extracts the Installer contents, then installs Clover bootloader to the USB stick.
1. Insert the USB drive
2. Open /Applications/Utilities/Disk Utility
3. Highlight the USB drive in left column
4. Click on the Partition tab
5. Click Current and choose 1 Partition
6. Click Options.
7. Choose GUID Partition Table
8. Under Name: type USB (You can rename it later)
9. Under Format: choose Mac OS Extended (Journaled)
10. Click Apply then Partition
11. Open /Applications/Utilities/Terminal
12. Type the following, enter password and hit enter. This command completely erases the USB, then creates native installer media from the Install macOS Beta Application.
macOS Monterey Release:
If your Mac isn’t compatible with the latest macOS, you might be able to upgrade to an earlier macOS, such as macOS Big Sur, Catalina, Mojave, or High Sierra.
To get the latest features and maintain the security, stability, compatibility, and performance of your Mac, it’s important to keep your software up to date. Apple recommends that you always use the latest macOS that is compatible with your Mac.
Check compatibility
The version of macOS that came with your Mac is the earliest version it can use. For example, if your Mac came with macOS Big Sur, it can’t use macOS Catalina or earlier. If a macOS isn’t compatible with your device, the App Store or installer will let you know. If you try to install a macOS that is older than the version currently installed, the installer will say that it is too old to be opened on this version of macOS.
- macOS Big Sur 11 hardware requirements
- macOS Catalina 10.15 hardware requirements
- macOS Mojave 10.14 hardware requirements
- macOS High Sierra 10.13 hardware requirements
- macOS Sierra 10.12 hardware requirements
- OS X El Capitan 10.11 hardware requirements
- OS X Yosemite 10.10 hardware requirements
Make a backup
Before installing any upgrade, it’s a good idea to back up your Mac. Time Machine makes it simple, and other backup methods are also available.
Use Safari to download macOS on your Mac
Safari uses these links to find the old installers in the App Store. After you download the installer from the App Store, the installer opens automatically.
- macOS Big Sur can upgrade Catalina, Mojave, High Sierra, Sierra, El Capitan, Yosemite, Mavericks
- macOS Catalina can upgrade Mojave, High Sierra, Sierra, El Capitan, Yosemite, Mavericks
- macOS Mojave can upgrade High Sierra, Sierra, El Capitan, Yosemite, Mavericks, Mountain Lion
- macOS High Sierra can upgrade Sierra, El Capitan, Yosemite, Mavericks, Mountain Lion
Safari downloads the following older installers as a disk image named InstallOS.dmg or InstallMacOSX.dmg. Open the disk image, then open the .pkg installer inside the disk image. It installs an app named Install [ Version Name ]. Open that app from your Applications folder to begin installing the operating system.
- macOS Sierra can upgrade El Capitan, Yosemite, Mavericks, Mountain Lion, or Lion
- OS X El Capitan can upgrade Yosemite, Mavericks, Mountain Lion, Lion, or Snow Leopard
- OS X Yosemite can upgrade Mavericks, Mountain Lion, Lion, or Snow Leopard
You can use an external drive or secondary volume as a startup disk from which to install the Mac operating system.
These advanced steps are primarily for system administrators and others who are familiar with the command line. You don’t need a bootable installer to upgrade macOS or reinstall macOS, but it can be useful when you want to install on multiple computers without downloading the installer each time.
What you need to create a bootable installer
- A USB flash drive or other secondary volume formatted as Mac OS Extended, with at least 14GB of available storage
- A downloaded installer for macOS Monterey, Big Sur, Catalina, Mojave, High Sierra, or El Capitan
Download macOS
The installer for macOS Monterey, macOS Big Sur, macOS Catalina, macOS Mojave, or macOS High Sierra downloads to your Applications folder as an app named Install macOS [ version name ]. If the installer opens after downloading, quit it without continuing installation. To get the correct installer:
- Download on a Mac that is compatible with that version of macOS.
- Download on a Mac that is using macOS Sierra 10.12.5 or later, or OS X El Capitan 10.11.6.
- Enterprise administrators: Download from Apple, not a locally hosted software-update server.
The installer for OS X El Capitan downloads to your Downloads folder as a disk image named InstallMacOSX.dmg. To get the installer:
- Download using Safari, and open the disk image on a Mac that is compatible with OS X El Capitan.
- Inside the disk image is an installer named InstallMacOSX.pkg. It installs an app named Install OS X El Capitan into your Applications folder. You will create the bootable installer from this app, not from the disk image or .pkg installer.
Use the ‘createinstallmedia’ command in Terminal
- Connect the USB flash drive or other volume that you’re using for the bootable installer.
- Open Terminal, which is in the Utilities folder of your Applications folder.
- Type or paste one of the following commands in Terminal. These assume that the installer is in your Applications folder, and MyVolume is the name of the USB flash drive or other volume you’re using. If it has a different name, replace MyVolume in these commands with the name of your volume.
Monterey:*
Big Sur:*
Catalina:*
Mojave:*
High Sierra:*
El Capitan:
* If your Mac is using macOS Sierra or earlier, include the –applicationpath argument and installer path, similar to the way this is done in the command for El Capitan.
After typing the command:
- Press Return to enter the command.
- When prompted, type your administrator password and press Return again. Terminal doesn’t show any characters as you type your password.
- When prompted, type Y to confirm that you want to erase the volume, then press Return. Terminal shows the progress as the volume is erased.
- After the volume is erased, you may see an alert that Terminal would like to access files on a removable volume. Click OK to allow the copy to proceed.
- When Terminal says that it’s done, the volume will have the same name as the installer you downloaded, such as Install macOS Monterey. You can now quit Terminal and eject the volume.
Apple
- Free
Screenshots
Description
MacOS Mojave delivers new features inspired by its most powerful users, but designed for everyone. Stay focused on your work using Dark Mode. Organize your desktop using Stacks. Experience four new built-in apps. And discover new apps in the reimagined Mac App Store.
Dark Mode
• Experience a dramatic new look for your Mac that puts your content front and center while controls recede into the background.
• Enjoy new app designs that are easier on your eyes in dark environments.
Desktop
• View an ever-changing desktop picture with Dynamic Desktop.
• Automatically organize your desktop files by kind, date, or tag using Stacks.
• Capture stills and video of your screen using the new Screenshot utility.
Finder
• Find your files visually using large previews in Gallery View.
• See full metadata for all file types in the Preview pane.
• Rotate an image, create a PDF, and more — right in the Finder using Quick Actions.
• Mark up and sign PDFs, crop images, and trim audio and video files using Quick Look.
Continuity Camera
• Photograph an object or scan a document nearby using your iPhone, and it automatically appears on your Mac.
Mac App Store
• Browse handpicked apps in the new Discover, Create, Work, and Play tabs.
• Discover the perfect app and make the most of those you have with stories, curated collections, and videos.
iTunes
• Search with lyrics to find a song using a few of the words you remember.
• Start a personalized station of any artist’s music from the enhanced artist pages.
• Enjoy the new Friends Mix, a playlist of songs your friends are listening to.
Safari
• Block Share and Like buttons, comment widgets, and embedded content from tracking you without your permission with enhanced Intelligent Tracking Prevention.
• Prevent websites from tracking your Mac using a simplified system profile that makes you more anonymous online.
Apple News
• Read Top Stories selected by Apple News editors, trending stories popular with readers, and a customized feed created just for you.
• Keep your favorite topics, channels, and saved stories up to date on your Mac and iOS devices.
Stocks
• Create a customized watchlist and view interactive charts that sync across your Mac and iOS devices.
• Browse business news driving the markets curated by Apple News editors.
Voice Memos
• Make audio recordings, listen to them as you work with other apps, or use them in a podcast, song, or video.
• Access audio clips from your iPhone on your Mac using iCloud.
Home
• Organize and control all of your HomeKit accessories from your desktop.
• Receive real-time notifications from your home devices while you work.
- Forums
- Macs
- macOS
- macOS
PaulFXH
macrumors member
- Oct 22, 2007
PaulFXH
macrumors member
- Oct 22, 2007
Marsil
macrumors member
- Apr 28, 2010
I just found your link and had same problem
homunq
macrumors newbie
- Sep 12, 2011
This is an insanely bad interface, and a useful answer, so here are some search terms to help people find this post. Journaling enabled, journaling on, turn off journaling, osx lion.
FurryToes
macrumors newbie
- Dec 3, 2011
Caramac
macrumors newbie
- Dec 28, 2011
I found this great guide to formatting a drive – even external backup.
(2011)
Should be able to simply select the Volume, then [command J] will toggle journaling.
Maybe the OP had the entire drive selected instead of the volume.
gskiskiski
macrumors newbie
- Jun 9, 2012
I found this great guide to formatting a drive – even external backup.
(2011)
Should be able to simply select the Volume, then [command J] will toggle journaling.
Maybe the OP had the entire drive selected instead of the volume.
This was ultimately the info I needed. thanks everyone for chiming in on this. Mac to Linux (writable) is often difficult to deal with, and you all nailed this one on the head for me.
estutmirleid
macrumors newbie
- Dec 12, 2012
I found this great guide to formatting a drive – even external backup.
(2011)
Should be able to simply select the Volume, then [command J] will toggle journaling.
Maybe the OP had the entire drive selected instead of the volume.
Testing shows that this information may no longer be valid in Mountain Lion, so I thought I’d post a working solution. I’m afraid it involves the Terminal and Disk Utility together, and requires Administrator privileges.
1) Launch Disk Utility, select the partition in the sidebar from which you wish to remove Journaling.
2) Get Info on this partition (File > Get Info or Command-i)
3) Note the Disk Identifier value, of the type diskXsY, where X and Y are numbers
4) Now, unmount this partition by clicking the Unmount button in the toolbar
5) Launch Terminal, and type the following:
sudo diskutil disableJournal force diskXsY
Replace diskXsY with the value you obtained in (3), then hit Enter.
6) Authenticate with the login password of the Admin user you’re using – NB: nothing will appear as you type the password: this is normal.
7) You may receive the following error message:
“An error occurred journaling the file system: The underlying task reported failure on exit (-69860)” – ignore it.
8) Safely eject the whole disk containing the partition you just disabled journaling on, and then re-attach it and mount the partition you just modified.
Journaling should now be permanently disabled on the partition in question. You can verify this by typing mount in the Terminal and hitting Enter, or by Getting Info in Disk Utility (as in (2) above).
Our apologies for the lyrical headline, but after fighting OS X’s Spaces feature for a few months, we couldn’t resist a bit of humor…
Excellent news, multi-display Witch users: we believe we have worked around the most-annoying Witch issue in OS X 10.9.5 and Yosemite (OS X 10.10): The inability to activate a window on another display when switching via Witch. The window would pop to the front, but not activate.
Apple changed something in OS X 10.9.5, and left it changed in OS X 10.10…and whatever it was they changed, it broke Witch’s ability to properly switch windows across displays. You’d only see this problem if you had “Displays have separate Spaces” enabled in System Preferences > Mission Control. But as this is the default setting, most users were experiencing the problem.
If you’d like to help us confirm the fix, read on for the instructions.
We can’t make a beta of the App Store version of Witch, so the testing must be done with the direct sales version. The direct version is a System Preferences panel; App Store users should be able to download and use it as licensed users, assuming they’ve run the App Store version at least once (per this tip).
So if you’d like to test, here’s what to do:
- Disable Witch. App Store users, launch the Witch application an uncheck the “Enable Witch” box, then quit the app. Direct users, open System Preferences > Witch, uncheck Enable Witch, then quit System Preferences.
- Download Witch 3.9.5 beta and mount the disk image.
- Double-click on the Witch.prefpane icon, as seen at right, on the disk image. This will open System Preferences and either install Witch (if you were running the App Store version) or pop up a cancel/replace dialog (if you were already running the direct version of Witch). If you get the dialog, choose Replace to install the new beta.
- It should be already done, but make sure “Enable Witch” is checked, and you should be good to go.
Now go ahead and try switching between windows on multiple displays, and things should pretty much just work. You’ll notice one visual oddity if you switch to a window of an app that has windows open on more than one display: we have to first bring up the window on the current display before switching to the proper window on the other display. This was the only way we could make this work at all; we felt the trade-off was worth it, given the alternative of no functionality.
So please, put this beta version of Witch to the test, and let us know if it resolves your switching issues. Once we’ve had people testing it for a bit, we’ll roll the changes into a minor update for both App Store and direct buyers.
This entry was posted on Sunday, November 16th, 2014 at 6:40 am by Rob Griffiths, and is filed under Products, Witch. You can follow any responses to this entry through the RSS 2.0 feed. Both comments and pings are currently closed.
15 Responses to “Witch switching glitch ditched—help us test the fix!”
I had been eagerly awaiting this fix for a little over a month now, but unfortunately, this seems to have changed nothing for me. I installed the 3.9.5 beta version as per the instructions above, but switching between applications on multiple spaces still does not work. Interestingly, when I logged out and logged back in with each display set to have its own space, the switching worked a few times (for a few seconds), but then stopped working and never worked again.
Can you confirm that 3.9.5 is actually running? Do this by calling up the Witch switcher panel, then press the comma key to open Witch’s settings. Go to the About tab, and the top row should indicate the version and build. Is it 3.9.5?
Okay. Thanks for this suggestion. I can see that actually Version 3.9.4 is still running. However, I have tried 3 times to follow the instructions above and read the Read_Me.html to no avail. Steps 1 – 3 above happen exactly as specified. I choose “Replace” and then I launch Witch. Then I select “Enable”. However, if I go to “About Witch” I see “Version 3.9.4 (3197)”. Is there a way to do a clean uninstall / reinstall or something?
I’m guessing the App Store version is still in your Applications folder, and perhaps it’s set to run at login. Remove it from the login items list, zip the app (for now), then logout/login (to clear everything out).
Then check the System Preferences > Witch panel, make sure it’s enabled, and see what happens.
I removed Witch from my login items list, and attempted to zip the app (I think it is zipped but it still appears the same (same icon same name) in the applications folder, and ls in command line still shows it as /Applications/). Then I repeated the instructions once again, without success. Then I realized that I was opening Witch by using finder instead of going through System Preferences. The problem seems to be there — evidently Finder opens version 3.9.4, but going through System Preferences > Witch opens version 3.9.5.
Now with the new version running, I can confirm it bug appears fixed. Thank you for that.
I have experience with Linux/Ubuntu and Windows, and I have to say that upgrading an app, even to a beta version, should not be this hard. (I have never had a problem with sudo apt-get install.) Frankly it is absurd enough that a third party app like Witch is even necessary for such functionality. I appreciate the work you at Many Tricks are up to trying to make OS X usable, but I have to say that if I weren’t required to use an apple computer at my work I would abandon their ridiculous bulls**t in a heartbeat.
Best,
Ed Coakley
It’s not generally this hard to install a beta version of an app. However, the App Store will not let developers distribute System Preference panels, so we had to wrap Witch in an app wrapper.
And yes, if you launch from Finder, you’re launching the application—System Preferences panels aren’t launched, they’re typically always running (probably one reason Apple doesn’t like them in the store).
The mere act of installing the Witch pref pane puts it into an active mode; when you launched the Finder Witch, you were overriding that.
So the only time this is complex is this example: the App Store version is an app, and the direct version is a System Preferences panel. (It’s also the only app of ours that’s like this.)
Fixed for me! Thanks!
I’m running Witch 3.9.4 (3197/3251) (no beta, no MAS). For me this error doesn’t seem to show up, so there’s no need for a fix at least for my Mac.
Then again… I might understood the bug incorrectly. Would you mind confirming that there “should be” a bug in this screencast demo I made:
I switched between two Google Chrome windows and the where activated without a problem. Naturally it would be a step backwards for me if suddenly Witch first brings up the window on the current display before switching to the proper window on the other display.
What you demonstrated in the video should work fine in 3.9.4 (and 3.9.5). What won’t work in 3.9.4 is this:
* Keep those two Chrome windows open.
* Go to some other app on one of the two displays.
* Invoke Witch, and try to open the Chrome window on the other display.
I don’t know how to update Nvidia graphic card drivers on MacBook Pro Retina.
I have been a Windows user and a gamer for a long time where we expect frequent driver updates.
My expectations revolve around whether Nvidia releases graphic driver updates for Mac and how to check for pending updates.
Where can I see the versions of drivers on OS X?
5 Answers 5
Apple makes its own drivers & they are included in the OS updates.
The way to be up to date on drivers is to always be running the latest OS.
There is debate over whether Apple make the entire driver set themselves, or just take NVidia/AMD’s core code & add their own hardware/OS-specific code to it. The latter seems more plausible to me, but either is just speculation.
The end result, though, is that there are rarely issues with Apple graphics drivers & regular software or games; again speculation, but for games I imagine they write to a pre-defined rule-set, rather than try to constantly be pushing the boundaries.
As noted elsewhere, NVidia themselves make OS X drivers for Quadro cards but these are aftermarket cards anyway, not supplied in any Mac build option available directly from Apple.
Apple provides core drivers, currently up to OpenGL 4.1 or 3.3 – depending on your card, of course – plus legacy drivers for OGL 2.1 compatibility. Which one you get to use in any particular game etc is up to the writers of that game.
Traditionally, if your card has full OpenGL support for the first monitor, it will also have it on the second, unlike many PC cards with ‘clipped’ performance on the 2nd monitor.
After comments & other answers here…
NVidia do have their own release for certain Mac GPUs – this is the current driver as of December 2015
However, they are predominantly for the Quadro series of aftermarket cards rather than default cards supplied by Apple.
There is also support for some cards which have been legacied by Apple – namely the GeForce 680, 285, 120 & 8800
There is mention of beta support for some recent mobile cards, presumably as Apple are dropping legacy support on these in favour of AMD in the current lineup.
To hazard an educated guess, I would say that driver updates are most likely rolled into Mac OS X version upgrades and point updates. If you’re concerned about the updates available for your particular card, (especially if it is not original to the Mac you’re using,) it behooves you to visit the manufacturer’s respective web sites to check. You mentioned NVIDIA: here’s the link to the drivers available for download. Looks like plenty of options for many operating systems. (Mac OS X NVIDIA drivers are only available for Quadro-series boards, tho’.)
Besides the drivers that Apple bundles with OS X updates, Nvidia also provides their own driver updates for their GeForce cards — yes, even the “mobile” cards that Apple puts in Macs. As far as I know, this is not true of AMD and Intel. In the case of your Retina MacBook Pro with an Nvidia card, there’s beta support with Nvidia’s latest drivers.
Nvidia’s graphics drivers for OS X can be downloaded straight from their website, and as such they’re sometimes called Nvidia Web Drivers. They’re somewhat hard to find if you just go through Nvidia’s driver search feature, but they’re an easy find if you just Google “Nvidia driver OS X” + your OS X version (e.g. 10.11.2).
For example, here is Nvidia’s current (as of December 2015) driver for OS X El Capitan 10.11.2. As it says in the release notes, support for some newer models of iMacs and MacBook Pros with GeForce cards is in beta.
Note that I don’t recommend installing Nvidia’s drivers (especially beta ones) unless you know what you’re doing, and you have a good reason to switch from the default (Apple-provided) ones that come with OS X. The default drivers are probably more thoroughly tested and stable, less likely to break your Mac, and are supported officially by Apple. If you do install the Nvidia driver, though, you’ll always have the option to switch back to the default driver or even uninstall the Nvidia driver via System Preferences. You’ll also be able to update the driver from there.
A good reason to try out Nvidia’s driver might be if you use your Mac for gaming, or you run any other apps that use OpenGL. On my MacBook Pro with OS X 10.11.2 and an Nvidia GT 650m card, Cinebench’s OpenGL test gives a very slight edge to Nvidia’s drivers (
Share this story
- Share this on Facebook
- Share this on Twitter
Share All sharing options for: Apple’s letting anyone help test its next OS X update
Apple is suddenly taking a much more open approach to testing its desktop operating system. For the first time in years, the company is inviting regular consumers to help test upcoming OS X software updates before they’re distributed publicly. Apple says the OS X Beta Seed Program will allow anyone to “test-drive beta software and provide quality and usability feedback that will help make OS X even better.” In recent years, Apple has offered beta tests for individual apps like FaceTime and Safari, but it hasn’t offered a public OS X beta program since way back in 2000 — and even then it charged users $29.95 to take part. This time it’s free and open to everyone, so long as you’re 18 or older and have an Apple ID.
To enroll, you’ll need to sign a fairly serious confidentiality agreement that forbids you from spilling details on new features early. “Don’t blog, post screen shots, tweet or publicly post information about the pre-release Apple software, and don’t discuss the pre-release Apple software with or demonstrate it to others who are not in the OS X Beta Seed Program,” warns Apple.
From there, it’s as simple as downloading a small tool that will tell the Mac App Store that your Mac is eligible to receive the pre-release software. A new utility called “Feedback Assistant” is also included, which is where you’ll put your thoughts on features being tested or any bugs you come across. Apple also encourages all users to make a backup before downloading beta updates just in case things take a bad turn.
The big question is whether Beta Seed Program participants will gain early access to the next full-fledged revision of OS X, which will likely debut at this summer’s WWDC conference. It sounds like they may, but Apple hasn’t confirmed directly (and likely won’t for software that hasn’t yet been announced). So it remains to be seen how far Apple will open the doors with the new beta program, but it’s good to see the company taking a big step beginning today.
Tyler Holman Neowin @@tyler_holman · May 15, 2012 02:13 EDT · Hot! with 21 comments
Remember Kaspersky accusing Apple of being 10 years behind Microsoft when it comes to security? Well, they’ve decided to do something about it: according to Computing.co.uk, Kaspersky is working with Apple (at Apple’s request!) to make OS X a more secure OS.
Kaspersky CTO Nikolai Grebennikov told Computing that they’ve been painstakingly analyzing OS X for security flaws. “Mac OS is really vulnerable, and Apple recently invited us to improve its security. We’ve begun an analysis of its vulnerabilities, and the malware targeting it.”
Even though they’re actively working with Apple now – no doubt for a hefty sum -, the folks at Kaspersky still have some harsh words for whoever is in charge of Apple’s security. “Our first investigations show Apple doesn’t pay enough attention to security. For example, Oracle closed a vulnerability in Java, which was a target for a major botnet several months ago.”
The fact is that any OS, no matter who makes it, and no matter how seriously they take security, is vulnerable in one way or another. A lot of Apple’s apparent malware resistance has as much to do with their obscurity as with their efforts at building a secure OS, and that obscurity is rapidly fading now that the word’s out. And yes, the same can be said of Linux, too.
Computing also points out that Kaspersky has finally fulfilled their longtime dream of working with Apple; last year, Grebennikov told them that he was considered about the security of iOS, and Apple’s ability to keep it locked down on their own. He also said that he expected to see malware targetting Apple’s mobile devices within about a year. Of course, that was a year ago.
Update 5/15/12: Grebennikov has clarified his statements with Computing, stating that Kaspersky was analyzing OS X independently, but that Apple has been receptive to working with them to patch whatever holes they find in OS X.


