Microsoft’s new Windows Terminal is finally stable. Windows finally has a more modern terminal environment including features like tabs, split panes, multiple session types, and settings that let you configure everything from keyboard shortcuts to animated GIF backgrounds.
Finally, a More Modern Terminal For Windows
At Build 2020 on May 19, 2020, Microsoft announced that the new Windows Terminal was stable and “ready for enterprise use.” Windows Terminal version 1.0 is here. It was originally announced at Build 2019, and Microsoft even prepared a flashy video to sell how awesome it is.
The new Windows Terminal is packed with useful features. Features aside, the core of the console environment has been modernized. Windows 10 has a built-in terminal environment that’s all about backward compatibility, so these changes couldn’t happen to Windows 10’s built-in console environment.
With the new Windows Terminal, Microsoft was able to make changes like a more modern text layout and rendering engine with GPU acceleration and support for Unicode text—you can even use emoji in the Terminal. Copy and Paste “just work” when you press Ctrl+C and Ctrl+V. There’s even a new font, named Cascadia Code.
You can download the Windows Terminal from the Microsoft Store. You can even get the source code on GitHub. Yes, the new Windows Terminal is even open-source.
Tabs, Finally!
Windows finally has a command-line environment with built-in tabs. To open a new tab after launching the Terminal, just click the “+” button on the tab bar or press Ctrl+Shift+T.
You can use familiar keyboard shortcuts to move through the tabs, like Ctrl+Tab to switch to the tab on the right and Ctrl+Shift+Tab to switch to the tab on the left. Ctrl+Shift+W will close the current tab.
You can drag and drop the tabs to reorder them on the tab bar, too.
PowerShell and Linux in the Same Window
By default, the Terminal will open PowerShell tabs. But it supports many types of shell environments. You can now have multiple types of shell environment in the same window.
If you click the arrow to the right of the New Tab button, you’ll see a list of sessions you can open: Windows PowerShell, Command Prompt, Linux distributions like Ubuntu (if you have them installed with the Windows Subsystem for Linux), and Microsoft’s Azure Cloud Shell.
With Windows 10’s built-in SSH client, you can easily start SSH sessions from the Windows Terminal, too.
Split Panes for Multiple Shells at Once
Tabs are great, but what if you want to see multiple shell environments at once? That’s where the Windows Terminal’s Panes feature comes in.
To create a new pane, press Alt+Shift+D. The Terminal will split the current pane into two and give you a second one. Click a pane to select it. You can click a pane and press Alt+Shift+D to keep splitting it.
These panes are linked to tabs, so you can easily have several multi-pane environments in the same Windows Terminal window and switch between them from the tab bar.
Here are some other keyboard shortcuts for working with panes:
- Create a new pane, splitting horizontally: Alt+Shift+- (Alt, Shift, and a minus sign)
- Create a new pane, splitting vertically: Alt+Shift++ (Alt, Shift, and a plus sign)
- Move pane focus: Alt+Left, Alt+Right, Alt+Down, Alt+Up
- Resize the focused pane: Alt+Shift+Left, Alt+Shift+Right, Alt+Shift+Down, Alt+Shift+Up
- Close a pane: Ctrl+Shift+W
These are the default hotkeys, and you can change them if you like.
Better Zooming
That new text-rendering system means smoother, better zooming. To zoom and enlarge or shrink the text in the terminal, hold Ctrl and rotate the mouse wheel.
In Windows 10’s built-in console environment, as seen in the standard PowerShell and Command Prompt windows, this will change the size of the text while also changing the size of the window. In the new Terminal, it changes only the size of the text and leaves the window size alone.
Shiny Background Opacity
The new Windows Terminal offers background opacity, too. Hold Ctrl+Shift and scroll down with the mouse wheel to make the window increasingly translucent. The colors of your desktop background—or whatever is behind the Terminal—will peek through with a Windows “Acrylic” style effect.
This only works when the application is focused—so, when you Alt+Tab away, the Terminal will have a solid background again until you Alt+Tab back.
Practical or not, it’s a feature Linux and Mac users have had for many years. Now, it’s built into the premier Windows terminal application, too.
So Many Settings: Keybindings, Color Schemes, Backgrounds, and More
The Windows Terminal is packed with customization options you can change. To access them, click the down arrow to the right of the New Tab button and select “Settings.”
You’ll see a text-based JSON file full of options. As a developer tool, Windows Terminal currently makes you configure these options by modifying the text file rather than with a graphical interface.
Available options you can change in the Settings.json file include:
- Configurable key bindings: You can bind keyboard shortcuts to actions or change the default keyboard shortcuts.
- Color schemes: Change the color scheme (theme) of the terminal environment. Here’s a list of the included color schemes.
- Profiles: Create different profiles that will appear under the New Tab button. You can customize the command that’s executed when you start the command-line environment and set custom fonts and color schemes for each session.
- Custom backgrounds: You can set a custom background image for a session. For example, you could change your Ubuntu session so that it had a Ubuntu-themed custom background image.
- Animated GIF backgrounds: You can even set an animated GIF as your custom background.
- Default profile selection: Choose the profile you want to launch by default when you launch Windows Terminal or click the New Tab button. For example, you could choose a Linux session instead of PowerShell.
Microsoft has a guide to editing the Windows Terminal JSON settings file as well as a list of all the options you can add to the file. You’ll find many more options we didn’t cover here on that list.
Unlike the standard Command Prompt, PowerShell, and Linux Bash shell environments on Windows 10, the Windows Terminal is finally packed with the options developers want—ones that have been found on other operating systems like Mac and Linux for years.
While using a Mac, sometimes you need to dig deep into settings or perhaps pull off some developer-grade command-line tasks. For that, you’ll need the Terminal app to access the command-line on macOS. Here’s how to launch it.
How to Open Terminal Using Spotlight Search
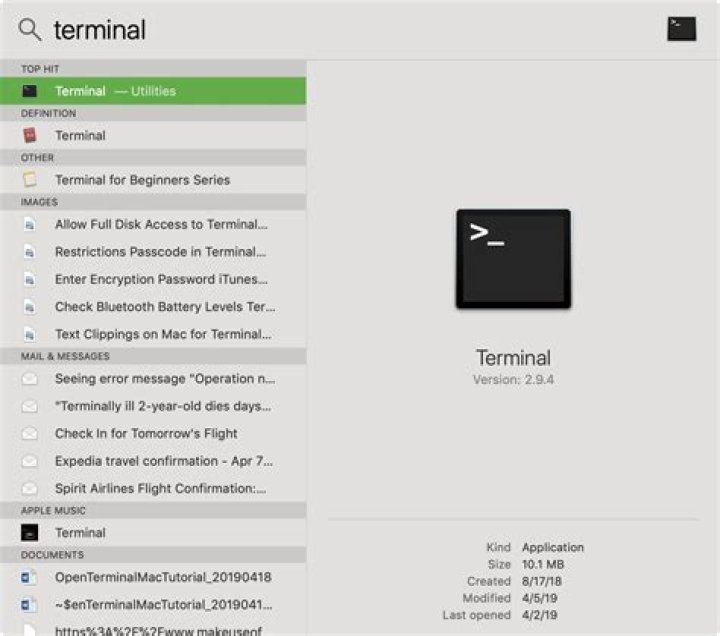
Perhaps the easiest and quickest way to open Terminal is through Spotlight Search. To launch Spotlight, click the small magnifying glass icon in your menu bar (or press Command+Space).
When the Spotlight Search bar pops up on your screen, type “terminal.app” and hit Return. Or you can click the Terminal.app icon that appears.
Terminal will launch, and you’ll be ready to go.
How to Open Terminal from Launchpad
You can also open Terminal quickly from Launchpad. If you have Launchpad in your dock, click the rocket ship icon—or press “F4” on your keyboard to launch it.
When Launchpad opens, type “Terminal” and hit return. Or you can click the “Terminal” icon.
The Terminal app will open.
How to Open Terminal from Your Applications Folder
If you’d prefer to go launch Terminal from the program icon in Finder, you’ll usually find it located in the /Applications/Utilities folder. This is its default location on fresh installations of macOS.
To open Terminal from your Applications folder, click your desktop to bring Finder into focus. In the menu bar, click “Go” and select “Applications.”
Your Applications folder will open. Scroll through until you find the “Utilities” folder. Double-click the “Utilities” folder to open it. Inside, you will find Terminal.
Double-click the Terminal.app icon and the Terminal will open.
Keep the Terminal in Your Dock for Faster Access
After launching Terminal, if you’d like to quickly access it again in the future, you can choose to keep its icon in your Dock. Just right-click the Terminal icon on your Dock and select “Options > Keep in Dock.” The next time you need to run Terminal, just click its Dock icon. Have fun on the command line!
Starting with macOS Catalina, the default command-line shell is Zsh, but you can switch back to the Bash shell if you prefer it.
Каждое окно в Терминале представляет свой экземпляр процесса shell. Окно содержит приглашение, которое означает, что можно вводить команду. Отображаемое приглашение зависит от настроек Терминала и shell, однако обычно оно включает имя хоста, к которому Вы подключены, Вашу текущую рабочую папку, Ваше имя пользователя и символ приглашения. Например, если пользователь с именем michael использует по умолчанию оболочку zsh, приглашение выглядит следующим образом:
В приглашении указано, что пользователь с именем michael вошел в систему на компьютере с именем MacBook-Pro и текущей папкой является его папка пользователя, обозначаемая тильдой (
Открытие Терминала
На компьютере Mac выполните одно из следующих действий.
Нажмите значок Launchpad в панели Dock, введите «Терминал» в поле поиска и нажмите значок Терминала.
В окне Finder откройте папку «Программы/Утилиты» и дважды нажмите программу «Терминал».
Завершение программы «Терминал»
В программе «Терминал» на Mac выберите пункт меню «Терминал» > «Завершить Терминал».
Завершение сеанса shell
В окне приложения «Терминал» на Mac, где запущен процесс shell, который Вы хотите завершить, введите exit и нажмите клавишу Return.
Это обеспечит закрытие всех текущих команд, выполняемых в shell. Если что-то продолжает выполняться, появляется диалоговое окно.
Если Вы хотите изменить поведение при выходе из shell, см. Изменение настроек shell для профилей.
- The Mac Terminal is a command line system that can help you quickly take control of your operating system and make changes.
- Getting to the Terminal app is easy — you can navigate via your Mac’s Finder or through Spotlight.
- You can use it to do things like open an application, open a file (through its default app), or open a file using a specific application or the text editor.
- Visit Business Insider’s homepage for more stories.
If you’re new to the Mac Terminal, think of it as the ultimate command shortcut hub, one that allows you to take control of your operating system in a super quick and efficient way (it’s also something you might use if you’re familiar with UNIX operating systems).
Learning to use the Terminal is kind of like speaking a different language — you’ll have to familiarize yourself with at least the general rules to use it properly.
For example, every character you type matters, even spaces; you navigate through lines using your arrow keys; and you have to press the “return,” or “enter,” button to give a command.
(We’ll run through a few basic commands you might want to use later on.)
But first, you’ll have to open the Terminal. Here’s how:
How to open the Terminal on a Mac
There are two primary avenues you can use to get to the Terminal: the Applications folder in your Finder, or searching in Spotlight. Here’s a quick run-through of both processes.
Opening Terminal through the Finder
1. Click the Finder logo, located in the bottom toolbar of your screen (it looks like a two-toned smiling face).
2. On the left toolbar, click “Applications” (if that was the last folder you visited within the Finder, Finder will open to this folder automatically).
3. Scroll down and open the “Utilities” folder.
4. Double click “Terminal” to launch it.
Opening Terminal through Spotlight
1. Press the “Command” button and the space bar, simultaneously (this will open a search bar on your screen).
2. Type “Terminal” (as you type, it should auto-fill).
3. Double click “Terminal” in the left sidebar to open your Mac’s Terminal
If you plan on using the Terminal a lot, it’s a good idea to pin it to your computer’s bottom toolbar (the “dock”) for easier access. To do that, right-click the Terminal logo in the dock (it should appear there as long as Terminal is open). Then hover over “Options” and select “Keep in Dock.”
A few basic commands you can use on a Mac’s Terminal
Remember: After typing in each command, you’ll have to hit the return button for the command to take hold. Here are a few useful commands to know, and make sure to copy the exact phrasing and spacing below into your commands:
Open an application:
Open -a APPLICATION
Or, if the application has a space in its name:
Open -a “APPLICATION NAME”
Open a file using the default application:
For this, you’ll have to know the command pathway for the file you want to access. To do so, you can either drag the file to the Terminal window to add to the line, or right click the file and select “Copy [NAME]” and then use the Command+V shortcut to paste it into the Terminal. Even though the latter appears to only copy the actual file name, it actually captures the full pathway. In either case, hit the spacebar following the app name and then the command would take hold.
Open [FILE PATHWAY]
Open a file using an application you specify:
Again, you’ll need the file pathway to use this command.
Open -a “APP NAME” [FILE PATHWAY]
Open a text-based file using the text editor:
Note that the file pathway is also fundamental here.
Open -a Text Edit [FILE PATHWAY]
If you need to get to your Terminal’s settings, hold down the command key while tapping the comma button. And, in case you want to stop a command you’ve input, you can do that by tapping the window (if it isn’t already selected) and holding down the “control” key and hitting “c.” Or, if you want to repeat a command, simply use the up arrow key to cycle through previously used commands and, when you see the one you want, press “return.”
Don’t worry if you make a mistake in your command pathways: You’ll just get a message back saying something along the lines of, “No such file or directory exists.”
Last updated on May 3, 2020 By Serhat Kurt Leave a Comment
This article explains how you can open Terminal on your Mac. This article further explains how you can quit Terminal and a shell process.
The Terminal app lets you type and execute text-based commands to control your Mac. It is found within the /Applications/Utilities/ folder.
Open Terminal on Mac
There are a lot of techniques for opening it. You can do one of the following methods.
1. Use Launchpad
- Open Launchpad on your Mac. You can click the Launchpad icon in the Dock. Alternatively, you can pinch your thumb and three fingers together on your trackpad.
- You can use the Search field. Type Terminal in Launchpad and press the Return to open it.
- Or alternatively, find the Other folder and click Terminal.
2.Use Finder
- Open a Finder window. You can click the Finder icon in the Dock.
- Click Applications from the left side sidebar.
- Find the Utilities folder. And open it.
- Double click the Terminal icon.
3. Use Siri
- Launch Siri. You can click the Siri icon in the menu bar. (If not already, turn on Siri first).
- Say say “Open Terminal.” And let Siri open Terminal for you.
- See this if Siri is not working on your Mac.
4. Use Spotlight
- Open Spotlight. You can click the search (magnifying glass) icon in the menu bar. Alternatively, press Command-Space bar.
- Type Terminal in the search field.
- Double click Terminal.
5. Add Terminal to the Dock
If you are using Terminal very often, you may want to do this for easy access:
- Open Terminal using any of the methods above.
- Now you can see its icon in the Dock. (see this article if the Dock is not working)
- Control-click (right-click) the app’s icon.
- Then click Options > Keep in Dock.
6. Use the Recent Items list
If you use Terminal a lot, you can use the Recent Items list to quickly open it. Here is how:
- Click the Apple menu.
- Click Recent Items.
- Click Terminal.
Quit Terminal
Here is how you can properly quit the Terminal app.
- In Terminal, click Terminal.
- Click Quit Terminal.
Or alternatively, you can press the Command-Q keys together.
See this article if you want to know what apps are running on your Mac.
Close a shell session
Sometimes you may want to quit a running shell process. You can use the exit command to exit the shell where it is currently running. Here is how:
- In Terminal, enter the following command:
- Press return.
Some more advanced Mac troubleshooting and diagnostics techniques require a user to access the Terminal from Mac OS Recovery Mode. We’ll show you how to quickly access the command line while a Mac is booted into Recovery Mode.
For some quick background, on a normally booted Mac, the Terminal application is found within the /Applications/Utilities/ folder, and it can be accessed directly through the folder hierarchy or by using Spotlight to search for and launch Terminal app. But Recovery Mode does not have the same applications directory access, nor does it have Spotlight or Launchpad. Nonetheless, accessing Terminal from Recovery boot mode is easy.
Accessing the Command Line in Recovery Mode on a Mac
- Boot into Mac OS Recovery Mode as usual by holding down the Command and R keys during system start
- Choose the language as usual (if applicable)
- At the “MacOS Utilities” screen, pull down the “Utilities” menu from the top of the screen
- Choose “Terminal” to launch Terminal app within Recovery Mode
Terminal app will launch within Recovery Mode, ready for your commands, whether it’s resetting a password, clearing out disk space, disabling or re-enabling SIP in Mac OS, or any of the other myriad functions available via the command line.
Terminal app in recovery mode has fewer commands available to it because it is running off of the recovery partition. Additionally, you will need to manually access other hard drives or disk partitions if that’s what you’re looking to do, though running commands like the disk repair fsck tool and
The terminal is powerful and requires exact syntax to execute commands properly, it’s also unforgiving in that an improperly typed command can have very unintended side effects that are irreversible. That, plus the generally more archaic user interface of text input, make the command line most appropriate for advanced Mac users only. We regularly cover all sorts of Terminal and command line tips, so feel free to browse around and learn a bit more if interested.
Rarely, some Mac users may find that the “Utilities” menu is totally missing from Mac OS recovery mode entirely, which negates the ability to access the Terminal. This is usually due to an issue with the recovery mode partition itself, which may need to be recreated, or due to booting from internet recovery mode rather than normal recover mode.
I am using a Mac for the first time and need to run Terminal as an admin. I have installed NodeJs and Git and want to download Phone Gap/Corova but when I try to install Cordova, it comes back with an error saying I should be an admin when running the terminal. How do I open a command prompt in terminal as an admin to the Mac Pro?
6 Answers 6
This is not Windows, you do not “run the Terminal as admin”. What you do is you run commands in the terminal as admin, typically using sudo :
To switch to root so that all subsequent commands are executed with high privileges instead of using sudo before each command use following command and then provide the password when prompted.
User will change and remain root until you close the terminal. Execute exit commmand which will change the user back to original user without closing terminal.
search for terminal after opening the termincal type
enter and then give the admin password then run your sudo commands e.g:
You can run a command as admin using
You can also switch to root and every command will be run as root
Add sudo to your command line, like:
press enter after every sentence
Change joeadmin to whatever you want, but it has to be the same all the way through. You can also put a password of your choice after password.
The standard way to open any directory within macOS is to open a Finder window and use it to navigate to a specific location on your hard drive. There’s also another way to open folders: use the Terminal. It may not be something you use every day unless you’re a developer, but the power is there if you need to call on it.
As such, this post will show you how to open any folder from the macOS Terminal. We also show you how to create a custom shortcut to carry out this command.
Why You’d Want to Open a Folder From the Mac Terminal
As we noted, the preferred way of opening a folder is by using Finder. This is a Graphical User Interface (GUI), and it’s macOS’s directory navigation de jure. But it’s not the only way to access files or folders within macOS.
We admit, using the Terminal to open folders isn’t a natural way to get around macOS. Though, you’ll find it will come in handy in the following situations:
- If you’re a command line user, it may be something you have in your toolbox.
- Developing for Mac often means working within the Terminal. If this is the case, it may be the path of least resistance to stay inside the Terminal as much as possible.
- If you’re in a rare situation where macOS is acting as server software, you may only be able to use the Terminal to navigate the Operating System (OS).
Given the above, it’s easy to see why you may want to have the knowledge. Next, we show you how to get the job done.
How to Open Any Folder from the Mac Terminal
To begin, you’ll need to open the Terminal. This can be found either through the “Application -> Utilities” folder
or by typing “Terminal” in Spotlight. Once it’s open, you won’t need any dependencies to open any folder from the Mac Terminal. You’ll only need the open command. The general syntax is as follows:
For example, to open the Pictures folder, you’d use the following:
This will open the Pictures folder in a Finder window, which you can then use to access its files.
There are a bunch of other short commands you can use to access specific folders. For example:
- To open the Root directory, use open / .
- For your Home folder (i.e. the folder containing Desktop, Documents, and other folders specific to the user), type open
.
To touch on this last point further, you may be navigating your files using the Terminal and have a need to open the folder you’re in.
While the commands so far open specific folders, you can also launch (and update) applications from the Terminal without using Finder. For example, to open Safari, type open /Applications/Safari.app .
Of course, you’re able to replace Safari with any app on your system as long as you know its file name.
Open a Folder in Terminal from a Shortcut Menu
It may be that you want to reverse the situation and open a Finder directory in the Terminal. In other words, make it the current working directory. You can do this by adding a right-click shortcut.
To do this, head to System “Preferences -> Keyboard.”
Next, navigate to the Shortcuts tab. Here, select the Services menu and scroll down to find “New Terminal at Folder.”
If you select any folder within Finder, open the Services menu from the Toolbar and choose “New Terminal at Folder.”
This is going to be ideal if you often switch between a GUI and the Terminal.
In Summary
The Mac Terminal isn’t something you’ll encounter often. In contrast, a developer or sysadmin might spend most of their time using a Terminal app. Given this, opening a folder is a basic task that can keep you on the command line as long as possible. All you need is the open command and the path to your folder.
If you’re looking for more to do with the Terminal, we’ve looked at searching the Web without a browser, direct from the command line. Will this inspire you to use the Mac Terminal more? Share your thoughts in the comments section below!
Related:
Tom Rankin is a quality content writer for WordPress, tech, and small businesses. When he’s not putting fingers to keyboard, he can be found taking photographs, writing music, playing computer games, and talking in the third-person.
I have the Atom editor and was wondering how you can open a file or folder from the terminal in Atom. I am using a Mac. I am looking for a way to do this:
Is this possible and how do I set it up?
18 Answers 18
When Atom installs it automatically creates a symlink in your /usr/local/bin. However in case it hasn’t, you can create it yourself on your Mac
Now you can use atom folder_name to open a folder and atom file_name to open a file.
With the Atom editor open, in the menu bar:
Click Atom >> Install Shell Commands
You should expect to see:
Potentially restart your terminal. (I did just out of habit, not sure if you need to)
Roll your own with @Clockworks solution, or in Atom, choose the menu option Atom > Install Shell Commands. This creates two symlinks in /usr/local/bin
The atom command lets you do exactly what you’re asking. apm is the command line package manager.
For Windows 7 x64 with default Atom installation add this to your PATH
and restart any running consoles
(if you don’t find Atom there – right-click Atom icon and navigate to Target)
The symlink solution for this stopped working for me in zsh today. I ended up creating an alias in my .zshrc file instead:
alias atom=’sh /Applications/
/.zshrc for edit the file and then put on the final: alias atom=’sh /Applications/ save the file and then: source
/.zshrc for load. – rld Dec 11 ’17 at 18:40
/.zshrc and restart the terminal – Sagar Ranglani Apr 8 ’18 at 8:21
On macOS you can add it to your
alias atom=’open -a “Atom”‘
and from terminal just call
Open the application by name:
For Windows10 and new release of atom i solved the problem by adding in my ENV VARIABLE on the “PATH” row
In addition to @sbedulin (Greeting, lovely Windows users!)
The general path on Windows should be
If you are using a bash emulator like babun. You’d better checkout the shell files, which only available in the real app folders
Iv’e noticed this recently with all new macs here at my office. Atom will be installed via an image for the developers but we found the Atom is never in the Application folder.
When doing a ls on the /usr/local/bin folder the path for atom will show something like “/private/var/folders/cs” . To resolve this, we just located atom.app and copied it into the application folder, then ran the system link commands provided by nwinkler which resoled the issue. Developers can now open atom from the command line with “atom” or open the current projects from their working director with “atom .”
Another simple solution is to add /usr/local/bin to your PATH. I had the same issue, I installed shell commands (see shaheenery’s response) the symlinks already existed and pointing to the correct destination (see thomax’s response), however I would still get ‘not found’. I’m using Korn Shell btw.
Here’s what I did:
/.profile using your choice of editor (in my case $ emacs
/.kshrc )
/.profile
Upgrading Atom appears to break command line functionality on the occasion. Looks like in my case it created two versions of the application instead of overwriting them. Occurs because the new file structure doesn’t match file paths created by “Atom -> Install Shell Commands”. In order fix the issue you’ll need to do the following.
- Move “Atom X” from Documents into Applications (why it ended up in here, I have no idea)
- Rename “Atom X” to “Atom”
- Might need to restart your terminal and Atom
After that everything should work just like it did before. Hopefully this saves someone 30 minutes of poking around.


