If your Windows 10 computer becomes unactivated, there will be many limitations in the system. For example, you will be unable to change wallpaper without activating Windows. For some reason, you can’t activate your Windows 10 immediately. Then, how to change background on Windows 10 without activation? In this post, MiniTool Software will show you two simple approaches.
You can go to Settings to change the background wallpaper in Windows 10 if you have activated the system. However, if your Windows 10 is unactivated, you will receive an error message saying You need to activate Windows before you can personalize your PC. All the options are grayed out on the page. And of course, you find you are unable to change wallpaper without activating Windows.
This is one of the limitations on an unactivated Windows 10 computer. You should not feel surprised.
Do you want to remove Activate Windows 10 watermark from your computer? In this post, we will show you two effective methods to do this job.
We believe that many of you have been bothered or are currently facing this problem: how to change background on windows 10 without activation? It is not a difficult issue. You can use some other available methods to change background on Windows 10 without activation.
In this post, we will show you two methods that can bypass the limitation and change your wallpaper without activating Windows 10.
How to Change Wallpaper without Activating Windows?
- Use File Explorer
- Use Web Browser
Method 1: Use File Explorer
Case 1: Use Windows Wallpaper
The Windows wallpapers are saved in the C drive (Where to Find the Windows 10 Wallpaper Location on Your PC). If you still want to use this wallpaper, you can access that folder and select your needed one to set it as the background.
Here is a guide on how to change background on unactivated Windows 10 using this method:
1. Click This PC on the desktop.
2. Go to C:\Windows\Web\Wallpaper.
3. Open the folder that contains the wallpaper you want to use.
4. Right-click the image you want to set as the background wallpaper and then select Set as desktop background.
After these steps, the background wallpaper will be switched to your selected one.
Case 2: Use Your Downloaded Picture
You can also use your downloaded picture to change the background on unactivated Windows 10. The target picture should fit your computer screen.
Here is a guide:
- Go to the folder that saves the image you want to use.
- Right-click the image you want to use as the wallpaper and then select Set as desktop background.
You can see it is very easy to use this method to change the background on your Windows 10 computer that is not activated.
Method 2: Use Your Web Browser
Some web browsers like Firefox and Internet Explorer support settings your desired image as the wallpaper without downloading them to your computer.
Tip: Both Google Chrome and Microsoft Edge don’t support this feature. If you want to use this method, you need to switch to an available web browser.
Here is a guide on how to change desktop background in Windows 10 without activation using this method:
- Open the web browser.
- Search for the wallpaper on Google or some other website.
- On the search result page, you need to right-click the target image you want to use and then select Set as background. You need to check the size of the image. If it is too small, the effect as wallpaper will not be so good. Here are some widescreen wallpaper websites: The Best 6 Widescreen Wallpaper Websites for You!
Bottom Line
Those are the two methods to change the wallpaper on an unactivated Windows 10 computer. You can just select one method according to your requirement. If you lose some wallpapers by mistake, you can use MiniTool Power Data Recovery, a free file recovery tool, to get them back.
Should have some other related issues, you can let us know in the comment.
About The Author
Stella has been working in MiniTool Software as an English Editor for more than 4 years. Her articles mainly cover the fields of data recovery including storage media data recovery and phone data recovery, YouTube videos download, partition management, and video conversions.
To enjoy a little variety when staring at their screens day-in day-out, many Windows users change their desktop background theme. Read on to find out how to change the background theme in Windows 11 and Windows 10, what individual setting options there are, and how to set up a monochrome desktop.
- How to change a desktop background theme: quick tutorial for Windows 10 and 11
- Options for changing a Windows background theme
- Changing the desktop background: step-by-step tutorial
- Changing the background theme in Windows 11
- Customize Windows 11 desktop: set an image as background theme
- Customize Windows 11 desktop: set solid color as background theme
- Customize Windows 11 desktop: set a slideshow as background theme
- Changing the background theme: how to modify settings
- Customize Windows 10 background: set an image as background theme
- Customize Windows 10 background: set solid color as background theme
- Customize Windows 10 desktop: set a slideshow as background theme
- Changing the background theme in Windows 11
Register great TLDs for less than $1 for the first year.
Why wait? Grab your favorite domain name today!
How to change a desktop background theme: quick tutorial for Windows 10 and 11
In Windows 10 you can adjust the background as follows:
- Launch Settings by clicking on the Start menu or using the key combination [Windows] + [i].
- Change the category to “Personalization”.
- Select “Background” and choose the image, solid color, or slideshow you wish to set as your desktop background.
- Select the desired color, image, or image folder. If you want to use a specific image, click on “Browse” and specify the location of the respective image file.
If you work with Windows 11, you can change the screen background as follows:
- Launch Settings by clicking on the Start menu or using the key combination [Windows] + [i].
- Change the category to “Personalization”.
- Select the entry “Background”.
- Select “Personalize your background” and choose the desired background (“Solid color”, “Image” or “Slideshow”).
- Choose a color, desired background theme or the respective image album for a slideshow. Click on “Browse photos” if you want to use an individual image file.
Prefer for Windows to load fewer applications on system startup? Take a look at the autostart modifications for Windows 11 or Windows 10 to exclude applications you no longer need.
Options for changing a Windows background theme
On Windows devices, you have three options to customize your desktop background:
- Images: Images are the most frequently employed option for desktop background themes. You could select a picture provided by Windows, download high-quality wallpapers, or insert a personal photo.
- Solid color: It doesn’t always have to be a picture. You could change your desktop background to a solid color. Windows provides a selection of colors or you can create your own.
- Slideshow: Don’t want to settle for a single image? You can set up a slideshow with any number of images. Just add them to the same folder for this purpose.
In principle, setting an image or slideshow for your desktop background is a simple process. Windows doesn’t have specific requirements when it comes to format either. Known image formats like JPEG or PNG are supported. However, those who value optimal arrangement of the selected image(s) should ensure the resolution of the image matches the resolution of the display.
You can view your current screen resolution in Windows as follows: “Start” > “Settings” > “System” > “Display”.
The resolution of the image and the screen do not need to match. The appropriate ratio of width and height is a more important consideration and can be adjusted using an image editing program. If, for example, the desired image section is smaller than the screen resolution, the “Fill” setting ensures that the image extends to the entire background.
Changing the desktop background: step-by-step tutorial
Adjusting the desktop theme in Windows is quick and easy. Any adjustments to settings can be undone again later, giving you plenty of freedom to experiment with different options. The following instructions will guide you step by step through the process of changing the background image or background color in Windows 10 and Windows 11.
Changing the background theme in Windows 11
You’ll find the menu for customizing the desktop background in the “Settings” in Windows 11 which you can access either via the button of the same name in the Start menu or by using the key combination [Windows] + [i].
Prevent Users from Changing Desktop Wallpaper in Windows 10: If you work in a multinational company then you may have noticed the company logo as the desktop wallpaper and if you ever try to change the wallpaper you may not be able to do so as the network admin might have prevented users from changing the desktop wallpaper. Also, if you use your PC in public then this article might interest you as you can also prevent users from changing the desktop wallpaper in Windows 10.
Now there are two methods available to stop people from changing your desktop wallpaper, one of which is only available to Windows 10 Pro, Education and Enterprise edition users. Anyway without wasting any time let’s see How to Prevent Users from Changing Desktop Wallpaper in Windows 10 with the help of the below-listed tutorial.
Prevent Users from Changing Desktop Wallpaper in Windows 10
Make sure to create a restore point just in case something goes wrong.
Method 1: Prevent Users from Changing Desktop Wallpaper using Registry Editor
1.Press Windows Key + R then type regedit and hit Enter to open Registry Editor.
2.Navigate to the following registry key:
HKEY_CURRENT_USER\Software\Microsoft\Windows\CurrentVersion\Policies
3.Right-click on policies folder then select New and click on Key.
4.Name this new kye as ActiveDesktop and press Enter.
5.Right-click on ActiveDesktop then select New > DWORD (32-bit) value.
6.Name this newly created DWORD as NoChangingWallPaper and hit Enter.
7.Double-click on NoChangingWallPaper DWORD then change its value from 0 to 1.
0 = Allow
1 = Prevent
8.Close everything then restart your PC to save changes.
This is how you Prevent Users from Changing Desktop Wallpaper in Windows 10 but if you have Windows 10 Pro, Education and Enterprise Edition then you can follow the next method instead of this one.
Method 2: Prevent Users from Changing Desktop Wallpaper using Group Policy Editor
Note: This method is only available to Windows 10 Pro, Education, and Enterprise Edition Users.
1.Press Windows Key + R then type gpedit.msc and hit Enter.
2.Navigate to the following path:
User Configuration > Administrative Templates > Control Panel > Personalization
3.Make sure to select Personalization then in right-window pane double-click on “Prevent changing desktop background” policy.
4.Select Enabled then click Apply followed by OK.
5.Reboot your PC to save changes.
Once you complete any of the above-listed methods then you can check if you’re able to change the desktop background or not. Press Windows Key + I to open Settings then navigate to Personalization > Background, where you will notice that all the settings are greyed out and you will see a message saying “Some settings are managed by your organization”.
Method 3: Enforce a default desktop background
1.Press Windows Key + R then type regedit and hit Enter to open Registry Editor.
2.Navigate to the following registry key:
HKEY_CURRENT_USER\Software\Microsoft\Windows\CurrentVersion\Policies
3.Right-click on policies folder then select New and click on Key.
4.Name this new key as System and hit Enter.
Note: Make sure the key is not already there, if so then skip the above step.
5.Right-click on System then select New > String Value.
6.Name the string Wallpaper and hit Enter.
7.Double-click on the Wallpaper string then set the path of the default wallpaper you want to set and click OK.
Note: For example, you have a wallpaper on Desktop name wall.jpg, then the path would be C:\Users\Adity\Desktop\bmw.jpg
8.Again right-click on System then select New > String Value and name this string as WallpaperStyle then hit Enter.
9.Double-click on WallpaperStyle then change its value according to following wallpaper style available:
0 – Centered
1 – Tiled
2 – Stretched
3 – Fit
4 – Fill
10.Click OK then close Registry Editor. Reboot your PC to save changes.
Recommended:
That’s it you have successfully learned How to Prevent Users from Changing Desktop Wallpaper in Windows 10 but if you still have any questions regarding this tutorial then feel free to ask them in the comment’s section.
Aditya Farrad
Aditya is a self-motivated information technology professional and has been a technology writer for the last 7 years. He covers Internet services, mobile, Windows, software, and How-to guides.
The Background section is listed under the Personalization settings in the Settings app. This is used to change the desktop wallpaper and fit for it. There is also an option for changing the background color of your system on this page. Some related settings like high contrast are also listed at the bottom of the page. An administrator can disable this page from any standard user at home or in any organization. Once the page is disabled, it will grey out all the options on this page and a standard user will be unable to change any option. In this article, we are providing you methods through which you can enable and disable the Background page of the Settings app.
Background settings disabled by an administrator
Method 1: Using the Local Group Policy Editor
The Group Policy Editor is a Microsoft Management Console that is used to control the working environment of the operating system. Administrators can use this tool to disable specific settings in the Windows Settings app. The background page is listed under the personalization settings. After enabling this policy setting, it will grey out most of the options on the background page. There are also some other policies that prevent users from changing the desktop wallpaper and desktop icons.
The Group Policy Editor is available only on the Windows 10 pro, education, and enterprise editions. If you are using the Windows Home edition, then you need to skip this method and try using the Registry method.
- Press the Windows + R key together on your keyboard to open a Run dialog. Then, you need to type “gpedit.msc” in the dialog box and press the Enter key or click on the Ok button. This will open up the Local Group Policy Editor window on your computer. Opening the Local Group Policy Editor
- In the Local Group Policy Editor window, head over to the following path: Navigating to the settings
- Now double-click on the policy named “Prevent changing desktop background” and it will open another window. Then choose the Enable toggle option. Enabling the setting
- After that, just click on the Apply and Ok buttons to save these changes.
- The Group Policy will automatically update the changes. If not, then you must force the update for the group policy.
- Search for Command Prompt in the Windows search feature and run it as an administrator. Now type the following command in Command Prompt (Admin) and press the Enter key. You can also update the group policy by restarting the computer. Force updating group policy
- If you want to enable the Background settings again, just change the toggle option to Disabled or Not Configured in step 3.
Method 2: Using the Registry Editor
The Registry Editor is the tool to view and modify the Windows Registry values. It contains all the information and settings about applications and operating systems. Unlike the Group Policy Editor, this method requires some technical steps from the user. You need to create the missing value and key for any specific setting. The Windows 10 Home users also have access to the Registry Editor and they can use it to disable the background page.
Follow the below steps carefully without making any mistakes. We recommend users that they should create a backup before making any new changes in Registry every time.
- First, open the Run dialog box by pressing the Windows and R keys together on your keyboard. Then, you need to type “regedit” in the dialog box and press the Enter key to open the Registry Editor. If you get UAC (User Account Control) prompt, then click on the Yes button. Opening the Registry Editor
- To create a Registry backup before making new changes, click on the File menu and choose the Export option. Select the path and name the file as you want. Lastly, click on the Save button to create the backup. Creating a Registry backup
Note: You can always restore a backup by clicking on the File menu and choosing the Import option as shown. Then, you can choose the backup file that you recently created.
In the Registry Editor window, head to the following location:
Note: If the ActiveDesktop key is missing, just right-click on the Policies key and choose the New > Key option. Then name that newly created key as “ActiveDesktop“.
Tip / Trick
Scenario 1: You are one of the employees. You have come to your office, grabbed a cup of coffee and started your desktop or laptop only to find that the desktop wallpaper has been changed! And, no matter what you do to Personalize again, it’s not working, i.e., your favorite wallpaper cannot be brought back! How annoying is that?
Scenario 2: You run a company and you have set your company’s mission statement as the wallpaper on all of your users’ desktops. But one day you notice one of the employees’ desktop, and it’s a different wallpaper. As an employer, would you like it?
If you want to prevent users from changing the desktop wallpaper, then this tutorial is right for you. Once you do this, no one will be able to change the desktop wallpaper either by right-clicking on the ‘Desktop’ to choose Personalize, or by right-clicking on an image and selecting Set as desktop background.
- Type regedit in the “Run” dialog box (keyboard shortcut: Win + R), or in the Start menu ‘Search programs and files’ box, and click OK, or hit Enter. It’ll open the “Registry Editor”.
WARNING: You are now going to ‘edit’ the registry. If something goes wrong, it can mess up your system. Look before you leap, and you should be okay!
- Navigate to the following key:
HKEY_CURRENT_USER\Software\Microsoft\Windows\CurrentVersion\Policies
- Under the Policies key, create a new key System (right-click Policies, and then New >Key if it hadn’t already existed). Select the System key, and in the blank area of the right-side pane, create a new ‘string’ value Wallpaper (right-click, and then New >String Value if it hadn’t already existed), and set its value to the exact path of your desired wallpaper (right-click Wallpaper, select Modify; this will open the “Edit String” dialog box; type in the exact location of the file, and click OK). You can only use a .JPG or .BMP file in this method (too bad that the PNG format cannot be used). The path may be something as follows:
- You can also set the wallpaper style, e.g., Centered, Tiled or Stretched. Like before, create a new ‘string’ value WallpaperStyle if it hadn’t already existed, and set its value to 0, 1 or 2 as you may like it:
0 (Centered) OR 1 (Tiled) OR 2 (Stretched)
- Restart or log off your system to apply the changes. No more change in the wallpaper until the registry is edited again!
Oh well, some users like me (or, you dotTechies) may dare to edit the registry to alter the wallpaper, but hey, not the rest of the world.
I have tested this in Windows 7 Professional 64 bit.
Sounds good? Share it with your acquainted ones! Troubleshooting?
The Windows themes are used to customize the interface of the Windows. It will change the colors, sounds, screen saver, pointers, and desktop background for the user account. There are several themes that the user can choose for their desktop. However, an administrator at home or in the organization can disable the theme changing settings from a standard account. It will completely disable the theme settings; however, the users can still change the colors, sounds, screen saver, pointers, and desktop background. In this article, we will show you methods for disabling the theme settings.
Windows 10 theme settings
Method 1: Using the Local Group Policy Editor
The Local Group Policy Editor contains all kinds of policies that can enable and disable specific settings on the operating system. It can be used to customize settings for a computer or a specific user on the computer. There is a specific policy setting for preventing users from changing the theme of their operating system. It is listed under the User Configuration category of the Group Policy Editor.
The Local Group Policy Editor isn’t available for every Windows 10 edition. If you are using the Windows 10 Home edition, then skip this method and try using the Registry method in this article.
- Press the Windows + R key together on your keyboard to open a Run dialog. Then, you need to type “gpedit.msc” in the dialog box and press the Enter key or click on the Ok button. This will open up the Local Group Policy Editor window on your computer. Opening the Group Policy Editor
- In the Local Group Policy Editor window, head over to the following path: Navigating to the setting
- Now double-click on the policy named “Prevent changing theme” and it will open another window. Then choose the Enable toggle option as shown below. Enabling the setting
- After that, just click on the Apply and Ok buttons to save these changes.
- The Group Policy will automatically update the changes. If not, then you must force the update for the group policy.
- Search for Command Prompt in the Windows search feature and run it as an administrator. Now type the following command in Command Prompt (Admin) and press the Enter key. You can also update the group policy by restarting the computer. Force updating the group policy
- If you want to enable the theme settings again, just change the toggle option to Disabled or Not Configured in step 3.
Method 2: Using the Registry Editor
Another way to prevent users from changing themes on the computer is by using the Registry Editor. Whenever we configure a setting in the Group Policy Editor, it will automatically update the Registry for that specific setting. If you used the Group Policy Editor and configured the setting, then you don’t need to use this method because it will be already configured. However, if you are using this method directly, then you need to configure it from the start. There will some technical steps for creating the missing key and value for this specific setting. Follow the below steps carefully to prevent users from changing the theme:
Note: We have included a registry backup step for safety. However, you can skip it if you don’t want to create a backup.
- First, open the Run dialog box by pressing the Windows and R keys together on your keyboard. Then, you need to type “regedit” in the dialog box and press the Enter key to open the Registry Editor. If you get UAC (User Account Control) prompt, then click on the Yes button. Opening the Registry Editor
- To create a Registry backup before making new changes, click on the File menu and choose the Export option. Select the path and name the file as you want. Lastly, click on the Save button to create the backup. Creating a registry backup
Note: You can always restore a backup by clicking on the File menu and choosing the Import option as shown. Then, you can choose the backup file that you recently created.
In the Registry Editor window, head to the following location:
Note: If the Explorer key is missing, just right-click on the Policies key and choose the New > Key option. Then name that newly created key as “Explorer“.
KB ID 0000461
Problem
If you need to lock down your client machines desktops and prevent your users from changing the wallpaper, then here’s a run through on how to do it.
Solution
1. On your domain controller , Start > Administrative Tools > Group Policy Management Console > Either create a new policy and link it to your targeted USERS or edit an existing one, then navigate to;
Locate “Prevent Changing Desktop Background”.
2. Set the policy to enabled, then either reboot the clients, wait a couple of hours, or manually run “gpupdate /force” on them.
3. Your users will no longer be able to select the “Desktop Background” link to change it.
4. If your users locate a picture on the internet they cannot select “Set as Background”.
5. If your users download a graphic and preview it, the option to “Set as desktop Background” is there but it no longer works.
My users can still “Set as Background” and “Set as desktop Background”
The above procedure works fine with Windows 7 and 2008, however some older versions of Windows still have access to these options. To fix that you need to lock active desktop then disable it.
If that’s the case, in addition to the above also do the following.
1. On the policy you edited above, navigate to;
Locate “Desktop Wallpaper”.
2. Enable the policy > Set the wallpaper name to . (a value that does not exist) > Set the wallpaper style to Stretch.
3. On the policy you edited above, navigate to;
Locate “Disable Active Desktop”.
4. Set it to enabled, then either reboot the clients, wait a couple of hours, or manually run “gpupdate /force” on them.
Prevent User From Changing Desktop Icons in Windows 10: By default Windows 10 users can change desktop icons using desktop icon settings but what if you want to deny access to users from using the desktop icon settings? Well, then you are in luck as today we are going to discuss exactly how to prevent a user from changing desktop icons in Windows 10. This setting is very beneficial if you use your laptop at work where you colleagues can mess up your desktop settings, thus messing up your important data. Although you can always lock your desktop but sometimes mistakes happen and thus your PC becomes vulnerable.
But before continuing, make sure you have added the necessary icons to your desktop because once the setting is enabled neither administrator or any other user can change the desktop icons settings. Anyway, without wasting any time let’s see How to Prevent User From Changing Desktop Icons in Windows 10 with the help of the below-listed tutorial.
Prevent User From Changing Desktop Icons in Windows 10
Make sure to create a restore point just in case something goes wrong.
Method 1: Prevent User From Changing Desktop Icons in Registry Editor
1.Press Windows Key + R then type regedit and hit Enter to open Registry Editor.
2.Navigate to the following registry key:
HKEY_CURRENT_USER\Software\Microsoft\Windows\CurrentVersion\Policies\System
3.Right-click on System then select New > DWORD (32-bit) Value.
4.Name this newly created DWORD as NoDispBackgroundPage and then hit Enter.
5.Double-click on NoDispBackgroundPage DWORD and change its value to:
To Enable Changing Desktop Icons: 0
To Disable Changing Desktop Icons: 1
6.Once finished, click OK and close everything.
7.Reboot your PC to save changes and see if you’re able to Prevent User From Changing Desktop Icons in Windows 10.
Method 2: Prevent User From Changing Desktop Icons in Group Policy Editor
Note: This method only works for Windows 10 Pro, Education, and Enterprise Edition.
1.Press Windows Key + R then type gpedit.msc and hit Enter.
2.Navigate to the following path:
User Configuration > Administrative Tools > Control Panel > Personalization
3.Select Personalization then in right window pane double-click on “Prevent changing desktop icons” policy.
4.Now change the settings of the above policy according to:
To Enable Changing Desktop Icons: Not Configured or Disabled
To Disable Changing Desktop Icons: Enabled
5.Click Apply followed by OK.
6.Once finished, reboot your PC to save changes.
Now once you have disabled changing desktop icons you need to confirm if users are able to change the desktop icons or not. Press Windows Key + I to open Settings then click on Personalization and from the left-hand menu select Themes. Now in the extreme right click on Desktop icon settings and you will see a message saying “Your system administrator has disabled launching of the Display Control Panel“. If you see this message then you have successfully applied the changes and you can continue using your PC normally.
Recommended:
That’s it you have successfully learned How to Prevent User From Changing Desktop Icons in Windows 10 but if you still have any questions regarding this tutorial then feel free to ask them in the comment’s section.
Aditya Farrad
Aditya is a self-motivated information technology professional and has been a technology writer for the last 7 years. He covers Internet services, mobile, Windows, software, and How-to guides.
– Last updated on May 27, 2008 by VG
In Windows you can change desktop wallpaper, screen saver, themes and other appearance settings by right-click on Desktop and select “Properties”.
Sometimes you might want to disable all or a few options in Desktop Properties to restrict users or you might want to enable those options in case they are disabled by your system administrator or a virus infection.
Following tutorial will help you in enabling or disabling all or a particular option in Desktop Properties:
NOTE: This tutorial will work for almost all Windows versions.
Table of Contents
A. Disable Themes Tab in Desktop Properties:
Type regedit in RUN dialog box and press Enter. Now go to:
If “Explorer” key is not present, then create it. Now in right-side pane, create a new DWORD value NoThemesTab and set its value to 1 to disable it.
B. Disable Desktop Tab in Desktop Properties:
Type regedit in RUN dialog box and press Enter. Now go to:
If “System” key is not present, then create it. Now in right-side pane, create a new DWORD value NoDispBackgroundPage and set its value to 1 to disable it.
C. Disable Screen Saver Tab in Desktop Properties:
Type regedit in RUN dialog box and press Enter. Now go to:
If “System” key is not present, then create it. Now in right-side pane, create a new DWORD value NoDispScrSavPage and set its value to 1 to disable it.
D. Disable both Themes and Appearance Tabs in Desktop Properties:
Type regedit in RUN dialog box and press Enter. Now go to:
If “System” key is not present, then create it. Now in right-side pane, create a new DWORD value NoDispAppearancePage and set its value to 1 to disable it.
E. Disable Settings Tab in Desktop Properties:
Type regedit in RUN dialog box and press Enter. Now go to:
If “System” key is not present, then create it. Now in right-side pane, create a new DWORD value NoDispSettingsPage and set its value to 1 to disable it.
BONUS TIP: In case you want to enable a restricted tab in Desktop Properties, just delete the required DWORD value as mentioned above or change its value to 0 instead of 1.
You are here: Home » Troubleshooting Guides » How to Enable / Disable Changing Themes, Wallpapers, Screen Savers and Other Desktop Settings in Windows?
About the author: Vishal Gupta (also known as VG) has been awarded with Microsoft MVP (Most Valuable Professional) award. He holds Masters degree in Computer Applications (MCA). He has written several tech articles for popular newspapers and magazines and has also appeared in tech shows on various TV channels.
Comments
NOTE: Older comments have been removed to reduce database overhead.
For such a long time I have been trying to figure out how to enable Themes which had been disabled… months and months!! In less than 1 minute you have helped me to fix this. THANK YOU.
^^ Either remove the DWORD values or change their values to 0
love your tips, do you have a simple way to simply stop Users from saving files (shortcuts etc) to their desktop?
^^ I hardly think its possible. Desktop is essential place for users and if we restrict it, it might create new unwanted problems.
i want to know how do i will block the entry of usb (old as well as new).
it does only for current user(admin). what about other limited users. iwant to disable for limited users. if i go to regedit in limited user account its not allowing me to change registry. help pls
^^ You can apply this for all users by modifying HKEY_LOCAL_MACHINE key instead of HKEY_CURRENT_USER key.
love your tips, do you have a simple way to simply stop Users from saving files (shortcuts etc) to their desktop?
^^ Open that user profile folder, look for Desktop folder, right-click on it and select Properties. Now go to Security tab, click on Edit button, select the username from the list and enable the checkbox for “Write” permission in DENY section. Apply changes. Now that user will not be able to save anything on his Desktop.
The desktop one to prevent wallpaper change doesn’t seem to work for windows 7
If you don’t lock desktop background, it can be changed by anyone who can access your computer. Thus, it is a vexing thing. This post will show you how to lock desktop background Windows 10 with ease. In addition, you can also try MiniTool software to keep your data safe.
2 Ways to Lock Desktop Background Windows 10
Desktop background is a digital image used as a decorative background of a graphical user interface on the screen of a computer, smartphone or other digital devices. And the desktop background also can be changed by other people who can access your computer or devices. So some people may feel that it would be very inconvenient, especially those businesses who want to display their brands on the desktop background.
Thus, they want to know whether they can lock desktop background or stop Windows 10 changing background. Of course, the answer is positive and you can prevent changing desktop background Windows 10.
In the following section, we will show you how to lock desktop background Windows 10 with two different ways. If you want to lock desktop background Windows 10, try these two ways.
Way 1. Lock Desktop Background in Registry Editor
In the beginning, we will show you the first way to lock desktop background. You can stop Windows 10 changing background in Registry Editor.
Step 1: Press Windows key and R key together to open Run dialog. Then type regedit in the box and click OK to continue.
Step 2: Navigate to the following folder.
HKEY_CURRENT_USER\Software\Microsoft\Windows\CurrentVersion\Policies
Step 3: Right-click the Policies and choose New and Key to continue.
Step 4: Name the new key as ActiveDesktop and hit Enter to continue.
Step 5: Then right-click on the right panel and choose New and DWORD(32-bit) Value to continue.
Step 4: Name the new DWORD as the NoChangingWallPaper and hit Enter to continue.
Step 5: Double-click it and change its value data to 1. Then click OK to continue.
After that, you can reboot your computer to take effect. You have locked desktop background Windows 10 and nobody can change the desktop anymore.
Way 2. Lock Desktop Background in Group Policy
In the above section, we have shown how to lock desktop background Windows 10 in Registry Editor. Here, we will walk you through the second way to lock desktop background.
In this way, you can prevent changing desktop background Windows 10 in Group Policy.
Here is the tutorial.
Step 1: Press Windows key and R key together to open Run dialog. Then type gpedit.msc in the box and click OK to continue.
Step 2: In the Local Group Policy Editor window, navigate to the following folder.
User Configuration > Administrative Templates > Control Panel > Personalization
Step 3: Double-click the Prevent changing desktop background to continue.
Step 4: In the pop-up window, check the option Enabled, click Apply and click OK to take effect.
When you have finished all the steps, you can find that you cannot change desktop background any more since you have locked desktop background.
Feel helpless when the Windows 10 brightness control not working? This post demonstrates 5 solutions to solve the screen brightness not working problem.
Final Words
To sum up, this post demonstrates you how to lock desktop background Windows 10 with two different ways. If you want to prevent changing desktop background Windows 10, try these ways.
About The Author
Tina is a technology enthusiast and joined MiniTool in 2018. As an editor of MiniTool, she is keeping on sharing computer tips and providing reliable solutions, especially specializing in Windows and files backup and restore. Besides, she is expanding her knowledge and skills in data recovery, disk space optimizations, etc.
On her spare time, Tina likes to watch movies, go shopping or chat with friends and enjoy her life.
Symptoms
If users right-click a picture and then click Set as Desktop Background, they can change their desktop wallpaper even though you (the administrator) have enabled the Prevent changing wallpaper property in Group Policy.
Cause
The Prevent changing wallpaper Group Policy prevents users from changing the desktop wallpaper by using Display Properties. However, there are ways of changing the wallpaper setting, such as through Image Preview, which does not involve Display Properties. By these other methods, users do not experience the limitations that apply to Display Properties. You must specify Active Desktop Wallpaper in Group Policy to prevent users from changing the desktop wallpaper without using Display Properties.
Resolution
To have us fix this problem for you, go to the “Here’s an easy fix” section. If you prefer to fix this problem manually, go to the “Let me fix it myself” section.
Here’s an easy fix
To fix this problem automatically, click the Download button. In the File Download dialog box, click Run or Open, and then follow the steps in the easy fix wizard.
This wizard may be in English only. However, the automatic fix also works for other language versions of Windows.
If you’re not on the computer that has the problem, save the easy fix solution to a flash drive or a CD, and then run it on the computer that has the problem.
Let me fix it myself
To resolve this issue, specify an Active Desktop wallpaper setting in Group Policy. To do this, follow these steps:
Click Start, click Run, and then type gpedit.msc.
Under Local Computer Policy, expand User Configuration, expand Administrative Templates, expand Desktop, and then click Active Desktop.
Double-click Active Desktop Wallpaper.
On the Setting tab, click Enabled, type the path to the desktop wallpaper that you want to use, and then click OK.
Status
This behavior is by design.
Did this fix the problem?
Check whether the problem is fixed. If the problem is fixed, you are finished with this section. If the problem is not fixed, you can contact support.
It is easy to switch to another wallpaper on Windows 10. However, some Windows 10 users ran into “can’t change desktop background Windows 10”. If you are facing the same issue, you come to the right place. This post offers 4 solutions to this issue. You can try them one by one.
Windows 10 Wallpaper Not Changing
Changing the wallpaper on Windows 10 is quite easy —you just need to right-click the picture you prefer and then choose the Set as desktop background option.
However, sometimes Windows 10 can’t change desktop background. Why does this issue happen? Keep reading to find the causes and corresponding fixes.
Fix 1: Reboot Your Computer
Have you ever encountered this issue before? If this is the first time that you are facing “can’t change desktop background Windows 10”, please try rebooting your computer and see if the issue gets fixed. If rebooting your computer is useless, please try the following fixes one by one.
Fix 2: Install the Pending Windows Update
Click the Windows icon on the taskbar and then click the power icon to see if any Windows update is pending or not.
If you see the Update and shut down option or Update and restart option, please complete the update and then check if “Windows 10 wallpaper not changing” is removed.
There are different Windows update error codes. This post helps you address 0xc1900107 with 6 solutions. You can check what they are if you run into this code.
Fix 3: Check If Windows 10 Has Been Activated
If you have not activated Windows 10, this likely prevents you from changing your desktop background. Follow the tutorial below to check if you have activated Windows 10.
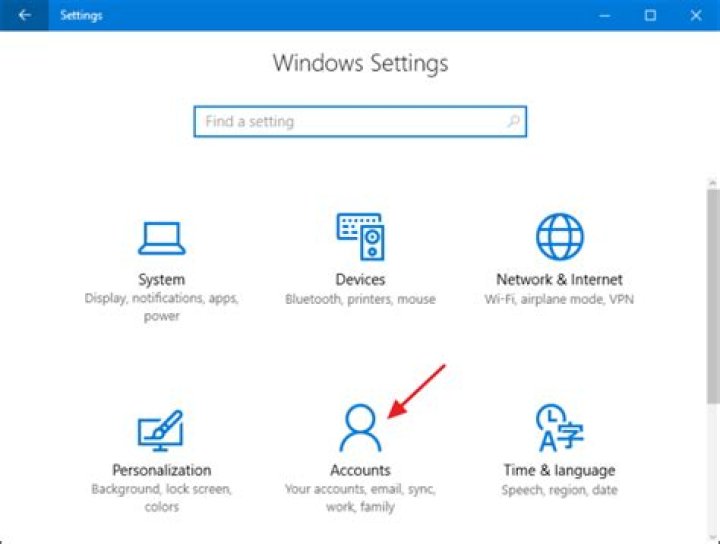
Step 1: Right-click the Windows icon on the taskbar and then select the Settings option.
Step 2: Select the Update & security option from the Settings window.
Step 3: Scroll down the left side of the Update & security window and select the Activation option.
Step 4: Look through the information on the left side to check if your Windows has been activated.
If your Windows has not been activated, please activate it and you should be able to change your desktop background successfully.
Fix 4: Disable the Prevent Changing Desktop Background Option
It is possible that the option that prevents you from changing desktop background is enabled. Therefore, disable it.
If you are using the Professional or Enterprise edition of Windows 10, you can disable the option via Local Group Policy Editor. If you are using Windows Home Edition, you can disable the option via Registry Editor (you might be interested in Windows 10 Home or Windows 10 Pro).
Disable the Option via Local Group Policy Editor
Step 1: Open Local Group Policy Editor.
- Press Windows + R to call out the Run dialogue box.
- Type gpedit.msc on the Run dialogue box and then click the OK button.
Step 2: Navigate to the path: User Configuration > Administrative Templates > Control Panel > Personalization.
Step 3: Locate the Prevent changing desktop background option from the right side of the window and double-click it.
Step 4: Select the Disabled option on the properties window. Then, click Apply and OK to execute and save the changes.
Making changes in Local Group Policy Editor can also be helpful when D drive is not showing up.
Disable the Option via Registry Editor
Step 1: Open Registry Editor.
- Call out the Run dialogue box by pressing Windows + R.
- Type regedit in the Run dialogue box and click the OK button.
Step 2: Navigate to the path: HKEY_CURRENT_USER\SOFTWARE\Microsoft\Windows\ CurrentVersion\Policies
Step 3: Right-click the Policies entry, choose New and Key, and name the key as ActiveDesktop.
Step 4: Right-click the blank space on the right side, select New and DWORD (32-bit) Value, and name it as NoChangingWallPaper.
Step 5: Double-click NoChangingWallPaper, switch the value data to 0, and click the OK button to save the change.
Step 5: Close Registry Editor and then restart your computer.
All fixes to “can’t change desktop background Windows 10” have been displayed. Have you tried some of them? Hope you can change your desktop background again after applying these fixes.
How to lock your keyboard on Windows 10? This post offers three tricks, using Keyboard Locker, and using Command Prompt, using a shortcut.
When it comes to Windows customization, changing desktop wallpaper is the first and foremost thing most of us do. In fact, I use the Dynamic Theme app to automatically set a new Bing image as the wallpaper on a daily basis.
Often times we try to set high-quality images as our desktop wallpapers. However, when you set a JPEG image as your wallpaper, Windows automatically compresses the image and reduces the quality of the said image. To avoid that and enjoy your desktop wallpaper in its original quality, here’s how to modify or disable wallpaper compression in Windows 10.
Note: though I’m showing this in Windows 10, the same steps are applicable to Windows 7 and 8.
Why Is Windows Compressing the Wallpaper?
This wallpaper compression feature was first introduced in Windows Vista. When you set a JPEG image as the wallpaper, Windows will compress and reduce it to 85% of its original quality. By compressing and reducing the image quality, Windows is able to reduce the original image size, and save some memory and disk space in the process.
Modify or Disable Wallpaper Compression
To change or disable wallpaper compression in Windows, we need to create a new registry value and configure it. To start, press “Win + R,” type regedit and press the Enter button to open Windows Registry. Alternatively, you can also search for it in the Start Menu.
After opening the Windows Registry, navigate to the following location. If you are using Windows 10 with Creators Update, simply copy the below path, paste it in the address bar and you will be taken to the required location automatically.
Right-click on the right panel and select the “New” option and then “DWORD (32-bit) Value.”
Name the new DWORD value as “JPEGImportQuality” and press the Enter button.
After creating the value, double-click on it to set the image quality. As mentioned earlier, Windows compresses the JEPG wallpaper to 85% of its original quality. If you want to disable the wallpaper compression, then select the “Decimal” radio button, enter “100” in the value data field and click on the “OK” button.
If you want to set a custom quality setting, then enter a value between 0 and 100. For instance, if you want the image quality to be 90% then enter 90 in the value data field and click the OK button.
Once you are done making the changes, this is how it looks in the Registry Editor.
Just restart your system or sign out and sign in to make the changes take effect. From this point forward, you can enjoy your desktop wallpapers in their full glory.
If you want to revert back, simply right-click on the newly created value and select the option “Delete.”
That being said, if you just don’t want to mess with the Registry Editor just to disable wallpaper compression, then simply use a PNG image as your wallpaper, and Windows won’t compress it like the JPEG image.
Do comment below sharing your thoughts and experiences about using the above method to change or disable wallpaper compression in Windows.
Our latest tutorials delivered straight to your inbox


