Cameron Summerson is ex-Editor-in-Chief of Review Geek and served as an Editorial Advisor for How-To Geek and LifeSavvy. He covered technology for a decade and wrote over 4,000 articles and hundreds of product reviews in that time. He’s been published in print magazines and quoted as a smartphone expert in the New York Times. Read more.
Most Chromebooks have relatively limited storage, which can fill up quickly with nigh-useless debris—like screenshots, for example. The default location for screenshot storage is in the Downloads folder, but you can easily change that.
If your Chromebook has an SD card slot, this is the place where you’ll want to store superfluous data—stuff like temporary downloads, screenshots, and the like. This way, if you forget to go in and clean out the rubbish, it’s not as big of a deal and your Chromebook’s internal storage isn’t constantly filled with stuff you probably won’t need to look at again.
Chrome OS considers screenshots the same as any other download, so to change where screenshots are stored, you have to change your default download location. First, open the Settings menu by clicking on system tray, then the gear icon.
From there, scroll down to “Advanced” and click it.
Once the Advanced section loads, keep scrolling down until you get to the “Downloads” section. Yep—since the default location for screenshots is in the Downloads folder, all you have to do is change its location.
The first option in this menu is “Location.” Off to the right is a button that reads “Change.” Click it.
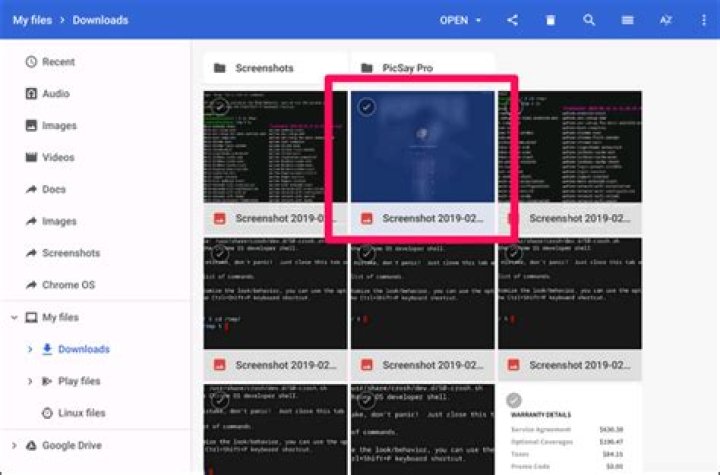
The file manager will open and you can navigate to the new location. Simply jump over to your SD card and create a new folder called “Screenshots,” then select it and click “Open.” Bam.
It’s also worth noting that this is where Chrome will save all downloads by default unless you have the “Ask where to save each file before downloading” option ticked. Enabling that option will, of course, allow you to save each file wherever you want.
To me, this is the best scenario: screenshots are all saved to an out of the way location, while I’m able to save downloads wherever I want them (which is generally also on the SD card). Now the internal storage of my Chromebook is reserved for important things, like app installations, for example.
Cameron Summerson is ex-Editor-in-Chief of Review Geek and served as an Editorial Advisor for How-To Geek and LifeSavvy. He covered technology for a decade and wrote over 4,000 articles and hundreds of product reviews in that time. He’s been published in print magazines and quoted as a smartphone expert in the New York Times. Read more.
There may not be a whole lot of reasons to take screenshots of the login screen on your Chromebook. If you ever need to, however, finding those screenshots can be a pain. Here’s how to do it.
First off, you need to know how to take a screenshot, which is surprisingly easy: press the Ctrl and []]] keys at the same time. (The “[]]]” key is located above the 6 key on your keyboard’s number row.) Boom, screenshot taken. This part works anywhere—even on the login screen.
The problem comes when you try to retrieve said screenshot because you won’t find it in the default location on your account. Since you’re not logged in when you take the screenshot, the system can’t associate it with an account on the Chromebook.
So where does it store it? In a temporary directory. The screenshot(s) will stay here even after you log in—you just need to know how to copy it over to your account. There are two ways of doing this: by accessing temporary files in your browser window, or by using the Chrome OS Shell (Crosh) if your ‘book is in Developer Mode.
How to Access Temporary Files
The easiest way to access these screenshots is by jumping into temporary files. Open a new Chrome tab, then type the following into the Omnibox:
This will bring up the full list of files. Just find your screenshot, then right-click on it and choose “Save link as.”
Choose the save location, and away you go. Easy peasy.
How to Transfer Temporary Files using Crosh
While grabbing files from the /tmp/ folder is the easiest method, you can also do it using Crosh if your Chromebook is in Developer Mode.
Note: Developer Mode and the Developer Channel are not the same thing. Your Chromebook needs to be in Deve Mode for this to work.
Go ahead and fire up Crosh by pressing Ctrl+Alt+T. Here, type shell and hit enter.
In the shell, navigate to the tmp directory by typing the following: cd /tmp/
Now, you’ll need to find the image file. Type ls to output a list of all files in this directory.
Once you’ve spotted the file, type the following to move it to your Downloads directory:
Don’t forget the single quotes here—because the name of the file has spaces in it, this tells the system that’st the entire file name.
If entered correctly, you won’t get any sort of notification here, like in the screenshot above. If it’s wrong, you’ll see an error.
If all went as planned, your screenshot will now be in the Downloads folder. Congratulations on taking the needlessly complicated, but necessary steps to do something that should be a whole lot simpler.
When it comes to taking screenshots from Chrome, you’ve got three options. Besides the traditional approach via keyboard shortcuts, there are some useful extensions like Chrome Capture that let you access additional features. Alternatively, you can save screenshots in Google Chrome using developer tools.
- How to take screenshots in Chrome manually
- Chrome Capture: the screenshot extension from Google
- Screenshot of visible screens
- Screenshot of the full page
- Additional options for screenshots with Chrome Capture
- How to screenshot in Chrome using developer tools
Register great TLDs for less than $1 for the first year.
Why wait? Grab your favorite domain name today!
How to take screenshots in Chrome manually
If you are looking to archive or share the content of your website, you can create screenshots with Chrome manually using the following key combination:
- [Alt]+[Print] for screenshots in Windows 10 and screenshots in Windows 11
- [Shift]+[Command]+[3] for screenshots in iOS.
This way you can take an image of the entire visible page in Chrome. However, only the visible part of the page will be captured. Content below what is visible won’t be captured in the screenshot.
Chrome Capture: the screenshot extension from Google
Chrome Capture is an extension that lets you take screenshots in Chrome to capture an entire page – beyond the visible part. The extension is freely available from Google Chrome. You can get it from the Chrome Webstore and add it to your browser with a single click.
Screenshot of visible screens
Once added, Chrome Capture provides different ways to capture Chrome screenshots. Like the manual method, you can capture the entire visible screen. Alternatively, you can select a portion of the screen to capture a specified area in your Google browser.
Screenshot of the full page
The extension shows just how useful it can be when you want to screenshot not only the visible area, but an entire page in Chrome. Chrome Capture provides this option in a few clicks using the following steps:
- Enter the URL you wish to screenshot.
- From the top right select “Extensions”.
- The menu that launches should include an overview of your screenshot tools. Locate Chrome Capture.
- To screenshot a visible area or a section, you simply click on Chrome Capture. When you want to capture the entire page, including areas that are not in view, click on the three dots to the right – “More actions”.
- You should now see the option “Full webpage screenshot (beta)” in fourth position. Click on it.
Chrome Capture gives you the ability to take a screenshot of the entire page.
6. Chrome Capture now auto-scrolls a page and creates a screenshot of the entire website.
7. After creating the screenshot, Chrome Capture automatically launches an editor that you can use to crop the image as you see fit.
After the screenshot is captured, the Chrome Capture editor launches automatically.
Additional options for screenshots with Chrome Capture
In addition to full-page screenshots, Chrome Capture provides several other options. Besides image editing, you can create and share GIF or WebM files. This is a useful feature to document a moving image or video instead of a static image. You can record up to ten seconds of footage and also crop or annotate it afterwards.
Alternatively, a premium version of Chrome Capture is available that lets you record longer videos. You are not restricted to a maximum running length, and the extension offers several options for editing. Although the version is not very expensive with a one-time fee of around $8.99, the free version is sufficient for ordinary screenshots in Google Chrome.
HiDrive Cloud Storage with IONOS!
Based in Europe, HiDrive secures your data in the cloud so you can easily access it from any device!
The quickest way to capture what you see on your screen is to use Chrome OS’ built-in tools.
Chromebooks exploded in popularity during the pandemic as parents snatched up these affordable laptops for kids now taking classes from their kitchen tables or bedrooms. And while that demand has cooled off in recent quarters, millions of Chromebooks are in circulation, and chances are, there are a few things you don’t know about these Chrome OS-based devices.
Take screenshots, for instance. As Chromebooks are internet-based laptops, there aren’t as many options for third-party screenshot tools as there are for Windows or macOS. Chrome extensions are plentiful, but the quickest way to capture what you see on your screen is to use Chrome OS’ built-in tools. Here’s how that works.
Our Top-Rated Chromebooks
Acer Chromebook Spin 713 (2022) Review
Acer Chromebook Spin 514 Review
Lenovo Chromebook Duet Review
Lenovo IdeaPad Duet 5 Chromebook Review
HP Chromebook x2 (2021) Review
Dell Chromebook 11 (3100) Review
Lenovo ThinkPad C13 Yoga Chromebook Review
Asus Chromebook CX9 Review
Asus Chromebook Flip CM3 Review
Lenovo IdeaPad Flex 5 Chromebook (2021) Review
Take a Screenshot With the Keyboard Shortcut
Chrome OS has long supported a screenshot keyboard shortcut. On your Chromebook, press the Shift + Ctrl + Show buttons (the Show window looks like a rectangle with two vertical lines next to it). In the menu that appears at the bottom of the screen, select Screenshot. Choose whether you want to take a full-screen screenshot, a partial screenshot, or window screenshot. If you’re using an external keyboard that doesn’t have the Show button, press Shift + Ctrl + F5 to access the screenshot menu.
Use the Screen Capture Tool in Quick Settings
With the launch (Opens in a new window) of Chrome OS 89 in March 2021, Google added a screen-capture tool to the Quick Settings menu on Chromebooks.
Go to Quick Settings on the bottom-right of your screen and select Screen Capture. Double-check that what you want to capture is on your screen. In the tool that appears, choose whether you want to capture the full screen, a single window, or just one part of your screen. Click Capture.
Where to Find Your Chromebook Screenshots
Screenshots are automatically copied to your Clipboard. They’ll also show up in Tote, which rolled out with Chrome OS 89 and keeps important files at your fingertips. Open Tote from the Shelf to access recent downloads, screen captures, and pinned files.
To find them later, screenshots also get saved to your “Downloads” folder. To change where they go, press the Shift + Ctrl + Show windows, select Settings > Select folder, pick the folder you prefer, and future screenshots will be sent there.
Given that Chromebooks have limited hard drive space (Opens in a new window) , one option is to back up these images to Google Drive, where they will be accessible across devices.
Like What You’re Reading?
Sign up for Tips & Tricks newsletter for expert advice to get the most out of your technology.
This newsletter may contain advertising, deals, or affiliate links. Subscribing to a newsletter indicates your consent to our Terms of Use and Privacy Policy. You may unsubscribe from the newsletters at any time.
Your subscription has been confirmed. Keep an eye on your inbox!
You probably know several ways to capture screenshots on your computer, including using the Print Screen button and the Snipping Tool in Windows 10.
But if you use Google Chrome as your web browser and frequently need to take screenshots, you might want to use the relatively obscure – yet easy to use – screenshot tool that’s built right into the browser. Few people know about it because it’s considered a tool for developers, but in reality, anyone can use it.
Here’s how to take a screenshot within Google Chrome, on your Mac or PC.
Check out the products mentioned in this article:
Apple Macbook Pro (From $1,299.00 at Apple)
Acer Chromebook 15 (From $179.99 at Walmart)
How to screenshot on Google Chrome
1. Open Google Chrome and press Ctrl + Shift + I if you’re on a PC, or Command + Option + I if you’re on a Mac — that’s the letter I, not the letter L. This will open a developer menu called the Element Inspector, which lets you see the HTML the current web page is made with.
2. Next, press Ctrl + Shift P if you’re on a PC, or Command + Shift P on a Mac. This will let you search through your list of developer tools.
3. Type “screenshot.” Don’t press Enter. You should see a set of four screenshot options.
Here’s what each of the four screenshot options do:
- Capture area screenshot. This lets you select a specific part of the screen and save it as a screenshot. If you choose this option, after a moment, you’ll be able to drag a box with the mouse anywhere within the Chrome window. Select the part of the page you want to capture and it’ll be saved. Note that you can’t use this tool to capture the Element Inspector itself — that never gets included in the screenshot.
- Capture full size screenshot. This option saves a picture of the entire web page, from top to bottom. It’s a convenient way to grab an image of a long page that extends well beyond the bottom of the screen.
- Capture node screenshot. This is more of interest to developers – it lets you capture an image of just a specific HTML element selected in the Element Inspector.
- Capture screenshot. This is most like a standard screenshot. It saves an image of what’s currently visible on your screen.
4. Using the arrow keys on your keyboard, scroll down to the one you want and press Enter. Your screenshot will be taken and automatically saved. You can find it in Chrome’s download manager at the bottom of the window.
The main difference between using the Print Screen key and this Chrome tool is that the Chrome screenshot tool doesn’t include the borders of the Chrome browser window itself — only the content of the web page.
- Tweet
- Share
- 0
One question users new to Chrome OS ask is: ‘How do I take a screenshot on a Chromebook?’
The answer is surprisingly easy, but only once you know how. This is why we include the screenshot shortcut in our list of Chromebook Keyboard Shortcuts you need to know.
In this post we show you several different ways to take a screenshot on a Chromebook.
Screenshots on a Chromebook? Easy!
Your Chromebook runs an operating system called Google Chrome OS and this comes with a screenshot feature built-in by default. This means you do not need to install a Chrome extension, download a random app, or tussle with a hidden settings to take a screenshot on your Chromebook.
Assuming you have fingers and a working device you have everything you need to do it.
On a traditional Windows laptop it’s easy: you just press the print screen button. But this button is not included on a Chromebook keyboard.
The Chromebook equivalent of print screen is to press the the Ctrl and Window Switcher keys at the same time. They look like this:
When you press these keys together the screen will flash white and a screenshot is instantly taken. A notification will appear a second or so later to tell you that a screenshot was taken.
Click on the ‘screenshot taken’ notification to open the screenshot file in the Chrome OS file manager. From there you can upload, edit, or share it elsewhere like any regular image file.
Can I take a cropped screenshot instead?
If you only need to screenshot a specific area of the screen you can take a cropped shortcut (also known as a partial screenshot) on your Chromebook too.
Press the ctrl , Shift and window switcher keys on your Chromebook to enter cropped screenshot mode:
When you press this keyboard shortcut your Chromebook screen will dim and your mouse pointer will turn in a cross-hair.
Click and drag out a box over the portion of the screen you want to take a snap of. The moment you lift your fingers off of the touchpad (or stop clicking with a mouse, if you’re using one) the screenshot will be taken.
As before, you get a notification to tell you the screenshot was successful. You can click on this to open the related image in the Files app.
There’s a Screenshot Menu Shortcut too
Not a fan of fancy finger-flexing keyboard shortcuts? No worries! Your Chromebook also has a “Take screenshot” option squirrelled away in the Settings > More Tools menu:
You can use this menu option at any time to screenshot your Chromebook’s entire display.
The only downside to using this method is that the Chrome browser stays on on screen; there’s no timer or delay so you can’t minimise Chrome and/or focus a different app to take a snap of that. Keep that in mind.
Using a Chrome OS tablet?
Taking a screenshot on a convertible Chromebook or a dedicated Chrome OS tablet is a little different.
If you use your Chromebook as a tablet (because the screen is able to fold back) the keyboard is a) hidden and b) deactivated. So to take a screenshot on a Chromebook tablet press the power and volume down buttons on the side of the device at the same time — just like on an Android phone!
Over to you
Regardless of which method you use all screenshots you take are saved as high-quality .PNG files. These are stored in the Downloads folder for easy retrieval.
- Tweet
- Share
Home » How To » Here’s How to Take A Screenshot on a Chromebook
Looking for an answer to the question: How do i save a screenshot to google drive? On this page, we have gathered for you the most accurate and comprehensive information that will fully answer the question: How do i save a screenshot to google drive?
Google Drawings document, clicking the ‘insert’ tab at the top, then ‘image’ in the dropdown box. In the middle of your screen, click on ‘choose an image to upload’. click on it. An image of your screenshot will appear in the document.
The best way is to right click any image and simply “Save to Google Drive”, but its not possible in your web browser. If you use the Chrome web browser, download this Google Drive extension and it will add this right click option for you. After you install the app, it will add the right click option to “Save to Google Drive.
On Chromebook: Simply insert the screenshot into a Google Drawings by opening a new. Google Drawings document, clicking the ‘insert’ tab at the top, then ‘image’ in the dropdown box. In the middle of your screen, click on ‘choose an image to upload’. Find your screenshot and double. click on it.
Find your Screenshot folder in the list and tap on it to view the images. At the top of the screen, above the picture thumbnails, you’ll see a gray bar that says “Backup & sync” with a toggle switch on the right. Tap that toggle switch to turn it off. From that point on, none of your screenshots will be automatically uploaded to Google Photos.
Where are screenshots saved in laptop?
Press Windows key + Print Screen. Now go to the Pictures library on your computer by launching Explorer (Windows key + e) and in the left pane click Pictures. Open the Screenshots folder here to find your screenshot saved here with the name Screenshot (NUMBER).
How do you take a screenshot and save it as a file?
Save Your Screenshot as a File Press Windows+Print Screen to save a screenshot as a file. In other words, press and hold the Windows logo key and tap the Print Screen key, which may be labeled something like PrtScrn or PrtScn.
How do you save a screenshot on Chromebook?
Press Ctrl + Show windows at the same time (everything on-screen will be in your screenshot). When the notification appears, click to see your screenshot, or find it in your Files app. Thanks for your feedback!
How do you paste a screenshot on Chromebook?
As shown above, click the Copy to Clipboard button, then press Ctrl + V when you want to paste it. Alternatively, find and select your screenshot, press Ctrl + C to copy it to the clipboard, and then press Ctrl + V to paste it — just like Windows.
How do you take a screenshot on a Chromebook and save it to Google Drive?
0:002:31Chromebook Change the Screenshots to Save to Google Drive – YouTubeYouTube
How do you take a screenshot on a Chromebook?
Screenshots automatically download to your CHromebook, into the default directory you set in Settings. Look for it there, then in any email, etc, use the PAPER CLIP icon to open the attachemnt dialogue. navigate to the file. attach it.
Why are my screenshots not saving Chromebook?
If your download location is filled, and there’s not enough space left for your screenshot, Chromebook won’t be able to save the image. Make sure you’re not running low on storage space. Delete unnecessary files from local storage, restart your laptop, and check the results.
Where are Screenshots saved on Chromebook?
Downloads All screenshots are saved as . png files and stored in the Downloads or Google Drive folder.
Where are screenshots saved?
Screenshots are typically saved to the “Screenshots” folder on your device. For example, to find your images in the Google Photos app, navigate to the “Library” tab. Under the “Photos on Device” section, you’ll see the “Screenshots” folder.
How do you download a screenshot on Chromebook?
To take a screenshot on a Chromebook:View the site you’re experiencing difficulty with.Press Ctrl + Show windows . (For non-Chrome OS keyboards, press Ctrl + F5.) Your screenshot is saved as a PNG file in your “Downloads” folder.
How do you upload a screenshot?
For a PC Computer:Go to any web page.To take a picture, find the “Print Screen” button on your keyboard. Click it once.Open a Word document.Click CTRL-V or right-click and Paste.Go to Save AS. Give your document a name. . On the assignment page, click “Submit assignment.”Browse for your file. Click “Upload.”
Where do the screenshots go on a Chromebook?
All screenshots are saved as . png files and stored in the Downloads or Google Drive folder.
Where can I find my screenshots on Chromebook?
Look for your Downloads folder under the “My Files” category on the left. Your screenshots will be there.
Where are screenshots saved on Chromebook?
Downloads All screenshots are saved as . png files and stored in the Downloads or Google Drive folder.
How do I save a screenshot on my computer as a picture?
To capture your entire screen and automatically save the screenshot, tap the Windows key + Print Screen key. Your screen will briefly go dim to indicate that you’ve just taken a screenshot, and the screenshot will be saved to the Pictures > Screenshots folder.
Can you screenshot on a Chromebook?
Press Ctrl + Show windows at the same time (everything on-screen will be in your screenshot). When the notification appears, click to see your screenshot, or find it in your Files app. Thanks for your feedback!
How do you put a screenshot on Google Docs on a Chromebook?
To insert a screen shot that you downloaded to your Chromebook, open the document and go to Insert > Image > Upload from computer. When the “My files” window opens, click on “Downloads” in the left column just below “My files.” Locate the screen shot and double-click on it to upload it to your document.
Where are my Screenshots on Chromebook?
Look for your Downloads folder under the “My Files” category on the left. Your screenshots will be there.
How do I find my screenshots on Chromebook?
Look for your Downloads folder under the “My Files” category on the left. Your screenshots will be there.
How do I save a screenshot on my laptop?
To capture your entire screen and automatically save the screenshot, tap the Windows key + Print Screen key. Your screen will briefly go dim to indicate that you’ve just taken a screenshot, and the screenshot will be saved to the Pictures > Screenshots folder.
Taking a screenshot of the Windows 10 lock screen is just a matter of hitting the PrtScn button, but to get the login screen there’s a bit more work involved.
Windows 10 has a couple of screens to navigate through before getting to the desktop. First is the lock screen and then the login screen. Taking a screenshot of the lock screen is easy. While at the screen, just hit the Print Screen (PrtScr) key and after logging in, open the app you want to use the shot in and hit Ctrl + V to paste it in.
The Windows 10 Lock Screen features the time, date, and other data from the apps you choose.
But, you might have noticed you can’t do the same thing with the login screen where you enter your password or PIN. If you need to take a screenshot of the login screen, you can hack the Registry and use the Snipping Tool.
Take Screenshot Windows 10 Login Screen
Use the keyboard shortcut Windows Key + R to launch the Run box and type: regedit and click OK or hit Enter.
Next, navigate to the following path:
Then create a new key and name it utilman.exe.
Then within the utilman.exe key that you just made, create a new String Value and name it Debugger and set its value as:
Once you’ve configured the Registry correctly, hit the Windows Key + L to lock your PC. Then hit Enter or swipe up to reach the login screen. From there, select the Ease of Access button in the lower-right corner, and the Snipping Tool will launch. Set it to take a full Windows shot, and after that, make sure to hit the Copy Button or hit Ctrl + C to save it to the Clipboard.
Go ahead and log in, open Paint or another app you want to use, and hit Ctrl + V to paste it in.
Do you use the keyboard shortcuts or built-in utilities like the Snipping Tool for screenshots in Windows 10? Or, do you prefer using a third-party program like TechSmith Snagit? Let us know in the comment section below, or for further discussion on all things Windows and Microsoft, head to our Windows 10 Forums.
Need to capture a screenshot in Chrome? This handy hidden command will be your new best friend.
Android Intelligence Advice
- 3 clever new tricks to turn Google Docs.
- 12 Android settings that’ll strengthen.
- A hidden gem in Gboard on Android
- 6 secret settings for better browsing.
- Fly around your phone with Android’s.
- Android’s forgotten shortcut superpowers
- 7 smart steps to get your Android phone.
- 6 easy fixes for Android 12 annoyances
- The Android 12 Quick Settings trick.
- 11 advanced Assistant tricks you should.
Show More
For all of its features and web-spelunking utensils, Google’s Chrome browser is curiously missing one core function: the ability to capture a screenshot of a website you’re visiting.
Or so it would seem.
Here’s a little-known secret: Chrome actually has a supremely useful built-in command for capturing screenshots — no extensions required. It’s flexible, effective, and easy as can be to use. And it works on Windows, Mac, Chrome OS, or any desktop platform where Chrome is available.
The only problem? It’s hidden away in a place where no normal mortal would ever possibly find it.
Get ready to have your web-browsin’ brain blown.
[Get fresh tips and insight in your inbox every Friday with JR’s Android Intelligence newsletter. Exclusive extras await!]
Chrome’s hidden screenshot secret
Before we get into the meat of this spicy tech sandwich, a quick but important word of warning: This Chrome screenshot capturing method takes you into some areas of the browser where regular folk shouldn’t do much pokin’. The command is tucked away within the Chrome developer tools section, and there’s plenty of advanced stuff in there that could mess up your browsing session if you aren’t careful. Stick to this one specific set of instructions, though — and don’t poke or prod anywhere else in that area — and you oughta be fine.
Cool? Cool. All right — here’s the simple, hassle-free, and extension-free shortcut for capturing a screenshot in Chrome:
And that’s pretty much it. You’ll see a series of screenshot options appear in a panel on the right side of the screen. All that’s left is to figure out which one you want:
- If you want to capture a specific area of the current page, just hit Enter; that’ll select the default option of “Capture area screenshot,” which will then allow you to draw a box around the area you want to save.
- If you want to capture the entire page, as if you were scrolling from the very top to the very bottom, hit the down arrow once and select “Capture full size screenshot.”
- If you want to capture a screenshot only of the current visible area, hit the up arrow once; that’ll take you to the “Capture screenshot” option.
JR
There’s also a fourth option, “Capture node screenshot,” but you probably won’t want to mess with that.
Whatever screenshot you capture will show up as a regular image file download along the bottom of your browser window; you can then open the file by double-clicking it right there or by looking in your Chrome downloads folder.
An advanced Chrome screenshot option
So you really want to get wild, you say? Well, wrap your tech-titillated hindbrain around this: In addition to snagging regular screenshots using this method, you can also capture a screenshot of a site’s mobile interface right from your computer with almost the exact same set of steps.
Here’s the trick: Start with the same first step we just went over — Ctrl-Shift-I (or Cmd-Option-I on a Mac) — then pause for a second. See that bar at the top of the screen, directly beneath the address bar? Click on the area where it says “Responsive” and pick out whatever type of device you want from the list that pops up.
That’ll make the site you’re viewing look like it’s being viewed in the phone you selected. Nifty, no?
Once you’ve done that, just pick up where you left off and move on to the final two steps from above to capture and save your screenshot. The resulting image will be in the size and shape of the phone.
Ctrl-Shift-I, Ctrl-Shift-P, “screenshot.” Say it, sing it, commit it to memory — and forever change the way you capture screenshots from your Chrome desktop browser.
Sign up for my weekly newsletter to get more practical tips, personal recommendations, and plain-English perspective on the news that matters.
Contributing Editor JR Raphael serves up tasty morsels about the human side of technology. Hungry for more? Join him on Twitter or sign up for his weekly newsletter to get fresh tips and insight in your inbox every Friday.
Would you like to efficiently take screenshots on your Chromebook? Fortunately, the snipping tool is in Chrome OS allows you to take a partial screen shot of your Chromebook’s screen, which will later require you to crop it with an image-editing program.
In this tutorial on the Snipping Tool for Chrome, we’ll show you how to take full-screen recordings on your Chromebook, along with instructions on how to create partial screenshots and panes.
The Chromebook snipping tool
How to access the Snipping Tool Chrome Operating system, press Shift + Ctrl + Show Window. the Show window The key is the one with a stack of rectangles on it that represents a series of windows. It’s usually the 5th or 6th button on the top row, positioned between the Full screen and Brightness down Key. Some keyboards might have this F5 Key instead Show window.
As soon as you press the key combination, the screen will darken a little and the mouse pointer arrow will turn into a crosshair symbol for the snipping tool. A screenshot / record toolbar is also displayed at the bottom of the screen with the partial screen graph icon selected.
Click and drag the crosshairs over the area of the screen that you want to record. As soon as you release the button, the clipped screenshot will be displayed in a preview window in the lower right corner of the screen.
By default, the screenshot is saved in Downloads Folder. To view it, click the preview window, then double-click the highlighted file to open it.
Screenshot of a specific window
It is also possible to take a screenshot of a specific window in. close Chrome Operating system. To do this, press Ctrl + Alt + Show Window for the snipping tool on your Chromebook.
Again, the mouse pointer turns into a crosshair and the Screen Capture / Recording toolbar appears with the window icon selected.
When you move the mouse pointer over a window, it becomes brighter. Click on the window you want to capture and the snipping tool will automatically take a screenshot for you.
Chrome Keyboard shortcuts for the OS snipping tool
In summary, here are the keyboard shortcuts for taking screenshots in Chrome Operating system, including one to capture the entire screen:
| plot | Keyboard shortcut |
|---|---|
| Specific area snip | Shift + Ctrl + Show Window |
| Screenshot of a specific window | Ctrl + Alt + Show Window |
| Full window | Ctrl + show window |
There are many other practical ones Chrome OS keyboard shortcuts are available to make your Chromebook experience faster than ever.
Take screenshots Chrome SHE
Now that you know how to use the Snipping tool in. use Chrome OS for taking screenshots of selected areas and individual windows as well as the full screen. As mentioned above, the Downloads Folder contains the screenshots in the form of PNG files with a timestamp name. You can save them on a USB stick or share them using the usual data transfer methods.
If you are new to Chrome OS, its unique user interface, and Android-like workflow may seem daunting at first. Getting to know your new Chromebook is the best way to learn more about it.
A blog that offers how-to tech guides, tips and reviews about most useful things around.
How to Capture Screenshots in Chrome and Firefox Web Browser
- Get link
- Other Apps
We may sometimes need to capture the screenshot of a web page and save it for later offline viewing or just to see its look and feel on other devices. This feature could be really handy as one might be able to see how a particular web page would appear for a specific device which is not there with us.
On the OS level in case of Windows we can use “Windows Snipping Tool” and get the job done but that doesn’t allow us any further functionalities. The newer versions of Google Chrome and Firefox have inbuilt screenshot capabilities which enables the user to perform screen capture without using any add-ons or extensions.
In addition to this Chrome even allows us to add Device frames (in some devices only) while capturing the image for more realistic mobile screenshot view. As of now, the way Chrome facilitates us to take screenshots seems to be quite well but compared to Firefox its functionality seems to be less formidable. The simplicity of taking screenshots in Firefox seems to be much more pertinent and refined. Firefox allows the users to take full screen or customized screenshots just by simple right click with a well laid out interface. One can easily take a snapshot of a particular region or the entire page or as per the device resolution and save it locally or on the Firefox cloud servers. Saving on the cloud basically saves the image for a limed period of time, that too without the need to open any account.
Steps to Capture Screenshot in Google Chrome
1. Right click anywhere on the web page and select Inspect or go to 3-dot Menu ➜ More tools ➜ Developer tools.
2. This will open up the Developer Tools. Now toggle the Device Toolbar button so that it turns blue.
3. Now select any mobile device from the built-in list of device presets and adjust the zoom level and orientation.
4. Thereafter click the 3-dot menu in the right and select Capture screenshot or Capture full size screenshot from the same menu to save a device screenshot in PNG format.
5. One can even adjust the resolution by selection “Responsive” from the device list and can even add more devices by clicking the “Edit…” option form the drop-down menu.
| Steps to Capture Screenshot in Google Chrome |
Steps to Capture Screenshot in Firefox
1. Right click on the desired page and select Take a Screenshot.
2. This will open up an interface to capture the screen.
3. Here we can capture a particular part of a page or the entire page or just the visible part of the web page.
4. On selecting the desired choice of capturing the screen we can then copy it or download it locally or save it in the Firefox cloud for a temporary period of time.
5. For viewing the web page as per the device frame, we need to open the “Responsive Design Mode” panel. For this select Inspect Element by right clicking anywhere on the web page. This will open up the Toggle Tools panel.
6. On the Toggle Tools select the “Responsive Design Mode” button which is located on the right side, so that it turns blue.
(“Responsive Design Mode” panel can also be opened directly by going to Menu ➜ Web Developer ➜ Select Responsive Design Mode)
7. Now select the desired device from the list of device presets and adjust the orientation.
8. Thereafter click the Camera icon on the right and capture the screenshot. Rest the other things are quite similar to Google Chrome.
9. In case the mobile or tablet view is not correct just refresh the page once. For adding further devices select Edit list. from the drop-down device listing and select more devices or add a custom device.
| Steps to Capture Screenshot in Firefox |
Conclusion
Thus, there is no denying the fact that in terms of practicality the screenshot feature now provided in Firefox seems to be quite useful & user-friendly with Chrome being lacking a bit in some cases. However, things might change in future as further improvements or updates are always developed to ameliorate the browser’s functionalities.
If you were lucky enough to get your hands on one of Google’s CR-48 laptops or happen to be running Chrome OS in a virtual machine, chances are that you’ve wanted to take a screenshot for whatever reason. If this is the case and you don’t know how to take screenshots or where the screenshots are saved, check out the instructions below.
Software/Hardware used: Google Chrome OS running on CR-48 laptop.
How to Take the Screenshot
Taking a screenshot in Chrome OS is as easy as taking a screenshot with Windows or Mac OS, simply press the following key combination to take a snapshot of your entire screen.
You will notice that not much happens, follow the instructions in the section below to access the screenshots you’ve taken.
Where is the Screenshot Stored?
Although it seems that there’s no real internal storage on your Chrome OS machine, there is.
1. To access saved screenshots, press the Ctrl + O keys to open the Downloads folder.
2. When the Downloads box appears, click the Screenshots folder.
There you will find the screenshots you took. Click on the screenshot you wish to view and it will open in a separate tab.
3. To delete a screenshot, click the small arrow on the right of the file name and click Delete from the menu.
I suspect that future versions of Chrome OS will allow you to email, upload, and perform other functions with the files stored locally. The best way to get that file out of the Chrome computer is to email it. Simply click the Attach link in Gmail and you will be able to access the local directory where the file is stored.
If you have any comments or questions please post them below.
If you know what Chrome Incognito mode is, you might probably also know that you cannot take screenshots in this mode. So, suppose you are browsing something privately and suddenly want to save something on your phone in the form of a screenshot, what will you do? Well, it is not possible with default settings, but still, you can do this. Here I am going to tell you the trick to take screenshots in Chrome Incognito mode.
Take Screenshots in Chrome Incognito Mode
Table of Contents
Google Chrome doesn’t let you take screenshots in Incognito due to security reasons. But there is an experimental feature that Google might soon launch, and this will allow you to take screenshots in this mode as well. Either you can use a third-party app to do so.
1. Use Chrome Flags
You can use Chrome flags to take screenshots in Incognito mode. However, you should note that this is an experimental feature and might not work on some phones. Google will soon release it for all users. Here’s how to enable this:
1. Open Google Chrome on your phone.
2. Now type Chrome://flags in the address bar and hit enter.
3. On the flags page, search for “Incognito” by entering the same in the search box.
4. When “Incognito Screenshot” appears in the results, tap on the drop-down menu below.
5. From the options, select “Enabled” and then tap on “Relaunch” at the bottom.
That’s it. Chrome will now restart and your setting will be saved.
Now, when you open Chrome incognito mode and try to take a screenshot, it will be captured just like the normal mode.
If you want to take a full-page screenshot or scrolling screenshot, you will see an icon for the same, if your phone has it. It was there on our Samsung Galaxy A31 and we were able to take scrolling screenshots too.
Take Screenshot in Firefox Private Mode
If you use the Firefox browser, you might know it has a “Private” mode just like Chrome’s Incognito. By default, it also doesn’t allow taking screenshots, but you can enable a setting to do so. Here’s how:
1. Open the Firefox browser on your phone.
2. Now, head to “Settings” by tapping on the three dots at the bottom right corner.
3. Here look for “Private browsing” under privacy and security and tap on it.
4. On the next page, switch on the toggle next to “Allow screenshots in private browsing”.
That’s it, now you will be able to take screenshots in Firefox private browsing mode.
Bonus: Use Third-party App
If the Chrome flag feature doesn’t work on your phone, you should use a third-party app to take screenshots on any app including private browsing modes. Here I am going to use AZ Screen Recorder to take screenshots in Chrome incognito mode. It is a free app and easy to use.
1. Download and install AZ Screen Recorder on your phone.
2. Now, open and allow it to draw over other apps.
3. Go to the “screenshot” icon and then give it storage access by tapping on “Turn it on” and then allow.
4. Now, you can open Chrome incognito mode and you will see a small AZ Screen Recorder icon on the right side. Tap on it to open the menu.
5. Then tap on the little setting icon and enable the screenshot option from the pop-up.
Now, you can take screenshots by tapping on the AZ Screen Recorder’s camera icon on the left side. That’s all.
This was all about taking screenshots in Chrome Incognito mode and on other browsers on Android. If you want to take screenshots on any other app that doesn’t allow this, you can read our guide on “Take Screenshot If App Doesn’t Allow“.
For more such tips and tricks, stay tuned!
You can also follow us for instant tech news at Google News or for tips and tricks, smartphones & gadgets reviews, join GadgetsToUse Telegram Group, or for the latest review videos subscribe GadgetsToUse Youtube Channel.
When taking a screenshot using Selenium Webdriver on windows with python, the screenshot is saved directly to the path of the program, is there a way to save the .png file to a specific directory?
13 Answers 13
Use driver.save_screenshot(‘/path/to/file’) or driver.get_screenshot_as_file(‘/path/to/file’) :
Inspired from this thread (same question for Java): Take a screenshot with Selenium WebDriver
Yes, we have a way to get screenshot extension of .png using python webdriver
use below code if you working in python webriver.it is very simple.
This will take screenshot and place it in a directory of a chosen name.
Here they asked a similar question, and the answer seems more complete, I leave the source:
Sure it isn’t actual right now but I faced this issue also and my way: Looks like ‘save_screenshot’ have some troubles with creating files with space in name same time as I added randomization to filenames for escaping override.
Here I got method to clean my filename of whitespaces (How do I replace whitespaces with underscore and vice versa?):
You can use below function for relative path as absolute path is not a good idea to add in script
Use code as below :
make sure you create the folder where the .py file is present.
os.path.join also prevent you to run your script in cross-platform like: UNIX and windows. It will generate path separator as per OS at runtime. os.sep is similar like File.separtor in java
it will work , please try.
Have a look on the below python script to take snap of FB homepage by using selenium package of Chrome web driver.
Script:
It’s quite simple, plz try this:
I understand you are looking for an answer in python, but here is how one would do it in ruby..
If that only works by saving in current directory only.. I would first assign the image to a variable and then save that variable to disk as a PNG file.
Although there are many parallels between Chrome OS and either Android or Windows, users have a number of choices when it comes to taking a screenshot. For the most part, those are keyboard shortcuts that allow for the quick capturing of whatever’s on display, with helpful alternatives for when a specific area, window, or app needs to be captured.
The Chrome browser itself has some additional methods on offer too, albeit through less conventional means for those willing to risk accidentally altering their browsing experience, expanding on those already readily available. Better still, those can readily be applied across the board, on pretty much any gadget that isn’t a mobile device.
The process of using those is relatively straightforward too. So users really do have a plethora of options to choose from with Google’s browser and operating system.
Shortcuts for your Chromebook
As is the case with every Chrome OS keyboard shortcut walkthrough, the place to start is with the overall shortcut guide built directly into the operating system. That is easily accessed by holding down the “Ctrl” and “Alt” keys and then pressing the “?” key and shortcuts for just about anything can be found there.
That shortcut is really one that just about anybody using a Chrome OS gadget should commit to memory.
Now, there are a total of three ways to take a screenshot on a Chromebook using the keyboard, each of which centers around the key featuring the overview icon (a square with vertical lines). Each also saves by default to the “Downloads” folder in the “My Files” directory within the “Files” application.
The first way to take a screenshot is best for when taking a snapshot of the entire screen is required either for editing later or for use as is. Holding “Ctrl” and pressing the overview key will accomplish that task.
A user can also snap a screenshot of an entire window, as it’s displayed on-screen. Holding down the “Ctrl” and “Alt” keys before pressing the overview key calls forward a new cursor type, shaped like crosshairs. That can be used to highlight the desired window to be captured but it’s worth noting that windows and apps won’t be able to be called forward or organized after pressing the keys. So it’s a good idea to have everything lined up for capture before instigating the screenshot.
Last but not least, it is possible to take a screenshot of a chosen segment of what’s being shown on the screen — referred to as a ‘partial’ screenshot. By pressing “Ctrl” and “Shift” before pressing the overview key, the same crosshair cursor as before will appear. From there, holding down the mouse button while dragging the cursor around the screen will select the area to be captured. Releasing the mouse finalizes the capture.
Chrome offers several ways to capture a screenshot, but extensions add even more features
When it comes to taking screenshots on Chrome, no single set of instructions will work for every user.
Unfortunately, there is no universal way to take a screenshot, and the controls to execute will differ from machine to machine. What’s more, some devices have multiple ways to capture the whole screen and the thing you’re taking a screenshot of might also have its own method. Google Chrome, for instance, has several handy shortcuts to capture the entire screen.
- Take Screenshots
- How to screenshot in Windows 10
- Popular Chrome and Firefox extensions leak sensitive user information to third-party resellers
Also worth noting that not all methods of screenshots are free: Chrome comes with existing tools to execute one and those are free and pre-installed, but they’re not the simplest tools to use. Some trial and error may be needed if you opt for them, but the functions are not too dissimilar to those found on Windows 10.
Browser extensions do have plenty of choices, however, with most of them housing additional tools to edit and tweak your images. We’ve curated the best, free screenshot extension available on Chrome, so you don’t have to.
Take a screenshot in Chrome without an extension
Chrome’s native screenshot tools are incredibly easy to use, but also incredibly convoluted. The average user may struggle to find where they’re located or even how they can call them up. They’re actually housed in Chrome’s developer tools panel, so users will need to search for them.
To begin, start by opening the devs tools within Chrome with one of these three options:
1. Clicking on the three dots in the browser’s top right corner. Then clicking on “More tools”, then “Developer tools”.
2. Using the keyboard shortcut: Control-Shift-I in Windows or Linux, or Command-Option-I on a Mac.
3. Or right-clicking anywhere on the web page and selecting “Inspect” in the pop-up window.
Once you’ve called up the developer tools panel, next you’ll open up the command menu. To do this, you’ll press Control-Shift-P in Windows or Linux, or Command-Shift-P on a Mac.
AI powered automation helping your business assure app performance
Free Download
Now type “screenshot” into the command menu, which will present you four screenshot options.
- “Capture screenshot” takes a screenshot of only what’s visible on your screen and nothing more.
- “Capture full size screenshot” takes a screen grab of the entire webpage you’re on from top to bottom — even beyond what you can immediately see on your screen.
- “Capture area screenshot” allows you to draw a box around the area you want a screenshot of.
- “Capture node screenshot” captures HTML/DOM elements on the page, which most people will never need to do.
Once you choose the appropriate option, the screenshot should save to your computer automatically. If so, it’ll show up as a download along the bottom of your browser window.
Like any download, you can open it by clicking the file at the bottom of the Chrome browser or double-clicking the file in your downloads folder. And just like any image, you can use an editor to crop it.
Though these steps aren’t overly complex, you may still prefer an even simpler method: a browser extension.
The best extensions for taking screenshots in Chrome
A browser extension is a piece of software you add to your browser to customize it. Since Chrome is the most popular browser, it has thousands of available extensions. Dozens of these extensions are simply for taking screenshots in Chrome.
Here are five popular screenshot extensions and what they’re best used for:
Full Page Screen Capture
There’s a reason this one has over 4 million users and nearly a five-star rating. For one thing, it’s free. Plus, it’s an easy-to-use extension that lets you capture the entire webpage you’re on with just one click.
Click on the extension’s icon at the top of your browser window, and the extension will capture the page as it scrolls from top to bottom. The software can handle complex pages, including inner scrollable elements as well as embedded iframes.
When the extension is done scrolling, it’ll open a new tab where you can save your screenshot in various file formats, including JPEG, PNG or PDF. If you want a PDF, you can also adjust the PDF page size.
Awesome Screenshot
This is a highly rated extension is free and has lots of useful features, including:
- Capturing an entire webpage or just part of it
- Support for PNG images
- Adding comments or annotations to your screenshots
- Blurring out any sensitive information you want to hide
- Making MP4 video recordings of your computer screen with your narration
Once you complete your screenshot or recording, you can upload it directly to various project management tools, like Jira or Trello. You can also upload your screenshot to a Google drive in the cloud.
Nimbus Screenshot & Screen Video Recorder
This is a sophisticated browser extension with a number of advanced tools, and it’s basic version absolutely free.
Its key free features include:
- Capturing an entire web page or part of it
- Performing a “select and scroll” capture where you select a part of the page and scroll down to capture more of it
- Capturing delayed screenshots
- Capturing a screen in a mobile layout
- Adding a watermark
- Recording a video from your screen, whether it’s of a browser tab or your entire desktop
There is a premium version that costs $24.99 per year adds a few extra useful features, including:
- Converting your screen recording to a GIF
- Adding a watermark to your screenshots
- Cropping and trimming your video
- Uploading videos to Google Drive or Dropbox
- Publishing screencasts to YouTube
It also runs offline, not requiring internet access.
Fireshot
This is a partly free extension that also has an upgraded version you can pay for.
As with most of these other extensions, you can capture the entire webpage or just the visible part of it. Or, by using your cursor, you can select a part of the webpage to capture.
This Google-inspired tool will let you capture, share, and even collaborate on screenshots without ever leaving your browser.
Android Intelligence Advice
- 3 clever new tricks to turn Google Docs.
- 12 Android settings that’ll strengthen.
- A hidden gem in Gboard on Android
- 6 secret settings for better browsing.
- Fly around your phone with Android’s.
- Android’s forgotten shortcut superpowers
- 7 smart steps to get your Android phone.
- 6 easy fixes for Android 12 annoyances
- The Android 12 Quick Settings trick.
- 11 advanced Assistant tricks you should.
Show More
I don’t know about you, but I seem to snag screenshots approximately 4,977 times a day. And with rare exception, believe it or not, I’m not doing it just for giggles (titter-inducing as the timeless art of screenshotting can be). No sirree: I’m usually aiming to show some part of a website or process to someone else — a reader, a colleague, a kindly kookaburra, or whatever other creature I happen to be conferring with at any given moment.
On Android, the screenshot-sharing sequence is pretty painless: With recent Android versions, right after you capture a screenshot, you see a single-tap option to edit and mark it up as needed — and from there, it’s just one more fast tap to send the final image anywhere you want.
But in Chrome on the desktop front, what should be a quick ‘n’ simple task ends up being surprisingly complex. Sure, the browser’s got all sorts of systems for saving screenshots — including a nifty native screenshot tool not many folks know about — but it’s always an extra step from there to annotate the image, yet another step to save it, and an incredibly clunky process to then find the file and pull it over into whatever messaging or email app you’re ultimately using to share it.
Well, my productivity-seekin’ soul mate, I’ve got a much more optimal option for your consideration. It’s a relatively new system called Snippyly. And if you can forgive the silly, damn-near-impossible to spell or pronounce name, it’s something that has the potential to save you time, simplify your workflow, and make you meaningfully more efficient. (As a bonus, it’s also just kinda fun to use.)
So here’s how it works: Once you come to terms with the name Snippyly and install the Snippyly extension into Chrome on your computer — any kind of computer, running any ol’ operating system you like — you can just click its icon (within the puzzle-shaped extensions menu in Chrome’s upper-right corner) or use the Ctrl-Shift-Y keyboard shortcut to capture a screenshot of any page you’re viewing, anytime. In a split second, you’ll find yourself in Snippyly’s editing tool, in a new tab right next to your original.
From there, you can crop, add rectangles and arrows, and add text onto the image as you see fit. You can also hide portions of the page by clicking the “Hide” option and then drawing a box over whatever area you want to obscure. You can even add lengthy comments, which appear as animated exclamation points and expand into interactive discussion threads when clicked.
That leads us right into Snippyly’s true power and what makes it so exceptional, and that’s the way it empowers you to share any screenshot you save and turn it into an interactive canvas — no downloading, no attaching, and no fussing required. Instead of doing the typical save-and-reupload dance, you just click the big red Share button in Snippyly’s upper-right corner, say “Snippyly” three times out loud (optional but recommended if you want to sound like a total nit), and then find yourself facing the choice to create either an edit-access link or a view-access link.
Those options do exactly what you’d expect — and exactly what you’re used to seeing in Google Docs and other such collaboration-oriented interfaces: The edit-access link allows your recipient(s) to mark up, change, and comment on the image, while the view-access link allows them only to see and comment on it. Either way you go, you get a short Snippyly link copied onto your system clipboard and ready to paste anywhere you want for anyone to use.
Easy peasy, right? And here’s the especially cool part: If you go with the edit-access option, you’ll give yourself a full-fledged real-time collaboration environment — where everyone with the link can work on the screenshot at the same time and see any other progress that’s being made as it happens. It’s almost like working together with someone in Docs, only in a setting that’s specifically optimized for screenshot-related work and communication.
The interesting footnote to this is that the inspiration for the tool apparently comes from Google itself: Its creators are two former Google product managers who say they found themselves missing an internal tool within Google that worked almost exactly this same way. In fact, they describe Snippyly as an “external version of Google’s most used internal productivity tool.” And now, you can use it, too.
Snippyly has some advanced options beyond the basics, including a three-second delay for screenshot capturing (in case you need to get something on the page ready before having the image snapped) as well as the ability to grab full-page, scrolling screenshots. It’s free for regular use — which includes unlimited screenshot capturing, editing, and sharing — and it has an optional $48-a-year Plus plan and $60-per-user-per-year Enterprise plan for advanced access control and other team-friendly features.
As for the ever-important area of privacy, the Snippyly extension doesn’t demand any permissions or special access at all. You’re never required to sign in or provide any personal information (though creating an account with the service will allow you to manage your screenshots in a centralized area, which could be helpful if you end up using it a lot). Your data is never sold or shared in any shady way, either, and you’re always able to delete any screenshots you capture whenever you want.
All in all, it’s a thoughtfully assembled package that’s bound to make you more productive. And that, if you ask me, is a pretty powerful proposition to ponder.
Want even more productivity-boosting powers? Sign up for my weekly newsletter to get next-level tips delivered to your inbox every Friday.
Contributing Editor JR Raphael serves up tasty morsels about the human side of technology. Hungry for more? Join him on Twitter or sign up for his weekly newsletter to get fresh tips and insight in your inbox every Friday.
The process for taking screenshots may vary on Chromebook than doing it on a Windows PC or Mac, but it’s not drastically different. You might not be sure how to do this in Chrome OS, because even the best of them don’t have a print screen key, but it’s fairly easy to learn.
Whether you want to get a part or the entire screen completely, the instructions below will show you how to do it on Chromebook.
Note: Depends on the model and manufacturer for Chromebook , the keys we will refer to may appear in different locations on the keyboard.
- using the keyboard
- Using the side buttons
- Using Stylus
- Using screenshot apps and extensions
- Where do I find my screenshots on a Chromebook?
using the keyboard
To take a screenshot on Chromebook There are two quick keyboard tips you can use, both of which require the Switch Window (or Show Windows) key to work. This button is usually found in the top row.
to get Full Screenshots , keep pressing the . key Ctrl + Switch Window.
If you only want a portion of the screen, press and hold the . key Ctrl + Shift + Switch Window , then click and drag the pointer to select the area you want to capture.
For external consoles, the combinations are different:
- Full screenshots: Ctrl + F5
- Partial shots: Ctrl+Shift+F5
In each case, a small confirmation window will appear briefly on your screen letting you know that the screenshot has been taken successfully.
Using the side buttons
If your Chromebook is in tablet mode, you can capture A screen shot By turning the keyboard back. However, there is an easier way to do it, just like on an Android phone.
Press the Power and Volume Down buttons simultaneously to grab the screen. This will capture the entire screen, so if you want to capture a portion of it, use the keyboard combinations described in Method XNUMX.
Note: The orientation of the volume buttons does not change with the orientation of the screen, so you always need to know which side the volume down button is facing.
Using Stylus
contain some Chromebooks , such as a Pixelbook or Samsung Chromebook Plus (or Pro), on a stylus pen. You can use it as an additional option to take screenshots with it.
The stylus offers a list of tools for you to take a screenshot of a specific part of the screen or the entire screen. It also allows you to comment on Screenshots Your own.
Using screenshot apps and extensions
If you want additional functionality, you can choose a screenshot app or extension from the Google Web Chrome Store.
Some of the best screenshot apps available include FireShot and Lightshot and Awesome Screenshot و SuperChrome و 1Click Screenshot.
It may help to use plugins, such as Nimbus Screenshot and Screen Video Recorder , on taking a screenshot on your Chromebook. It not only allows you to capture the screen but also record a video of it. If you want to take a screenshot of a particular item in the list, it allows you to delay the screen grab.
Where do I find my screenshots on a Chromebook?
The Downloads folder in the Files app is on Chromebook It is the default location where screenshots are saved locally. You can find the screenshot you want based on the date it was taken. You can also edit it by cropping, adding filters, or other editing options.
To permanently backup screenshots on Chromebook, Back it up on Google Drive or upload to Google Photos.
Previous Post
Next Post
Tip / Trick
Full page screenshots can come quite in handy especially if you want to use a particular site as a reference for your own site’s layout and design. It can also be used to quickly save a web article as an image instead of a PDF document. Anyways, it doesn’t really matter what your reason is for taking a full page screenshot. What matters is that you know how to do it properly. Apparently, you can’t rely on the default print screen function of your computer because it can only capture the visible area of a page or site.
As for those who are using Chrome, you can easily take a full page screenshot of any page for as long as you follow the guide below. You can even edit the screenshot right before you save it to your computer.
Capture and edit full page screenshots on Chrome
- On your Chrome browser, go to the Web Store then download and install the extension called “Webpage Screenshot”.
- Once installed, the extension will add a small icon on the right side of your address bar (see image below).
- Now, go to any website or page that you want. To take a full page screenshot of it, just click the Webpage Screenshot icon on your browser and then select “All page screenshot”.
- Wait for a few seconds while the extension does its work. Once it’s done, it will open your full page screenshot on a new window. This is where you can preview and edit your screenshot before saving it to your computer.
- To edit your screenshot, just use any of the available tools that are listed on the toolbar. Speaking of which, you can crop the screenshot by highlighting the section that you wish to keep. You can also insert some texts, lines, custom shapes, etc.
- Once you’re done editing your screenshot, just click the “Save” button that’s located on the right corner of the toolbar. You will then be prompted to download and save the edited screenshot to your computer.
If you want, you can also opt to save the screenshot directly to your Google Drive or Dropbox. You can also share it online by sending it private share link to your contacts via email, Facebook, Twitter, etc.
Nishant Choudhary
Posted On: October 1, 2020
97290 Views
11 Min Read
- Home
- >
- Blog
- >
- How To Take A Screenshot Using Python & Selenium?
This article is a part of our Content Hub. For more in-depth resources, check out our content hub on Selenium Python Tutorial.
The goto software framework for any web developer looking for an open-source, free test automation tool is Selenium. It is used with various programming languages, including Java, Python, PHP, Perl, and C#. Selenium can also be used as a web-scraping tool or to create a human-replica bot to automate social-media or even test PDF files! Geeks at Google & Thoughtworks are highly credited for its development and maintenance.
In this Python Selenium screenshot tutorial, we are going to explore different ways of taking screenshots using Selenium’s Python bindings. Before we hop-on to capturing Python Selenium screenshots, let’s first acquaint ourselves with Selenium Python bindings.
What Is Selenium Python Bindings?
Selenium has different components; we have Selenium WebDriver, Selenium IDE, and Selenium Grid. Selenium Python bindings is an API interface to use Python with Selenium WebDriver for writing functional/acceptance tests. We shall be using these Python bindings for Selenium to capture full page screenshots, HTML element-specific screenshots and save it in our desired location.
Installing Dependencies
Before we learn how to use Selenium Python for taking screenshots, we need to install some dependencies. Below is a list of all that you need in your machine-
- Python
- Pip
- Selenium Python bindings
- GeckoDriver
- ChromeDriver
- For learning how to use Selenium Python, you must have Python & pip installed on your system or server. Python comes pre-installed with Linux & Mac systems. For Windows, you may download the Python installer from here.
Note: Python 2 is redundant now. So, if your Linux or Mac system is having the older version, you may consider updating them to the latest stable versions.You would also need pip installed on your system.pip is a tool or a package manager tool for Python and it comes pre-installed with the latest versions (as you can see in the image above). You can check if it is existing in your system by running following command in the command prompt-
If you get a response like below from pip, you are good to go.
If it displays something like this-
Then you have to download this get-pip.py file to any location in your system, but you should have the path to the file. Remember, you only have to do this if pip is not installed in your system.
Next, run this command to install pip.
If you aren’t in the directory as that of the downloaded file, replace the file name in the command given above with the full path to the file location.
Now try the command pip help again, you should see the screen we shared earlier.
Next, we install Selenium Python bindings using pip. Then, you will have to run this command-
pip install selenium
This installs Selenium’s Python bindings in your system. Alternatively, if you don’t like this installation mechanism, you may first download the Selenium-Python source distribution from Pypi. Unarchive it. Once you do this, run the following command to install the bindings –
python setup.py install
Again, remember you only need this if you don’t want to install using pip. Also, if you are not in the same folder where you have archived the downloaded Selenium Python bindings then replace setup.py with full path to setup.py.
Next, we need a driver to proceed with clicking Python Selenium screenshots of webpages.You can choose any browser of your choice, and you can download the drivers from the following links :
- Chrome
- Firefox
- Edge
- Internet Explorer
For me, taking screenshots is an essential, daily practice. Sometimes it’s easier to show someone rather than try to explain it! Fortunately, taking a screenshot on your Chromebook is built-in and super easy!
Capture your entire screen
If you want to capture everything on your screen, all you need to do is press ctrl + overview key (the funky key on the top row of your keyboard where F4 or F5 would normally be). As soon as you press this key combination you should see a notification appear in the bottom right corner of your screen that confirms your success!
Tip: If you don’t see a confirmation, make sure notifications are enabled.
Capture a specific portion of your screen
I’ll be honest – I rarely take a screenshot of my entire screen. Most of the time I want to capture a specific portion of my screen. To capture a specific area of your screen, press ctrl + shift + switcher. You will notice your screen dim and your cursor will turn into a cross-hair. Click and drag to select the area of the screen you wish to capture.
How to find and use your screenshot
Ok, great! You took a screenshot…but where did it go? Screenshots (and any other file you download) are automatically saved to your download folder which you can access from the Files app. Just click the launcher (circle in the bottom left corner of your screen) and search for “files.”
Tip: I “pin” the files app to my shelf for easy access. To do this, right-click on the app and look for “pin.” This will permanently place the files app icon on the shelf at the bottom of your Chromebook screen.
You took a screenshot…now what? 🤷🏼♀️
For quick things, like capturing a confirmation number or documenting an error message, all you need is the screenshot. Sometimes, however, you may want to annotate or markup your screenshot. 🖍️
I do this all the time for my blog posts, presentations, and even my book!
There are two different tools that I use for annotating my screenshots:
- Google Keep – for quick annotation, Google Keep has everything you need. I just upload my screenshot and use the annotation features to draw on top of the image. Download the file and you are ready to go!
- Chrome Canvas – if you need more precise drawing tools, check out Chrome Canvas which offers more writing tools, pressure sensitivity, and layering.
Tip: if you have a Chromebook with an integrated pen (like the Pixelbook or Chromebook Flip), you can specify a default note-taking app by visiting Chrome Settings and navigating to “device.”
As a former high school science teacher, I understand the power of showing something rather than trying to explain it. That’s why screenshots are so useful. If a picture is worth a 1,000 words, a screenshot is worth 10,000!
BONUS: if you are a teacher, check out this post I wrote with 20 different ways you can use screenshots and screencasts in the classroom.
Puppeteer the node.js library that allows you to control Google’s Chrome or Chromium browser, can be used for taking screenshots of websites. If you are extracting data from web pages, you may want to verify the data later. Using screenshots is a great solution to check if the data extracted is correct. At times you may scrape a page but fail to get the data, you can take a screenshot to know why.
In this post, we will show you how to capture screenshots based on different device sizes and screen resolutions.
The quick answer:
For those among you who would like to know more, keep reading.
Required Tools
If you already know how to install Puppeteer, please skip to the next section.
You need to first install node.js and write the code to automate and capture screenshots in JavaScript. Puppeteer requires at least Node v7.6.0 or greater but for this tutorial, we will go with Node v9.0.0.
Installing Node.js
Linux
You can head over to Nodesource and choose the distribution you want. Here are the steps to install node.js in Ubuntu 16.04:
- Open a terminal run – sudo apt install curl in case it’s not installed.
Then run – curl -sL | sudo -E bash –
Once that’s done, install node.js by running, sudo apt install nodejs . This will automatically install npm.
Windows and Mac
To install node.js in Windows or Mac, download the package for your OS from Nodes JS’s website
Generating Screenshots with Puppeteer
Now that we have node.js installed, let’s create a directory called ui_testing and open the command prompt or terminal. Go into the directory and run the command:
Hit enter for each question asked. This will create a file called package.json inside the directory.
Next, we’ll have to run the command to install puppeteer:
The installation could take a couple of minutes. This is because unlike most other frameworks for headless testing, Puppeteer automatically downloads a version of Chromium for you (about 130mb). That’s actually a great feature since you won’t have to set up a local instance of Chrome manually.
Taking a Screenshot
Capturing a screenshot is very simple. We’ll start with the most basic one and build on that. The script below will start a browser, open a page, and take a screenshot of all of its contents.
Running the script
To run our puppeteer script you must save the code (in our case test.js) inside the directory you have created and run the file with node:
I f there are no errors you should have an image file in your working directory.
The GIF above shows how the screenshot is captured. We have named our screenshot as image.jpg in the code. You’ll find it in the directory once the Chromium browser is closed.
When taking the screenshot, Puppeteer will simulate a browser window with the default width. If the page we are testing is responsive, we’ll get a snapshot of what it looks like at that viewport. Puppeteer sets the default page size to 800 x 600, which defines the screenshot size, but we can change the dimension in setViewport method like this:
If you want to run it in headless mode, you need to remove the line ();
By default, Puppeteer saves images as PNG. You can change it to jpeg format by adding it in type:
Taking the screenshot of the entire page
This script will generate the screenshot of the entire page. We have added the option fullPage:true
Taking the screenshot of a specific area
If you only need the screenshot of a specific area you can insert the x and y coordinates and the width and height of the image:
Taking a screenshot at a particular viewport
Sometimes you want to see how your website looks on certain screen sizes. Puppeteer helps you mimic those screen sizes so that you can test how your website looks on those screens.
Here is an example to take screenshots at 1366×768 which is still widely used in older computers:
You can change the width and the height of the viewport to your desired resolution if you want to test it on other screen sizes. We have provided example codes of some popular smartphones below:
iPhone 8
Google Pixel 2
Learn how to scrape data from websites using Puppeteer and Node.js
If you are looking for a way to emulate screenshots and automate your browser tests, Puppeteer is probably the most user-friendly tool out there. It has a very well structured API and has a documentation that is easy to follow. Since Puppeteer is based on Headless Chrome, you won’t be able to test any browsers other than Chrome. For automating other platforms you might want to try the Selenium framework. You can check out our blog:
Web Scraping Tutorial using Selenium:
We can help with your data or automation needs
Turn the Internet into meaningful, structured and usable data
CloudApp’s Screenshot Tool and Screen Recorder is available for Mac, Windows, iOS and Chrome. Downloading the tool is quick and easy. Simply download the app above, access it from the Apple Store for Mac and iOS, for PC from the Microsoft Windows Store, or go to the Chrome Webstore and add the extension to Chrome.
A Simple yet Powerful Screenshot Tool
A Screenshot Tool for Mac and Windows
CloudApp is also a Video Recorder with Webcam
Supercharge Your Screenshots with Annotation
How to Download CloudApp’s Screenshot App
How to Capture a Screenshot with CloudApp
Put the Power of CloudApp on Your iPhone or Chrome
It’s Time to Embrace Your Role as an Industry Leader
Screenshot Software FAQs
If you want to use an app that gives you more features, CloudApp is the best screenshot tool or screenshot app for screenshots. Why? CloudApp enables you to take free screen recordings, screenshots, GIF-s and more so you can collaborate easily with your teams.
To capture a screenshot using CloudApp, follow these steps:
Download and install CloudApp
Through your web browser’s download folder, select and download the CloudApp.msi file
If CloudApp does not immediately open, search for and select “CloudApp”
Create an account when prompted and enjoy a free 14-day trial
Choose from “camera,” “GIF”, and “HD” icons to create screenshots, GIFs or videos
Click and drag on your screen to select the area that will be included in the screenshot
The best way on Windows is to use the print screen button. The print screen button (PrtSc) is located on the top right corner of your keyboard. Just press the Windows button on your keyboard while holding down the print screen button.
If you want to use an app that gives you more features, CloudApp is the best screenshot tool or screenshot app for screenshots. Why? CloudApp enables you to take free screen recordings, screenshots, GIF-s and more so you can collaborate easily with your teams.
To capture a screenshot using CloudApp, follow these steps:
Download and install CloudApp
Through your web browser’s download folder, select and download the CloudApp.msi file
If CloudApp does not immediately open, search for and select “CloudApp”
Create an account when prompted and enjoy a free 14-day trial
Choose from “camera,” “GIF”, and “HD” icons to create screenshots, GIFs or videos
Click and drag on your screen to select the area that will be included in the screenshot
If you want to use an app that gives you the most features, CloudApp is the best screenshot tool or screenshot app for screenshots. Why? CloudApp enables you to take free screen recordings, screenshots, GIF-s and more so you can collaborate easily with your teams.
To capture a screenshot using CloudApp, follow these steps:
The screenshot feature lets you automatically save screenshots and screen recordings to your Dropbox account. Once you turn this feature on:
- Screenshots and screen recordings automatically save to a folder in your account called Screenshots
- A link to the screenshot or screen recording is automatically copied for easy sharing
This feature is only available on Mac and Windows computers, except Windows in S mode.
Note: If you’re on macOS Catalina 10.15 or higher, you’ll see a notification that says, “Dropbox would like to access files in your Desktop folder.” Click OK to ensure Dropbox saves your screenshots.
How to save screenshots and screen recordings to Dropbox on Mac and Windows computers
To automatically save screenshots and screen recordings to your Dropbox account on a Mac or Windows computer:
- Make sure the Dropbox desktop application is installed.
- Open your Dropbox desktop app preferences.
- Click the Backups tab.
- Check the box next to Share screenshots and screen recordings using Dropbox.
- Note: If you’re using a Mac computer, your screenshots must be set to save to your desktop for this feature to work. Choose where your screenshots save on a Mac.
When you take a screenshot, a link to that screenshot will be copied. You can paste the link where you’d like to share it.
How to choose if screenshots and screen recordings save to your business or personal account
If you have a Dropbox business account, and you’ve connected it to your personal account, and linked them both to your computer, you can choose which account your screenshots and screen recordings save to. To do so, use the dropdown menu next to the Share screenshots and screen recordings using Dropbox checkbox.
Can I save screenshots to Dropbox on a mobile device?
The screenshot feature isn’t available on mobile devices. As an alternative, you can use the camera uploads feature to automatically upload your camera roll to Dropbox.
Praveen Mishra
Posted On: June 11, 2021
106259 Views
18 Min Read
- Home
- >
- Blog
- >
- How To Take Screenshots In Selenium WebDriver Using JavaScript
This article is a part of our Content Hub. For more in-depth resources, check out our content hub on Selenium JavaScript Tutorial.
While performing automation testing, even the most reliable of test cases might face roadblocks as the action progresses. A failed test case, for instance, is a sure sign that something has gone wrong. Test failure can either be due to some issue in the script or due to some issue in the AUT (Application Under Test). What’s even more challenging is debugging such deviation scenarios for the development as well as the testing teams. Capturing screenshots of the failed scenarios can be of great help to figure out where things went wrong. Screenshots in Selenium should be the way forward to make the most out of Selenium automation testing. In this blog, we deep dive into how to take screenshots in Selenium WebDriver using JavaScript.
Source
Selenium WebDriver has built-in functionality to capture screenshots of the page, and it’s quite easy to use. It uses the TakesScreenshot interface for capturing the respective screenshot. This Selenium JavaScript tutorial shows the usage of TakesScreenshot method to take screenshots of a page and particular element. It is demonstrated with a step-by-step process that is executed over cloud-based Selenium Grid using Selenium automation testing.
Bonus Tip: If you are on Selenium 4, you can capture a screenshot of the page & WebElements with minimal instructions.
Starting your journey with Selenium WebDriver? Check out this step-by-step guide to perform Automation testing using Selenium WebDriver.
TABLE OF CONTENT
You can refer to the below video tutorial on How To Take Screenshots In Selenium testing.
Why take screenshots when running a Selenium test
Before we go in-depth about how to take screenshots in Selenium WebDriver, let’s have a look as the ‘why’ part of capturing screenshots:
- Screenshots can be very useful in understanding the test execution flow of the application and its behavior.
- Capturing screenshots can be helpful in debugging any test scenario with ease.
- In case of a test failure, screenshots can help to identify if the problem is with the test script or the application under test.
- While executing a test script, screenshots at certain steps can be compared with the baseline image to verify if there is any deviation from the actual image.
- When we execute any Selenium test, sometimes we need to see the execution at later stages. So such screenshots can help us avoid re-execution of tests.
So taking or capturing screenshots during a Selenium test is essential and can be of great help. These screenshots can be in different forms, such as:
- Full page screenshot of the application under test.
- Screenshot of a particular element in the application.
- Screenshot of only the viewable part of the page.
How to take screenshots in Selenium WebDriver using JavaScript?
Now that we have understood the need to capture screenshots, it’s time for some action! Some classes (or interfaces) in the Selenium WebDriver can help us take screenshots of the AUT such as TakeScreenshot, AShot, etc. Let us deep dive into these classes one by one and see how to take screenshots in Selenium WebDriver using JavaScript.
You can take this certification as proof of expertise in the field of test automation with JavaScript to empower yourself and boost your career.
Here’s a short glimpse of the Selenium JavaScript 101 certification from LambdaTest:
Taking screenshots in Selenium JavaScript using the TakeScreenshot interface
Before getting to know about taking screenshots, let us first look at the TakeScreenshot interface of Selenium WebDriver in detail.
TakesScreenshot Interface in Selenium
The TakeScreenshot interface in the Selenium WebDriver package is made with the sole purpose of capturing screenshots of applications during Selenium test automation. The TakeScreenshot interface has a subinterface – WebElement, which indicates a WebDriver instance or an HTML element to capture a screenshot and store it as per the specified instructions.
Browsers that support TakeScreenshot Interface
Here is a list of browsers that support the TakeScreenshot interface:
Browsers supporting TakeScreenshot interface
Corresponding Classes implementing TakeScreenshot interface
Have you ever wanted to take a screen capture of a whole Web page, but could only capture what was on your screen? We’ll show you how to use a cool Google Chrome extension to capture a whole page.
Ed Rhee, a freelance writer based in the San Francisco Bay Area, is an IT veteran turned stay-at-home-dad of two girls. He focuses on Android devices and applications while maintaining a review blog at techdadreview.com.
Screen captures can be immensely useful for education, support, presentations, etc. When capturing Web pages, your captures are typically limited to what is viewable on the screen. A Chrome extension by Google, however, allows you to capture an entire page. Here’s how:
Step 1:
Go to the Chrome Web store and search for “screen capture” in the search box.
Screenshot by Ed Rhee
Step 2:
Select the “Screen Capture (by Google)” extension and install it.
Screenshot by Ed Rhee
Step 3:
After installation, click on the Screen Capture button on the Chrome toolbar and select Capture Whole Page or use the keyboard shortcut, Ctrl+Alt+H.
Screenshot by Ed Rhee
Step 4:
You’ll see Chrome scrolling down to capture the whole page and once finished, an options bar will display above the Web page that allows annotations, sharing, and saving the capture.
Screenshot by Ed Rhee
With this nifty Chrome extension installed, you can now capture my How To articles in their entirety, for later viewing or sharing. Seriously.
There have been times in my life when I’ve needed to capture a web page – and I mean all of it. Sometimes it was for archival reasons or when I was trying to gather up the curriculum for my coding class. Sometimes it was to share a page with someone. You might have your own reasons for capturing a full web page in image form, archives being at the top of the list.
If you’re a designer or you have to send feedback to a designer about a website, you want to capture more than what’s on the screen. And you might want to annotate on the screenshot as well. You can, of course, use an app like Skitch but who wants to launch a whole new app.
Below, we’ll talk about full web page screenshot tools for Chrome and iOS (Ashish has covered an Android tool already). We’ll also take a look at websites that will generate an image of any web page for you – no need to install additional software.
1. Full Page Screen Capture for Chrome
I’ve been using Full Page Screen Capture for a couple of months now. It’s worked out very well for me. It’s a simple extension with no options. All you have to do is make sure the page is set to the default view size (not zoomed in or out) and click the extension icon. It will do its thing and the image will be downloaded to the default folder. Doesn’t get much simpler really.
2. Awesome Screenshot Extension for Chrome
Awesome Screenshot came under some heat last year for comprising user’s privacy. The extension has since removed the adware, and the makers have rectified their mistakes.
Secondary Option: If you don’t feel comfortable using the extension, take a look at the alternative – Blipshot.
Awesome Screenshot is popular for a reason – it does a lot, and it does it well. The extension will let you capture screenshots of the web page (yes, full web page screenshots are supported), annotate them, and then share them using a unique link.
3. Awesome Screenshot Extension for Safari on iOS 8
A lot of browsing these days takes place on mobile phones. So it makes sense that you might want to capture web pages as served to an iPhone or iPad.
iOS 8 now supports extensions. Using Awesome Screenshot’s extension you can capture a full web page from right within Safari and also annotate and share/save it. No switching to Skitch or another app.
4. Screen Capture Website
Screen Capture is a simple website from tech blogger extraordinaire Amit Agarwal. All you have to do is paste in the link for the web page and then click Capture Screenshot. The website will do its thing and you’ll have downloaded a PNG file of the full page.
The beauty of the Screen Capture website is that it works anywhere – desktop, iOS, and even Android.
Bonus: Download Web Pages as PDFs
Downloading the web page as a PDF is a good alternative to simply downloading it as an image. When you’re talking about a really long web page, it’s going to work much better this way.
On Chrome, try the Save as PDF extension, which features one-click web page to PDF download. You can also try Pdfcrowd and HTML to PDF websites.
What Do You Use Full Page Screenshots For?
Do you use them for archival reasons or to critique? Share with us in the comments below.
Last updated on 03 February, 2022
The above article may contain affiliate links which help support Guiding Tech. However, it does not affect our editorial integrity. The content remains unbiased and authentic.
The Google Chrome browser offers two ways to capture full size webpage screenshots. This can be necessary or useful for many web workers, whether they’re developers, designers, editors, managers, writers, analysts, or just about any other possible web-based gig.
The approaches we’ll cover to capture full size webpage screen shots with Chrome require the full version of Chrome for any desktop-level device, which includes Mac, Windows, Linux, and Chromebook. There are no plugins required, as we’ll be using built-in developer tools with Chrome.
Note we are covering the Chrome browser here for desktop. You can also take full page screenshots with Firefox, Safari on Mac, and Safari for iPhone and iPad, if you need to or prefer.
How to Capture Full Size Scrolling Screenshots in Chrome
Ready to snag a full size screenshot of a webpage in Chrome? Here’s what to do:
- Open Chrome Developer Tools (View > Developer > Developer Tools)
Click the Responsive Design Mode button in the developer tools drawer
On the Mac you’ll find the full size screenshot of the webpage available in User Downloads, unless you manually changed that.
The dimensions of the captured screenshot will vary depending on which device you chose in responsive mode, for example if you picked iPad Air and took a full sized scrolling screenshot of osxdaily.com home page your screenshot may be around 2084 × 16439 pixels. Obviously the longer style a page or
* If you do not scroll through an entire web page, any lazy-loaded images will not be captured by the screenshot, making the full page screenshot incomplete and not representative of what a user sees on the page.
Capturing Full Page Screenshots in Chrome via Console
Another way to take full page screenshots in Chrome is to use the developer console ‘Run’ command, and type “screenshot”, then choose to “Capture full size screenshot” from the options that appear. Be sure to scroll through the entire webpage before* doing this as well.
This may be a better option for some users, but it’s a bit more complex for those who are less familiar with command lines.
Are these methods for Chrome easier than what’s available in Safari for Mac with Developer Tools? Or the super simple method of taking full webpage screenshots on the Mac with Firefox? Or the even easier way of taking full page screenshots using iPhone or iPad? That’s up to you to decide, and it also likely depends on what browser you use most often, and your proficiency with each of them.
If you’ve ever needed to take screenshots of an entire webpage, you know how much of a pain it is to have to manually scroll and take separate screenshots of the same page.
Good news! There are a couple of tools you can use to capture full webpages and make your life a whole lot easier.
One of these tools is actually built into Chrome and one is an extension.
1. Built-in Chrome option
The pros of using this method are that you don’t need to download an extension, and the tool is one of the better ones out there when it comes to ignoring any sticky bars (like th WordPress one in my video) as it scrolls the website.
Here’s how to use it:
1. Go to the three “more” dots at the top right of your browser window.
2. A window will pop up. Go to “more tools”, and then to “developer tools.”
3. You’ll enter a slightly different view mode and will see a new window pop up filled with code.
4. If the page doesn’t look any different, hit the “toggle device toolbar” icon at the top left of the developer window.
5. Use the “responsive mode” to select what device you’d like to see the screen shot on. To use default, just leave it on “responsive”.
6. At the top right of this new row, you’ll see a new “more” button. Click this and go to “capture screen shot” in the menu, or “capture full size screenshot” to get it all.
7. Wait a few seconds and you’ll see that the tool would have already downloaded a file and opened it up for you, as seen here.
In my example, the site’s footer got cut off, so be sure to keep that limitation in mind if you use this tool.
2. Awesome Screenshot & Screen Recorder Chrome Extension
1. Search for the extension “Awesome screenshot & screen recorder” in the Chrome web store or through a Google search.
2. Install the extension and you’ll see its colourful icon at the top of your toolbar.
3. Click on the extension when you’re on the website you want to capture. You’ll get a list of options and their keyboard shortcuts if you hover over them.
You can screenshot a visible part of a page, a full page, or a selected area. The extension can even help you record screen captures if that’s what you’re looking for.
4. Select full page to capture a full webpage screenshot.
5. Wait a few seconds, and you’ll end up on a page displaying the screenshot.
6. At the top of your page, you’ll see a new toolbar that gives you the flexibility of adding annotations to your screenshot. You can easily add annotations, text, and arrows like below and even crop sections out.
7. Once you’re done adding your annotations, click the done button at the right hand corner to save your changes.
8. A new window will pop up on the right with a range of options for saving and sharing your new screenshot through a share link, through dropbox, email, on Slack, etc. You can choose to manually save, or even copy the screenshot to paste it elsewhere.
So there you have it, two handy ways you can take screenshots of full websites, and even annotate them if you need them.


