Related
- How to Resize a Microsoft Office Document
- How to Make a Blogger Header Font
- How to Apply a Gradient Across a Group of Objects in Illustrator
- How to Fix a Little Screen on Chrome to Make It Bigger
- How to Turn Off Zoom in Windows 8.1
Instead of opening a separate window to change fonts in Word, you can use the Font drop-down menu on the “Home” tab. If you want to shave even more time off font switching, however, you can add the Font menu to your Quick Access toolbar or change the default font for all documents.
Quick Access Toolbar
The Quick Access Toolbar of each Word window can hold shortcuts to buttons and menus from across all of Word’s menu tabs. If you frequently change fonts, adding the font menu to the toolbar will save you from needing to open the Home tab every time. Click the down arrow on the toolbar and select “More Commands.” Select the first “Font” item in the list, click “Add” and then click “OK.” When picking a font, you can save even more time by typing the first few letters of the font name to scroll to it immediately.
Changing the Default Font
You can also change the default font Word uses whenever a new document is created. Open the “Home” tab and click the arrow in the corner near the word “Font.” Pick the font settings you want to use and click “Set As Default.” Select the “All documents. ” button and press “OK.”
Warning
Information in this article applies to Word 2010 and 2013. It may vary slightly or significantly in other versions.
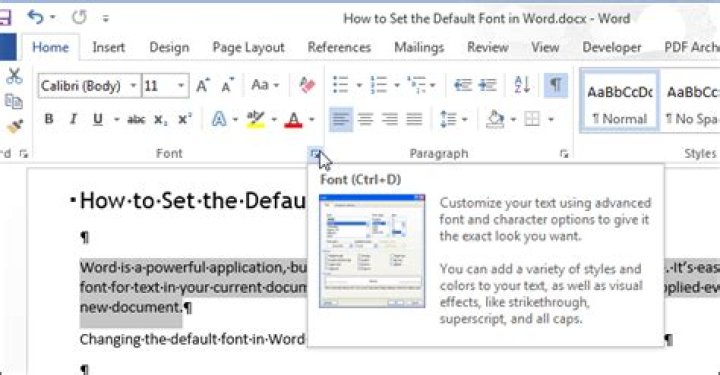
Word is a powerful application, but some of the configuration tools are not very intuitive. It’s easy enough to change the font for text in your current document, but that doesn’t change the default font that’s applied every time you create a new document.
Changing the default font in Word is not obvious. We’ll show you an easy way to do this.
Open an existing document or enter some text in a new document. Select some text and click the “Font” dialog box button in the “Font” section of the “Home” tab.
On the “Font” dialog box, select the font you want to set as the default in the “Font” list box and click the “Set As Default” button.
A dialog box displays asking if you want to set the default font for the current document only or for all documents based on the Normal template. Select the “All documents based on the Normal.dotm template” radio button. Click “OK”.
NOTE: The new default font is saved only to the template currently in use. Existing documents will not be changed the next time they are opened.
If you have a custom template applied to the current document, the default font will be saved in that template and not in the Normal template. The easiest way to change the default font in the Normal template is to create a new document and then follow the steps in this article.
How many Microsoft Word documents have you seen using Calibri or Times New Roman? Too many to count, we’d surmise. Unfortunately, most users don’t stray past the default formatting when they’re creating Word documents. That’s a shame, as there’s actually a wide range of fonts to choose from to fit with the style of document you’re creating.
If you have a font that you use regularly, having to change the font every time can be a pain. The good news is that it’s possible to change the default font in Word. This allows you to use the same font in every new Microsoft Word documents you create.
If you want to change the default font in Word, here’s what you’ll need to do.
Changing the Default Font in Microsoft Word
In order to change the default font, you need to open your Word document and access the Font dialog box. There are two ways to do this.
To start, open your document, right-click in the text body (it doesn’t matter where), and hit the Font option.
Alternatively, you can click the Font dialog box launcher.
To do this, select the Home tab on the ribbon bar, then click the small arrow icon in the bottom right-hand corner of the Font section.
Once the dialog box opens, you can choose the font that you wish to use. As well as changing the font itself, you can also change the style, size, and color of your text.
Once you have made your changes, click the Set as Default button. This will set the font you’ve selected as the default font for all future documents.
Select All documents based on the Normal template.
Click OK to confirm your choice. Once confirmed, your chosen font should appear as the new, default font in any new document.
Editing or Deleting the Word Template File
If changing the default Word font hasn’t worked, it’s possible that you don’t have permission to edit the Normal.dotm template file. This is the template that Word uses to create new documents that contain your default formatting settings.
Access to this file can be restricted in some workplace environments for security reasons. You may need to unlock access to edit or delete the file. Deleting the template file will restore your default Word formatting settings, should you wish to do so.
You can start by closing your Word document, opening Windows File Explorer, typing Normal.dotm in the search field, and hitting enter.
Windows will search for the file.
To allow for changes to your Word template file, right-click the Normal file and press Properties.
In the Normal properties window, make sure the General tab is selected.
Uncheck the Read-only checkbox in the Attributes section to allow changes to the file to be made.
Save the settings at this point—you should now be able to make changes to your default Word formatting settings. If you are unable to change these settings, consult with your IT administrator for access.
If you want to reset your Word template file, you can delete it entirely. This will force Word to recreate the Normal.dotm template document using its preset default settings, including the default font choice.
Once you’ve searched for the file, right-click and press Delete to remove it.
With the file removed, open Microsoft Word again to regenerate the template and restore your default settings.
Regular Microsoft Word Users
If you use Word regularly, setting a default font can save you a lot of time. You can take this a step further by creating your own Microsoft Office templates with the formatting you’re looking to use on a regular basis. You can set your own fonts, page sizes, and more.
If you’re happy with your Word document, then consider how you can create more advanced documents. Adding a table of contents, for instance, could help you to organize much longer documents.
Set the default font
When you set a default font, every new message you create uses that font setting default.
Go to File > Options > Mail > Stationery and Fonts.
Select the font you want to change
New mail messages – Sets the default font for original messages you compose.
Replying or forwarding messages – You can have a different font on messages you’re forwarding or replying to. This setting is mostly for the two check boxes that let you mark your comments with your name (or other text) or with a different color of text.
Composing and reading plain text messages – Plain text messages will be received by the other person with a standard font, but if you want to use a nicer font when you’re writing the message you can. Just understand that font won’t be sent with the message.
Select the options that you want to apply to the default font, such as font style and font size.
Select OK all the way back out to save your changes.
See also
Go to Outlook > Preferences > Fonts
Change the font for New mail, Reply or forward, or Plain text.
Change the text size using the slider.
You can change fonts if you use HTML format to compose new messages.
Go to Settings > View all Outlook settings > Compose and reply.
Under Message format, set Compose messages in to HTML format.
Set the font and size you want for the default.
To use your favorite font in Word all the time, set it as the default.
Go to Home, and then select the Font Dialog Box Launcher .
Select the font and size you want to use.
Select Set As Default.
Select one of the following:
This document only
All documents based on the Normal template.
Select OK twice.
If the default font setting doesn’t persist
Sometimes, a company’s permission settings or some add-ins change the default font back to the original font. If that’s happening, here are some things to try.
In the Search box, type Normal.dotm and select Search.
Right-click Normal.dotm, and select Properties.
On the General tab, make sure Read-only isn’t checked. If it’s checked, uncheck it.
Select the Security tab. Under Group or user names, select your name, and then make sure you have Write permission in the Permissions box.
If you aren’t able to uncheck the Read-only box or if you don’t have Write permission, contact the person who’s in charge of your company’s computer systems.
If you have Write permissions and the default font setting still doesn’t stick, you might have to turn off Word add-ins and change the default font setting. Here’s how:
Select File > Options > Add-Ins.
In the Add-ins box, find one of the add-ins you want to turn off and note the add-in type listed in the Type column.
Select that add-in type in the Manage list, and select Go.
Uncheck the boxes for the add-ins you want to turn off, and select OK.
Repeat steps 1-4 for other types of add-ins.
After you change the default font, turn on the add-ins.
Select File > Options > Add-Ins.
Select an Add-in type in the Manage list, and select Go.
Check the boxes for the add-ins you want to turn on, and select OK.
Repeat steps 1-3 for the other types of add-ins you want to turn on.
Note: You don’t have to turn off the Document Inspector type add-ins.
To use your favorite font in Word all the time, set it as the default.
Go to Format > Font > Font.
You can also press and hold + D to open the Font dialog box.
Select the font and size you want to use.
Select Default, and then select Yes.
If the default font setting doesn’t persist
Sometimes, a company’s permission settings change the default font back to the original font. If that’s happening, try this:
Open Finder, and in the Search box, type Normal.dotm.
On the File menu, select Get Info. Or, press and hold + I.
Select General, and make sure Locked is unchecked. If it’s checked, uncheck it.
Select Sharing & Permissions, and next to your name, make sure you have Read & Write permission under Privilege.
If you aren’t able to uncheck the Locked box or if you don’t have Read & Write permission, contact the person who’s in charge of your company’s computer systems.
Are you frustrated by always having to change the font size before you create a document it Word? Here’s how you can end that frustration and set your favorite default font size for once and for all!
Microsoft changed the default font font to 11 point Calibri in Word 2007 after years of 12 point Times New Roman being the default. Although it can be easily overlooked, there are ways in Word to change the default settings to anything you want. Whether you want to change your default to 12 point Calibri or to 48 point Comic Sans…here’s how to change your default font settings in Word 2007 and 2010.
Changing Default Fonts in Word
To change the default font settings, click the small box with an arrow in the lower right corner of the Font section of the Home tab in the Ribbon.
In the Font dialog box, choose the default font settings you want. Notice in the Font box it says “+Body”; this means that the font will be chosen by the document style you choose, and you are only selecting the default font style and size. So, if your style uses Calibri, then your font will be Calibri at the size and style you chose. If you’d prefer to choose a specific font to be the default, just select one from the drop-down box and this selection will override the font selection in your document style.
Here we left all the default settings, except we selected 12 point font in the Latin text box (this is your standard body text; users of Asian languages such as Chinese may see a box for Asian languages). When you’ve made your selections, click the “Set as Default” button in the bottom left corner of the dialog.
You will be asked to confirm that you want these settings to be made default. In Word 2010, you will be given the option to set these settings for this document only or for all documents. Click the bullet beside “All documents based on the Normal.dotm template?”, and then click Ok.
In Word 2007, simply click Ok to save these settings as default.
Now, whenever you open Word or create a new document, your default font settings should be set exactly to what you want. And simply repeat these steps to change your default font settings again if you want.
Editing your default template file
Another way to change your default font settings is to edit your Normal.dotm file. This file is what Word uses to create new documents; it basically copies the formatting in this document each time you make a new document.
To edit your Normal.dotm file, enter the following in the address bar in Explorer or in the Run prompt:
This will open your Office Templates folder. Right-click on the Normal.dotm file, and click Open to edit it. Note: Do not double-click on the file, as this will only create a new document based on Normal.dotm and any edits you make will not be saved in this file.
Now, change any font settings as you normally would. Remember: anything you change or enter in this document will appear in any new document you create using Word.
If you want to revert to your default settings, simply delete your Normal.dotm file. Word will recreate it with the standard default settings the next time you open Word.
Please Note: Changing your default font size will not change the font size in existing documents, so these will still show the settings you used when these documents were created. Also, some addins can affect your Normal.dotm template. If Word does not seem to remember your font settings, try disabling Word addins to see if this helps.
Conclusion
Sometimes it’s the small things that can be the most frustrating. Getting your default font settings the way you want is a great way to take away a frustration and make you more productive.
And here’s a quick question: Do you prefer the new default 11 point Calibri, or do you prefer 12 point Times New Roman or some other combination? Sound off in the comments, and let the world know your favorite font settings.
Good question. When you first get started with Word 2016, or if you never took the time to customize your Office apps, the program uses a boring set of font defaults. Thankfully, it’s easy to modify and adjust them to find your ideal Word font settings and then save those settings as document defaults.
Here’s how to change the default font, font style and font size in Word 2016 for Windows.
How to change your Word 2016 default font
- Open Word.
- Open any document or create a new document. It doesn’t matter which, but a document needs to be open to access the required menus.
- Click the Home tab in the top left corner.
Under the Fonts block, click the expand button. It’s a small arrow icon in the bottom right corner. This will open the Font settings window.
Click Set as Default in the bottom left corner.
Check All documents based on the Normal template.
All new Word documents will now use your font of choice by default.
How to change your Word 2016 default font style
- Open Word.
- Open any document or create a new document. It doesn’t matter which, but a document needs to be open to access the required menus.
- Click the Home tab in the top left corner.
Under the Fonts block, click the expand button. It’s a small arrow icon in the bottom right corner. This will open the Font settings window.
Click Set as Default in the bottom left corner.
Check All documents based on the Normal template.
All new Word documents will now use that new font style by default.
How to change your Word 2016 default font size
- Open Word.
- Open any document or create a new document. It doesn’t matter which, but a document needs to be open to access the required menus.
- Click the Home tab in the top left corner.
- Select your desired Font Size.
- Click Set as Default in the bottom left corner.
- Check All documents based on the Normal template.
- Click OK to confirm your changes.
All new Word documents will now use that font size by default.
If you want to modify any of your font-default changes, just repeat the appropriate process listed above.
And for more related resources, check out:
We may earn a commission for purchases using our links. Learn more.
Hands-on with Windows 10 build 21354 showcasing new changes and features
We’re back with another Windows Central build video walkthrough. Today, we’re taking a look at Windows 10 build 21354 that was just released in the Insider Dev Channel. It’s the first co_release build, but that doesn’t mean there aren’t new changes to check out.
Review: Outriders is a genuinely fun looter shooter in spite of itself
Outriders has been one of the most anticipated co-op games of 2021. Did People Can Fly manage to deliver a looter shooter that stands above its contemporaries? Here’s our review.
These are all our picks for the very best Windows laptops available
The HP Spectre x360 13 is our pick for the best overall Windows laptop you can buy, but there are a ton of other great options if you need something different. If you’re now working from home and need a quality device, you’ll find it here.
These are the best motherboards to use with the AMD Ryzen 5 5600X
AMD has A520, B550, and X570 motherboards already available for its new Ryzen 5000 series processors. The AMD Ryzen 5 5600X is a mid-range eight-core processor that’s best suited to mid- or high-tier motherboards.
Fonts are basically text writing styles available in Word and other word processing applications. There is a considerably good number of font families available on Microsoft Word as well as online for you to explore. Some of which are paid and many are available to use for Free.
Fonts are a fun way to visualize your text in your own favourite style to make an entire word document look appealing.
It’s really easy to give your default font a new look, if you would like to try that here’s what you need to do:
1. Open a Word Document
2. Click on the tiny arrow icon from the bottom right corner of the Font panel under the home tab to open the font dialogue box
or
Just right-click anywhere on your document and select the Font option to open the font dialogue box
3. Font Dialogue box will look something like this (Screenshot below) and here you can choose any font, font style or font size of your choice to make it default.
4. Once you are done selecting attributes for your favourite font, click “Set As Default” to save the changes.
5. Upon clicking on “Set As Default” you will be asked if you want to make the selected font default for that particular document only or for all documents. You can choose an option based on your preference and click OK to confirm your selection.
Are you frustrated by always having to change the font size before you create a document it Word? Here’s how you can end that frustration and set your favorite default font size for once and for all!
Microsoft changed the default font font to 11 point Calibri in Word 2007 after years of 12 point Times New Roman being the default. Although it can be easily overlooked, there are ways in Word to change the default settings to anything you want. Whether you want to change your default to 12 point Calibri or to 48 point Comic Sans…here’s how to change your default font settings in Word 2007 and 2010.
Changing Default Fonts in Word
To change the default font settings, click the small box with an arrow in the lower right corner of the Font section of the Home tab in the Ribbon.
In the Font dialog box, choose the default font settings you want. Notice in the Font box it says “+Body”; this means that the font will be chosen by the document style you choose, and you are only selecting the default font style and size. So, if your style uses Calibri, then your font will be Calibri at the size and style you chose. If you’d prefer to choose a specific font to be the default, just select one from the drop-down box and this selection will override the font selection in your document style.
Here we left all the default settings, except we selected 12 point font in the Latin text box (this is your standard body text; users of Asian languages such as Chinese may see a box for Asian languages). When you’ve made your selections, click the “Set as Default” button in the bottom left corner of the dialog.
You will be asked to confirm that you want these settings to be made default. In Word 2010, you will be given the option to set these settings for this document only or for all documents. Click the bullet beside “All documents based on the Normal.dotm template?”, and then click Ok.
In Word 2007, simply click Ok to save these settings as default.
Now, whenever you open Word or create a new document, your default font settings should be set exactly to what you want. And simply repeat these steps to change your default font settings again if you want.
Editing your default template file
Another way to change your default font settings is to edit your Normal.dotm file. This file is what Word uses to create new documents; it basically copies the formatting in this document each time you make a new document.
To edit your Normal.dotm file, enter the following in the address bar in Explorer or in the Run prompt:
This will open your Office Templates folder. Right-click on the Normal.dotm file, and click Open to edit it. Note: Do not double-click on the file, as this will only create a new document based on Normal.dotm and any edits you make will not be saved in this file.
Now, change any font settings as you normally would. Remember: anything you change or enter in this document will appear in any new document you create using Word.
If you want to revert to your default settings, simply delete your Normal.dotm file. Word will recreate it with the standard default settings the next time you open Word.
Please Note: Changing your default font size will not change the font size in existing documents, so these will still show the settings you used when these documents were created. Also, some addins can affect your Normal.dotm template. If Word does not seem to remember your font settings, try disabling Word addins to see if this helps.
Conclusion
Sometimes it’s the small things that can be the most frustrating. Getting your default font settings the way you want is a great way to take away a frustration and make you more productive.
And here’s a quick question: Do you prefer the new default 11 point Calibri, or do you prefer 12 point Times New Roman or some other combination? Sound off in the comments, and let the world know your favorite font settings.


