The first time you install and use an Office program, you are asked for your user name and initials in a dialog box that looks similar to this:
Your name and initials will be associated with any Office document that you create and will appear in places like comments, revisions, and general document properties. You can enter anything you like, but it’s a good idea to consider who you might be sharing documents with, or reviewing documents for, when choosing a user name. Most people simply use their first and last name.
If you are seeing the User Name dialog box every time you open an Office program, see Prevent a program from asking for user name and initials.
Change your user name and initials
If you are creating Office documents that will be shared with others, appropriate attribution and correct author information can be important. You can change your user name and initials at any time.
Important: Changing your name or initials in one Office program will change your name and initials in all of the other Office programs installed on your computer.
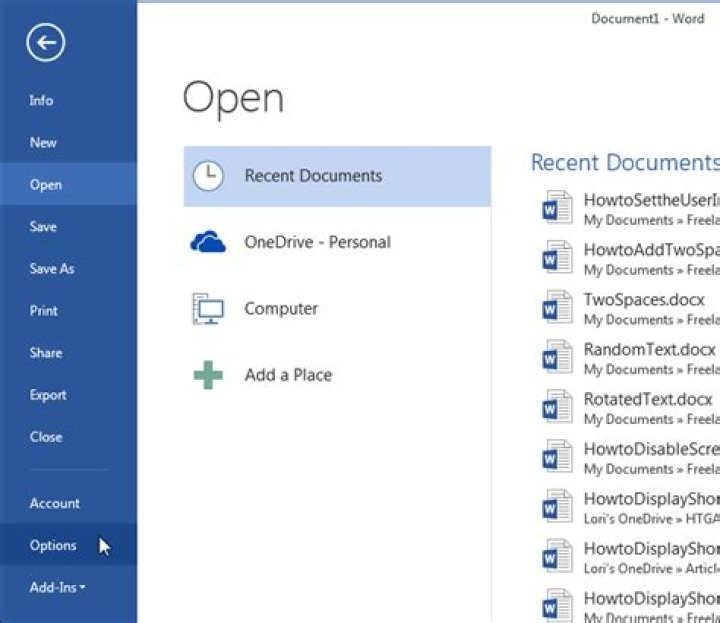
Click File > Options.
In the Options dialog box, change your user name and initials in the Personalize your copy of Microsoft Office section.
Note: Excel 2010 uses only a user name, not initials.
In an open document, click the Office button , and then click the Options button at the bottom of the menu.
In OneNote, click the Tools menu, and then click Options.
In Project and Visio, click the Tools menu, click Options, and then click the General tab.
In the dialog box, change your user name and initials in the User Name and Initials boxes. The dialog box that you see may appear different from the example below, depending on the Office program you’re using.
Note: Excel 2007 uses only a user name, not initials.
Prevent a program from asking for user name and initials
You should see the User Name dialog box only once—the first time you open a newly installed Office program. However, if you see this dialog box every time you open a program, you may be able to stop this from happening by changing permissions in the registry.
Warning: This procedure contains steps that tell you how to modify your computer’s registry. Serious problems might occur if you modify the registry incorrectly. Make sure to follow these steps carefully. For added protection, back up the registry before you modify it. Then, you can restore the registry if a problem occurs. To learn how to back up and restore the registry, see How to back up and restore the registry in Windows.
From the Windows Start screen in Windows 10, Windows 8, Windows 7, or Windows Vista, type regedit.exe in the Search box, and then press Enter.
Note: In Windows XP, click Start, click Run, type regedit.exe, and then press Enter.
In the Registry Editor, browse to the following location: HKEY_Current_User\Software\Microsoft\Office\Common\UserInfo.
On the Edit menu, click Permissions.
Click your user name.
Select the Allow check box for Full Control.
Lori Kaufman is a technology expert with 25 years of experience. She’s been a senior technical writer, worked as a programmer, and has even run her own multi-location business. Read more.
When you create a document in Word, it contains more than just the content you type into it. Attached to the document is author information based on the user name and initials you entered them when you installed Office.
This is fine for personal documents, but if you are creating a document that will be shared with and worked on by others, you may want to change the author information to something more appropriate. We will show you how to change this information.
To begin, click the “File” tab.
On the backstage screen, click “Options” in the list of items on the left.
The “General” screen should be the default screen that displays on the “Word Options” dialog box. In the “Personalize your copy of Microsoft Office” section, change the “User name” and “Initials” fields to reflect the correct information you want in the document.
You can also add a mailing address to the information associated with your document. To do this, click “Advanced” in the list of items on the left.
Scroll down to the “General” section on the right and enter an address in the “Mailing address” box.
Click “OK” to accept your changes and close the “Word Options” dialog box.
If you don’t want any personal information in your document, you can remove it.
Every time you create a new document, Word sets the Author property based on the User name setting that appears in the Word Options dialog box. Likewise, PowerPoint sets this property for new presentations you create, using the setting in PowerPoint Options, and Excel sets this property for new workbooks you create, using the setting in Excel Options. The User name setting also provides the name and initials that are displayed in comments and tracked changes.
To see the Author property for a document or workbook, click File > Info, and then look for Author under Related People on the right.
Change the author name for new documents, presentations, and workbooks
Important: This procedure changes the related settings for all Office apps, regardless of which app you are using when you change them.
Click File > Options.
Under Personalize your copy of Microsoft Office, type a new name in the User name box.
Make sure the Always use these values regardless of sign-in to Office check box is selected.
Change the author name only in an existing document, presentation or workbook
Click File, and then look for Author under Related People on the right.
Right-click the author name, and then click Edit Property.
Type a new name in the Edit person dialog box.
Note: Changing the Author property in the properties pane of an existing document has no effect on the User name setting in the Word Options, PowerPoint Options, or Excel Options dialog box.
Important: Office 2007 is no longer supported. Upgrade to Microsoft 365 to work anywhere from any device and continue to receive support.
1 In new documents, the name that appears as the Author property (visible in the Document Information Panel) comes from the User name box in the Word Options dialog box.
To see the Author property for a document, click the Microsoft Office Button , point to Prepare, and then click Properties.
Change the author name for new documents
Click the Microsoft Office Button , and then click Word Options.
Under Personalize your copy of Office, type a new name in the User name box.
Change the author name in an existing document only
Click the Microsoft Office Button , point to Prepare, and then click Properties.
In the Document Information Panel, type the author name in the Author box.
Note: Changing the Author property in the Document Information Panel of an existing document has no effect on the User name setting in the Word Options dialog box.
When you create a document in Word, it contains more than just the content you type into it. Attached to the document is author information based on the user name and initials you entered them when you installed Office.
This is fine for personal documents, but if you are creating a document that will be shared with and worked on by others, you may want to change the author information to something more appropriate. We will show you how to change this information.
To begin, click the “File” tab.
On the backstage screen, click “Options” in the list of items on the left.
The “General” screen should be the default screen that displays on the “Word Options” dialog box. In the “Personalize your copy of Microsoft Office” section, change the “User name” and “Initials” fields to reflect the correct information you want in the document.
You can also add a mailing address to the information associated with your document. To do this, click “Advanced” in the list of items on the left.
Scroll down to the “General” section on the right and enter an address in the “Mailing address” box.
Click “OK” to accept your changes and close the “Word Options” dialog box.
If you don’t want any personal information in your document, you can remove it.
More stories
Network Attached Storage (NAS)
A NAS, or Network Attached Storage device, is a specialized file server that connects to your local network. NAS devices are, compared to full server installations, running bare bones operating systems that serve to facilitate file sharing using common networked file sharing protocols (such as SMB,
How to Use An Antivirus Boot Disc or USB Drive to Ensure Your Computer is Clean
If your computer is infected with malware, running an antivirus within Windows may not be enough to remove it. If your computer has a rootkit, the malware may be able to hide itself from your antivirus software.
How to Add a Longer-Lasting Battery to Your Smartphone
Well, it’s noon and your phone’s battery is already at 37 percent. There are ways to avert this disaster, adding more battery capacity to your favorite smartphone.
How to Make the Windows Taskbar Thumbnails Bigger (Without Software)
When you hover your mouse pointer over a button in the taskbar, Windows shows you a preview of that window by default, but that preview is usually really small. Luckily with a quick registry hack, we can make those thumbnails bigger.
How to Customize the Quick Access Toolbar in Office 2013
The ribbon in Microsoft Office applications provides access to most major commands and options, but there is another feature that can be very useful if you take the time to customize it. The Quick Access Toolbar provides one-click access to any commands added to it.
How to Use Headphones With Your TV
So you’ve got a nice big widescreen TV and an amazing home theater setup. Your speakers offer excellent sound — there’s just one problem. You want to use it while people are sleeping or otherwise busy. That means turning to headphones.
Show Hidden Files and Folders in Windows 7, 8.x, 10, or Vista
Windows 7, Windows 8, Windows 10, and Vista hide important files and folders from view to keep users from deleting or otherwise modifying files they shouldn’t, but a simple checkbox can change that behavior.
Geek Trivia: The Finnish People Survived A Great Famine In The 1860s By Eating?
Think you know the answer? Click through to see if you’re right!
How to Delete a Windows Service in Windows 7, 8, 10, Vista, or XP
If you are a fan of tweaking your system and disabling services, you might find that over time your Windows Services list becomes huge and unwieldy with a large number of services in the list that will never be enabled.
Geek Trivia: The Only Person To Be Interred On The Moon Is?
Think you know the answer? Click through to see if you’re right!
Документ Word содержит намного больше информации, чем Вы думаете. И это не только набранный текст. К файлу также прикрепляется информация об авторе, состоящая из имени и инициалов пользователя, которые были введены при установке Office.
Иметь такую информацию в личных документах – здорово, но если Вы создаёте документ для общего доступа, над которым будут работать другие люди, возможно, понадобится сменить личные данные автора на что-то более подходящее. В этой статье мы покажем, как изменить эту информацию.
Для начала откройте вкладку Файл (File).
В меню слева нажмите кнопку Параметры (Options).
По умолчанию должен открыться раздел Общие (General). В группе параметров Личная настройка Microsoft Office (Personalize your copy of Microsoft Office) введите информацию, которая должна быть указана в документе – Имя пользователя (User name) и Инициалы (Initials).
Кроме этого, в информации, прикрепляемой к документу, можно указать почтовый адрес. Для этого перейдите на вкладку Дополнительно (Advanced).
Пролистайте вниз до раздела Общие (General) и введите почтовый адрес в поле Почтовый адрес (Mailing address).
Нажмите ОК, чтобы сохранить изменения и закрыть диалоговое окно Параметры (Options).
Если Вы не хотите указывать личную информацию, просто удалите её.
Have you ever wanted (or needed) to be an incognito editor, a covert reviewer, or a clandestine collaborator? If so, this post is for you—or for your secret identity—because it demonstrates how to change your user name for Track Changes in Microsoft Word on a PC.
This tutorial is also available as a YouTube video showing all the steps in real time.
Watch more than 100 other writing-related software tutorials on my YouTube channel.
The images below are from Word for Microsoft 365. These steps also apply to Word 2021, Word 2016, Word 2013, and Word 2010. However, your interface may look slightly different in those older versions of the software.
How to Change Your User Name for Track Changes in Word
Important Note: These steps must be completed before you use Track Changes because they don’t change the name associated with existing edits or comments. Word doesn’t have a straightforward way to change user names connected to existing edits or comments.
However, you can replace user names with the default label Author for all existing and future edits and comments, as shown in “How to Remove User Names from Existing Track Changes in Microsoft Word.”
1. Select the Review tab in the ribbon.
Figure 1. Review tab
2. Select the dialog box launcher in the Tracking group.
Figure 2. Dialog box launcher in the Tracking group
3. Select the Change User Name button in the Track Changes Options dialog box.
Figure 3. Change User Name button in the Track Changes Options dialog box
4. Change the user name and/or the initials in the Word Options dialog box.
Figure 4. User name and initials in the Word Options dialog box
Pro Tip: You can also open the Word Options dialog box by selecting the File Tab followed by Options in the backstage view.
5. Check the box in front of “Always use these values regardless of sign in to Office” if you want to save these changes for future documents.
Figure 5. “Always use these values regardless of sign in to Office” checkbox in the Word Options dialog box
6. Select the OK button to save your changes.
Figure 6. OK button in the Word Options dialog box
Your updated user name should now appear when you add new comments and edits.
Q. To activate Microsoft Word on my new laptop, I had to open a Microsoft account, but I didn’t use my real name. Now, when I edit a document in Word and add a comment, it lists the note under that made-up name. Any way I can get it to switch back to my real name?
A. The Track Changes, Comments and other tools built into Microsoft Word are designed to let users collaborate on a document — and keep tabs on who did exactly what to the file (and when). When the document-editing tools are enabled, every text deletion and insertion is marked in the file and labeled with the name or initials of the person who made the change. Nonprinting comments added to the file from collaborators are also tagged with names.
Even if the program picked up the moniker you used to create your Microsoft account, you can reclaim your rightful name by making a change in the program’s settings. When you make the switch, though, the new identification takes effect from that point forward and does not retroactively change the name attached to your editing changes.
In Word 2016 for Windows, go to the File menu and select Options. In the Word Options box, select the General tab. In the “Personalize your copy of Microsoft Office” section, enter the name and initials you wish to use, and turn on the check box nearby to “always use this name.” Click the O.K. button. (If you already have a document open in Word and want to change your name there, you can also select the Review tab and click on the tiny icon for the Track Changes options in the ribbon tool bar to get to the Change User Name settings.)
To change your username in Microsoft Word 2016 for Mac, go to the Word menu in the Mac’s tool bar and select Preferences. In the Preferences box, click the User Information icon and enter your preferred name and initials, then check the box next to the option to always use this name. Close the box when you are finished.
By default, Microsoft Word saves the author’s name with all documents that that author creates. Though with the MyLaw upload this is not necessary, Word does allow you to disable this feature for a particular document to ensure the anonymity of exams. Here’s what to do.
PC Users—Word 2010
- Click the “File” tab, then “Info,” then “Check for Issues,” then “Inspect Document.”
- When the Document Inspector dialog box opens, click the “Inspect” button at bottom right.
- Word examines the document, and then displays the results in a list. The second item in the list is “Document Properties and Personal Information.” To the right of “Document Properties and Personal Information” is a button labeled “Remove All.” Click that button. Next click “Close” then save your document.
PC Users—Word 2007
- Click the Word 2007 Microsoft Office button.
- Place the mouse cursor over “Prepare” to reveal the “Prepare the Document for Distribution” menu. Click “Inspect Document.”
- Click “Inspect.” The Document Inspector will scan your file for personal information.
- Click “Remove All” if Document Inspector finds personal information in your file. Now click “Close” then save your document.
Mac users—Word 2011
- With the document open, select “Word” in the Word menu at the top of the screen and click “Preferences” in the drop down menu.
- From the “Word Preferences” dialog box, select “User Information” under the “Personal Settings” heading.
- Delete all the personal information that is displayed, click “OK”, then save your document.
At this time, law school IT does not know for sure if doing that will remove all possible identifying information from the document, but it will at least remove the author’s name.
Law School
Williamsburg, VA
Contact Us All Rights Reserved ©
How to remove identifying properties from a Microsoft® Word file before submitting it
If your professor is using anonymous grading, you should include only your identification number on your submissions. Please ensure that your name does not appear on the face of your work or in the file properties embedded within your submission. To remove identifying properties from a Microsoft® Word file, please follow these steps before submitting your work:
(WINDOWS) Microsoft Word 2010, 2013, 2016:
- Go to “file”
- Select “info”
- Click on “check for issues”
- Click on “inspect document”
- In the “Document Inspector” dialog box, select the check boxes to choose the types of hidden content that you want to be inspected.
- Click “Remove All”
- Click “Close”
- Save the document.
- See the instructional video.
(WINDOWS) Microsoft Word 2007:
- Open the Microsoft® Word file and click the “Office” button (the Microsoft symbol in the top-left corner of the program)
- Point to “Prepare”
- Click “Inspect Document”
- In the “Document Inspector” dialog box, select the check boxes to choose the types of hidden content that you want to be inspected.
- Click “Remove All”
- Click “Close”
- Save the document.
(WINDOWS) Microsoft Word 2003 and earlier versions:
- Open the Microsoft® Word file and click “Tools.”
- Click “Options.”
- Click the “Security” tab.
- Select “Remove any personal information from file properties on save.”
- Click “OK.”
- Save the document.
(MACS) MICROSOFT WORD:
For the latest version of Word (2015/2016):
- Go to the Review tab
- Click the Protect Document tool
- Click Remove personal information from this file on save
For older versions
- Go to Preferences
- Click on Security
- Select “Remove personally identifiable information from the file on save” and “Warn before printing, saving or sending a document that contains tracked changes or comments”.
or - It may work to simply set Word 2008 on the mac to “remove personal information from this file on save” under Preferences in the Word menu, Personal Settings, Security, Privacy options. If you only wish to enforce the security measure on a final save it may be sufficient to select the “Warn before printing, saving, or sending a file that contains tracked changes or comments” check box.
Media
This resource is designed to be printed as a one page PDF file. An HTML version is also available below.
Heading Styles
Create a uniform heading structure through use of styles in Word. This allows screen readers to navigate a document and improves accessibility for everyone.
Adding and Editing Headings
Alternative Text for Images
Images can be given appropriate alternative text in Word. This Alt text is read by a screen reader in a Word file and should remain intact when exporting to HTML or PDF.
Adding Alt Text
- Right-click on the image and choose Format Picture.
- Select the Layout & Properties icon and choose Alt Text.
- Enter appropriate Alt text only in the Description field (not the Title field).
Columns
When creating columns, always use true columns, not columns created by hand with the Tab key.
Creating Columns
- Select Page Layout on the ribbon.
- Select Columns under Page Setup and choose the appropriate number of columns.
Lists
Use true numbered and bulleted lists to emphasize a point or a sequence of steps.
Creating Lists
- Select the Numbered List or Bulleted List option on the Home ribbon, under the Paragraph section.
Links
Word automatically creates a hyperlink when a user pastes a full URL onto a page. These may not make sense to screen reader users, so more information is needed.
Adding Hyperlinks
- Select the text you want linked, right click, and select Hyperlink or Ctrl + k.
- Make sure the text in the Text to Display field is a meaningful description and type the link URL in the Address bar.
Data Tables
Accessible tables need a clear table structure and table headers to help guide a screen reader user.
Creating Tables
- Select the Insert tab on the ribbon, then select Table > Insert Table.
- To add table headers to the first row, select Table Tools > Layout on the ribbon, then choose the Repeat Header Rows option in the Data section.
Options in the Design tab may be used to change appearance but will not provide the necessary accessibility information.
Accessibility Checker
Word includes an accessibility resource that identifies accessibility issues.
- Select File > Info.
- Select the Check for Issues button and choose Check Accessibility.
- The Accessibility Checker task pane will show accessibility errors, warnings, and tips on how to repair the errors. Select specific issues to see Additional Information at the bottom of the task pane.
Other Principles
- Ensure that font size is sufficient, around 12 points.
- Provide sufficient contrast.
- Don’t use color as the only way to convey content.
- Provide a table of contents for long documents.
- Use simple language.
Popular
Featured Item
The Benchmarking &
Planning Tool can help
your institution
become web
accessible.
View Benchmarking & Planning Tool
by Allen Wyatt
(last updated December 19, 2020)
When you install Word, you are asked for your name. This information is stored with Word, and you can later access it. For instance, Word allows you to use your name in the return address of an envelope. If you want to automatically insert the user’s name in your documents, you can follow these steps:
- Position the insertion point where you want the user’s name to appear.
- Display the Insert tab of the ribbon.
- Click the Quick Parts tool (in the Text group) and then choose Field. Word displays the Field dialog box.
- In the Categories list, choose User Information. (See Figure 1.)
Figure 1. The Field dialog box.
The advantage of using a field to add this information to the document is that it is dynamic. This means that if you change the username in Word itself, the name returned by the field is updated as well.
WordTips is your source for cost-effective Microsoft Word training. (Microsoft Word is the most popular word processing software in the world.) This tip (9353) applies to Microsoft Word 2007, 2010, 2013, 2016, 2019, and Word in Office 365. You can find a version of this tip for the older menu interface of Word here: Inserting the User’s Name.
Author Bio
With more than 50 non-fiction books and numerous magazine articles to his credit, Allen Wyatt is an internationally recognized author. He is president of Sharon Parq Associates, a computer and publishing services company. Learn more about Allen.
Services at a Glance
On This Page:
- Open a file with RMS restrictions
- Set RMS restrictions on a file
- Set RMS restrictions on an email
The Microsoft Rights Management Service (RMS) allows you to restrict access to Microsoft Office documents to specific individuals. RMS is integrated into Microsoft Office and is available for faculty and staff. Check with the IT professional in your department for assistance in enabling RMS for your account.
Note: This service only allows UMass Amherst employees to share restricted documents with each other. If you share a document with restricted access to an individual outside of the campus community, they will not be able to open it.
Open a file with RMS restrictions
- Download the file. You may see a dialog box that states, “Word needs to connect to the Rights Management Services server. Do you want to continue?” Click Continue. If you are prompted for a server address, enter .
- In the Username field, enter your NetID (you may also be prompted for your domain). In the Password field, enter your NetID password. The file will open.
Set RMS restrictions on a file
Microsoft Office 2013 (Windows)
- Go to File > Info > Protect Document > Restrict Access > Restricted Access. The Permission window will open.
- Make sure the Restrict Permission to this document box is selected. Enter the email addresses of individuals who can Read or Change the document. Click ok.
Microsoft Office 2010 (Windows)
- Go to File > Info > Protect Document/Workbook/Presentation > Restrict Permission by People > Restricted Access. The Permission window will open.
- Make sure the Restrict Permission to this document box is selected. Enter the email addresses of individuals who can Read or Change the document. Click ok.
Microsoft Office 2007 (Windows)
- Go to File > Prepare > Restrict Permission > Restricted Access. The Permission window will open.
- Make sure the Restrict Permission to this document box is selected. Enter the email addresses of individuals who can Read or Change the document. Click ok.
Microsoft Office 2011 (Mac)
- Go to File > Restrict Permissions > Restricted Access. The Set Permissions window will open.
- Enter the email addresses of individuals who may Read, Change, or have Full Control of the document in the appropriate fields.
Set RMS restrictions on an email
Microsoft Outlook 2011 (Mac)
In a new email message, go to Options > Permissions > Do Not Forward.
Microsoft Outlook 2007 (Windows)
In a new email message, go to Office button > Permission > Do Not Forward.
Microsoft Outlook 2010 (Windows)
In a new email message, go to Options > Permission > Do Not Forward.
Microsoft Outlook 2013 (Windows)
In a new email message, go to Options > Permission > Do Not Forward.
Microsoft Word allows a user to store several types of advanced properties related to your document. Some of these properties are displayed on the “Info” screen and you can change these properties.
Microsoft Office 2013 was used in this demonstration.
To access the dialog box that allows you to change the properties for the currently open document, click the “File” tab.
By default, the “Info” screen should display. If not, click “Info” at the top of the list of items on the left.
On the right side of the “Info” screen, click “Properties” and select “Advanced Properties” from the drop-down list.
A dialog box displays with the file name (without the file extension) on the title bar, showing you information about your document. To access the properties you can change, click the “Summary” tab.
Enter properties on the “Summary” tab such as “Title,” “Author,” “Company,” and “Keywords.” Keywords are also called tags and can be used to categorize and find your document more easily.
You are returned to the “Info” screen and the advanced properties you entered display. The keywords you entered are displayed as “Tags.”
You can also display and change the advanced properties in a “Document Information Panel” above the document. To show the panel, click “Properties” on the “Info” screen and select “Show Document Panel.”
You are automatically returned to your document where the “Document Information Panel” displays below the ribbon. For each property, there’s an edit box displaying the current value for the property and allowing you to change the values. You can also use the “Document Properties” button on the panel to access the properties dialog you can also use to edit the properties and view other information.
To close the panel, click the “X” button in the upper-right corner of the panel.
Microsoft Word is among the most popular text editors on the market (it is, after all, part of the famed Microsoft Office). When you create a document in Microsoft Word, the documents have an author assigned by default; the person who owns the account on your PC.
The name of the author of the document can be seen on the information page in Word. The complete properties of the document can be viewed in the lower side of the Info page including the name of the authors, editors and others involved in document creation. Author’s name is retained by the document as an informational attribute.
If you wish to change the name of author in the documents you are creating, you will have to manually change it on the Info page. Here’s how:
- ■Initialize the Microsoft Word 2013 program.
■On the program window, select FILE from the menu bar.
■On the Info screen, from the bottom right corner, under the Related People section,
click the Add an author field.
■Type your name to use it as the author of the document.
■Delete other existing author names by right-clicking on them, and clicking on the Remove Person option in order to use your name as the default author.
Now restart the Word application. On the Info page you will be able to see the new author’s name that you just added. As a side note, Word has an option of adding the names in the Author section by using your contacts book or from online global contacts.
Note: You can also edit, rename, or remove the names from the Related People section.
One of the most convenient ways to enter, edit, or view the SharePoint metadata for a Microsoft Word document (or other Microsoft Office document) is to use the Document Information Panel (DIP). For Office documents that are not stored in SharePoint, the panel can be used to view and edit the Document Properties fields that are built in to Office documents. When opening a document uploaded to a SharePoint Library, the DIP often opens automatically. It’s very easy for a user to accidentally (or sometimes on purpose) hide the DIP: This is done by simply clicking on the “X”, as shown below. Once it’s closed, however, the user may not know how to open the Document Information Panel again. Here’s how.
Open the Document Information Panel Through the Backstage
Unfortunately, once the DIP has been closed, it’s not so obvious how to show the it again. However, it’s not difficult to open the DIP, either. Click the File tab to go to the Backstage area. In the left navigation panel, click the Info category. On the right side of the screen, click the Properties drop-down and choose Show Document Panel.
There you have it, four simple clicks to open the Document Information Panel in Word (or Excel or PowerPoint).
To learn more about working with metadata in Microsoft Office documents in SharePoint Libraries, plus lots of other document management tools, techniques, and strategies, take a look at our class Designing SharePoint Document Management and Records Management Systems in SharePoint 2010. In the course we dig deep into the interaction between SharePoint Library metadata and Word. We develop Word templates associated with Content Types; these templates include fields for the Library metadata inside the document body as well as being visible and editable through the Document Information Panel. We offer additional SharePoint training as well.
Release Date: November 7, 2018
Category: Writing Tools
Author: Amanda W., Ph.D.
Many versions of Word allow users to enter text in right-to-left format to accommodate other languages. Most of these change the formatting to left-to-right text direction when users select English for the text language. However, a few versions have bugs in this process and the formatting remains right to left, such as the Arabic versions of Word. If you receive a document originally written in one of these versions, the cursor, text direction, and/or punctuation will behave abnormally.
Here, we describe 1) how to fix this problem in a selected segment of text and 2) how to set all new comments to run in the correct direction. The information in this guide was compiled from instructions for the 2010, 2013, and 2016 versions of Word, so these instructions should be accurate for those versions, but might not work with older versions.
Changing right-to-left to left-to-right formatting
To do this, we will add two buttons to our Quick Toolbar. These will stay in Word as long as it is installed on your computer, so you can use them whenever you encounter this problem.
- In the Quick Access Toolbar at the top left of the screen (where the save and undo buttons are), click the arrow at the right side and select “More Commands”.
- Under “Choose commands from:” select “All Commands.”
- Find “Left-to-Right Text Direction” in the alphabetical list and click “Add>>”.
- Find “Ltr Run” and click “Add>>”.
- Click “OK” to close the window.
- You should now have two new buttons in the Quick Access toolbar at the top left of your screen: the Left-to-Right Text Direction button, which looks like an arrow and a paragraph symbol, and the Ltr Run button, which looks like an open, gray, or green circle depending on your version of Word.
- Select the text that needs to be fixed, or select all text in the document by pressing Ctrl-A.
- Click both the Left-to-Right Text Direction and Ltr Run buttons (it doesn’t matter which you click first).
Text should now run left to right as we expect in English writing. If the text is suddenly right justified, meaning that it all lines up along the right margin, don’t worry – that means the author of the original document was trying to get around the bug and make the text look normal. Just select the text and click “Left Align” in the “Paragraph” section under the “Home” tab.
Setting comments to default to left-to-right text
If you are providing feedback on this document, you will likely need to add comments to the document. Although the directions above are effective in comments, it can get very annoying to click your two Quick Access buttons every time you need to write a new comment. Luckily, we can set Word to use the correct formatting for all future comments.
- If there are no comments, write one and fix it using the directions above.
- In a properly formatted comment, click somewhere in the comment text that doesn’t have any special formatting (no italic, bold, superscript, etc.).
- Go to “Home” tab and click the tiny arrow in the bottom right corner of the “Styles” section.
- Click “Options…”
- Change “Select how list is sorted:” to “Alphabetical”.
- Change “Select styles to show:” to “All styles.”
- Find “Comment Text” in the list and click it if it’s not already selected.
- If there are no styles in the list and it’s just a blank white box, click the “Style Inspector” button at the bottom (the one in the middle with a magnifying glass), and the first item in the smaller box that pops up should be “Comment Text.” You’ll follow the next steps within that box.
- If clicking “Comment Text” changes the comment back to right-to-left formatting, select all the text in that comment and click your two new Quick Access buttons again.
- Hover your mouse over “Comment Text” and click the drop-down arrow that appears.
- Click “Update Comment Text to Match Selection.”
- Close all open style boxes.
Try adding new comments; the text should run left to right. This will save a bit of time and a lot of frustration. It will need to be done for each document in which you encounter this issue, but once you’ve done it, that style information should stay with the document even if you send it to someone else.
Keywords: Microsoft Word, Microsoft Office, Text Direction, Editing, Comments
Scientific Writing Workshops
If you like our articles, try our workshops! Our articles are based on the material from our scientific writing workshops, which cover these and many other topics more thoroughly, with more examples and discussion.
We offer on-site workshops for your event or organization, and also host workshops that individual participants can attend. Our on-site scientific writing workshops can range from 1-2 hours to several days in length. We can tailor the length to suit your needs, and we can deliver a writing workshop as a stand-alone activity or as part of scheduled meetings.
Our scientific writing workshops consistently receive high praise from participants including graduate students, post-docs, and faculty in diverse fields. Please see our scientific writing workshop page for details.
If you found this article helpful or if there is a topic you want us to address in a future article, please use our online comment submission form, or contact us directly. Your comments and suggestions are valuable! Click here to return to our scientific editing article library.
How to Create a Table of Contents in Microsoft Word
Long documents can be overwhelming for both the writer and the reader. This week, our Microassist Software Tips tutorial shows you how to create a table of contents for your long Word documents, helping both you and your readers navigate your work.
Using Headings to Designate Sections of Your Document
Before you create a table of contents for your document, it’s important to separate your content into small, easily consumable sections. Each section should focus on one or two concepts. This will allow you to provide clear, focused, and concise explanations. Readers appreciate when they can identify when you’re moving to a new concept. Once you’ve identified your sections, you can create your table of contents. An automatically generated table will show the page number where each section begins.
Word 2013 builds your table of contents based on the headings you identify with heading styles. A style is a predefined combination of font attributes, including color and size, that can be applied to any text in your document. To apply a heading style, highlight the text you want to be your heading. Then choose the desired heading option in the Styles group on the Home tab. Heading 1 is usually for your main title, and Heading 2 and Heading 3 are for your subheadings.
After applying headings throughout your document, you are ready to create your table of contents in Microsoft Word.
Inserting a Table of Contents Based on Headings
To insert a table of contents:
- Insert a blank page at the top of your document. To do this, place your cursor at the beginning of your text and select Ctrl + Enter.
- Select the References tab on the ribbon.
- In the Table of Contents group, click the Table of Contents button:
- The first two Automatic Table options will use your headings to create the table of contents. The Manual Table allows you to manually identify each section regardless of the heading content. Choose the option that works best for your document.
Your table of contents will appear on the blank page you added to the beginning of your document. Now both you and your readers can quickly determine which page to navigate to from your table of contents.
NOTE: Be sure to update your table of contents anytime you make changes to your headings. Doing so is quite simple: Right-click anywhere in the table and select Update Field from the menu. You can choose to update only the page numbers (for instance, if you added content to a section) or you can update the entire table. You’ll need to do the latter if you’ve changed heading names or added new headings.
When it comes to word processing, Microsoft Word is the gold standard. As part of the Microsoft Office productivity suite, more than one billion computer users rely on the program every day. That’s nearly one in seven people on the entire planet — an impressive number unmatched in the technology industry.
Even though so many consumers use Microsoft Word, not everyone knows how to maximize the capabilities of the program. Word is packed with a multitude of features that can help make the creation of documents, reports, and text files easier. And when your day-to-day work becomes easier, you become more productive and more efficient — which should be the ultimate goal of any piece of software.
Below are 10 of our favorite shortcuts, tips, tricks, and timesavers to supercharge your use of Microsoft Word. (Most of these suggestions work with all versions of Word, but some are exclusive to newer versions like Word 2013, 2016, or 2016 for Mac.) Try a few out today and let us know what works for you…
1. Copy, paste, and cut with keyboard shortcuts.
Ask anyone who knows these shortcuts — Ctrl + C to copy, Ctrl + V to paste, and Ctrl + X to cut — and they will testify to their critical timesaving nature. Master these three basic commands first and you’ll find yourself zooming through document creation at surprising speeds.
2. Quickly zoom in or out to save eye strain.
Some people like to work in a Word window zoomed in to 150%, while others like to eliminate the need to scroll left and right or up and down by zooming out to 75% to see a document in its entirety. Either way, use the Window > Zoom button to choose the setting that works best for you — or look for the “100%” tab with a slider at bottom right of the document to easily zoom in or out.
3. Delete entire words at a time.
This is an easy one you may not know about: instead of slowly pecking at the keyboard to delete text, or holding down Backspace to eliminate words or entire sentences, press Ctrl+Backspace with the cursor placed after a word you want to erase a word at a time, making a tedious task much easier.
4. Use Smart Lookup to search the Internet.
Anytime you highlight a word or phrase and right-click it, you’ll see “Smart Lookup,” which serves as a quick shortcut to browse the web — without slowing down to open a separate browser window. From word definitions to news scans, this powerful tool can transform a simple question into a wealth of knowledge.
5. Remove unwanted formatting.
Trying to turn a document from an external source into something that works for you? Strange formatting can slow you down, so instead of trying to fix one thing at a time, press Ctrl + Space or click the Clear All Formatting button (in newer versions, an eraser on an A on the Home tab) to remove formatting from highlighted text and start fresh with your own style.
6. Tell the program exactly what you want to do.
Most newer versions of Word include a handy “Tell me what you want to do” field at the top of the toolbar. Insert a word or phrase pertaining to any instruction and the program can quickly identify the command you’re looking for.
7. Use multiple clicks to select chunks of copy.
Rather than employing the tedious drag and highlight method, you can use your mouse to select chunks of copy: double-click over a word to highlight it or triple-click to highlight an entire sentence or section.
8. Quickly insert links into a document.
Similar to the copy / paste / cut commands, learning the keyboard shortcut for adding web links to a document — Ctrl + K — will save lots of time and quickly become one of the sharpest tools in your kit.
9. Select the default font you want, not the default font Word wants you to use.
Don’t like Calibri or Cambria? Prefer Arial to Times New Roman, or like the modern nature of Verdana? The best part about Microsoft Word is you can choose the default font — this command differs by version, but the most reliable way is to click Format > Font, select the attributes you want, and then click Default.
10. Find any word you want quickly and easily.
Instead of using your mouse to navigate to the Find command, click Ctrl + F to either open the window in older versions of Word, or move the cursor automatically to the Search in Document menu that always appears in the toolbar in newer versions.
BONUS TIP: Click the drop-down arrow on the Find menu’s magnifying glass and click Replace to automatically replace a certain word or phrase with a different word or phrase you specify.
No matter what your level of proficiency with Microsoft Word, we could all use a boost to make our use of the program more productive and efficient. Curious about how the Office productivity suite can have an impact on your day-to-day operations? Wondering about whether it’s time to upgrade your version of Word? Have other tips and tricks that have revolutionized your use of the program? Contact CMIT Solutions today.
Когда вы создаете документ в Word, он содержит больше, чем просто вводимый вами контент. К документу прилагается информация об авторе, основанная на имени пользователя и инициалах, которые вы ввели пр
Содержание:
Когда вы создаете документ в Word, он содержит больше, чем просто вводимый вами контент. К документу прилагается информация об авторе, основанная на имени пользователя и инициалах, которые вы ввели при установке Office.
Это нормально для личных документов, но если вы создаете документ, который будет доступен другим и будет работать над ним, вы можете изменить информацию об авторе на более подходящую. Мы покажем вам, как изменить эту информацию.
Для начала щелкните вкладку «Файл».
На экране за кулисами щелкните «Параметры» в списке элементов слева.
Экран «Общие» должен быть экраном по умолчанию, отображаемым в диалоговом окне «Параметры Word». В разделе «Персонализируйте свою копию Microsoft Office» измените поля «Имя пользователя» и «Инициалы», чтобы отразить правильную информацию, которую вы хотите в документе.
Вы также можете добавить почтовый адрес к информации, связанной с вашим документом. Для этого нажмите «Дополнительно» в списке элементов слева.
Прокрутите вниз до раздела «Общие» справа и введите адрес в поле «Почтовый адрес».
Нажмите «ОК», чтобы принять изменения и закрыть диалоговое окно «Параметры Word».
Если вы не хотите, чтобы в документе содержалась личная информация, вы можете удалить ее.
Configuring a Word Merge in SmartSimple is a three-step process:
- Create the MS Word document that will be used as the template. This page describes the process to add form fields to your Word document.
- Upload the Word document to a SmartFolder. (See Uploading Word Merge Document to a SmartFolder for instructions.)
- Create the Special – MS Word Merge custom field that maps the SmartSimple fields you wish to merge to the Word template.
Your Word document will contain Form Fields which are linked to “Bookmarks.” The SmartSimple Word Merge field will be configured to match the bookmarks up with SmartSimple variables in the third step.
In this step, you will add the Form Fields and assign Bookmarks to each field in your Word document that is to be merged. The steps vary slightly in different versions of Word.
Take note of all the Bookmarks that you add to the Form Fields below. They will be used in step 3: creating an MS Word Merge custom field.
Contents
- 1 MS Word 2000-2003
- 2 MS Word 2007
- 3 MS Word 2010/2013
- 3.1 Word 2010
- 3.2 Word 2013
- 3.3 Preparing Template for List View Export
- 4 See Also
MS Word 2000-2003
- From the View Menu select Toolbars and enable the Forms Toolbar
- Click in your Word document wherever you wish to insert a Form Field.
- On the Forms Toolbar click on the first button to insert a Form Field into your document:
- Right-click on the Form Field and select Properties. Then provide a name for the field in the Bookmark section.
MS Word 2007
- Click on the Menu button and select Word Options
- In the Popular section, select Show Developer Tab in the Ribbon
- Click in your Word document wherever you wish to insert a Form Field.
- On the Developer Menu select the Legacy Tools icon which is in the Controls section:
- On the Legacy Forms menu click the first icon to insert a Form Field.
- Right-click on the Form Field and select Properties. Then provide a name for the field in the Bookmark section.
MS Word 2010/2013
- Click in your Word document wherever you wish to insert a Form Field.
- Click on the Developer tab.
- If the “Developer” tab is not visible, click on File > Options > Customize Ribbon, and check off the “Developer” tab in the right hand frame.
- On the Developer tab, click on the Legacy Tools button: .
- Click on the Text Form Field button
Word 2010
Word 2013
In Word 2013, the document must be saved as a “Word 97-2003 Document”:
Preparing Template for List View Export
List View Export to a Word Merge field required the fields used be Word Merge instead of the old bookmarks which is described above. This method will also work for Word Merge fields used outside of the list view.
To ensure the list view export functions, fields must be created using the following:
- In Word 2007 and higher, select Mailings from the ribbon menu.
- If you haven’t already, click on Select Receipients then Use Existing List.
When the Select Data Source dialog box appears, select a blank Excel document (or any existing Excel document you have accessible). This will enable the required buttons.
- Click on Insert Merge Field.
- Select the Address Fields radio button
- With the first field on the list selected, click on Insert. The selected field name will now appear within the document.
Ex. «Field_Name» - You can now close this dialog box.
- To rename the newly added Word Merge field, right-click on the field and select Edit Field
- You can now relabel the Field name with whichever name you wish to use.
- Copy and paste this field to other parts of your document and rename accordingly.
Note: If you do not rename the field, then the data merged within will be the same for all like-named fields.
See Also
To set up a Word merge:
- Step 1 – Create the MS Word document that will be used as the template.
- Step 2 – Upload the Word document to a SmartFolder.
- Step 3 – Create a Special – MS Word Merge custom field.
Advanced Word Merge Features Include:
One of the most common mistakes that people make while formatting a document in Word is to use spaces to align text. Many of us have been frustrated by things not lining up perfectly, and we’re left dissatisfied by the slightly meandering edges.
Because proportional-font characters take up different amounts of space, the text in that font cannot be aligned correctly using spaces. Using tabs will ensure that your text is aligned perfectly and is easy to modify if you change your mind!
The chief advantage to using tabs rather than spacing is that after the tabs are in your document, you can move or change the tab stops and then the selected text moves or realign. Each of the tab settings that you create or modify are specific to that paragraph. And remember, a new paragraph is created every time you press Enter. That means that you’ll have to select multiple paragraphs and create tabs stops for all of them, or you could create different tab stops for different paragraphs to get that perfect look!
Word documents are set up with default tab stops every 1/2-inch across the document, but you can set your own tab stops anywhere you choose. In fact, there are several different types of tab stops that you can use. Ever wonder what that little button in the upper-left where the rulers intersect does? You can click it and toggle through the tab options!
Left-aligned: Begins test at the tab stop (This is the default tab setting).
Center-aligned: Centers text on the tab stop.
Right-aligned: Ends the text at the tab stop.
Decimal: Center the text over decimal point for a list of numbers.
Bar: Creates a vertical line through a selected paragraph at the tab stop.
To try this out for yourself, you’ll want the ruler to be visible. Simply click on the View Tab and check the Ruler box in the Show Group.
Watch our Word Expert demystify the power of tab stops and perfect alignment! You can even create leaders to help the reader easily scan across the page.
Update: 5/10/2017
We had a site visitor, thanks William, recently ask about aligning text to the right of a page. We thought a short video would help users that would like to accomplish what William was requesting. We hope this helps you too.
Word: Insert File/Path Name into Document Footer or Header
Inserting your Word document’s file/path name into the footer or header will help you know where your document is located.
- Open Microsoft Word.
- Click the “Insert” tab.
- From the “Header & Footer” group, click [Header] or [Footer].
- From the drop-down menu, choose a Header or Footer style.
- Return to the “Insert” tab.
- From the “Text” group, click [Quick Parts] > Select “Field. “
- Under “Field names,” select “FileName.”
- In the “Field properties” section, select a format.
- In the “Field options” section, check “Add path to filename.” The file name will now appear in the header or footer.
Keywords: header, filename, filenames, file names, path, pathname, pathnames, path names, add
Share This Post
Blog Resources
Cedarville offers more than 150 academic programs to grad, undergrad, and online students. Cedarville is known for its biblical worldview, academic excellence, intentional discipleship, and authentic Christian community.
Cedarville University
for the Word of God and the Testimony of Jesus Christ
Need to write or read in a different language? Follow these tips
- Tweet
- Share
What to Know
- In Windows: Choose the desired Display and Help Languages in File >Options >Word Options >Language.
- Then, select Choose Editing Options in the same section to change the editing language.
- All but the proofing language in Office for Mac are the same as those for the operating system. To change it in Word: Tools >Language.
This article explains how to change display and/or editing languages in Word for Office 365, Word 2019, Word 2016, Word 2013, Word 2010, Word Online, and Word for Mac. In Windows—but not in macOS—you can choose them independently of the language installed for your operating system.
How to Change the Display Language
The display language in Word governs the ribbon, buttons, tabs, and other controls. To force a display language in Word that’s different from that of your operating system:
Select File > Options.
In the Word Options dialog box, select Language.
In the Choose Display Language section, choose the Display Language and Help Language you want to use. Languages installed in Windows 10 are listed.
If a specific language is not listed, select Get more display and help languages from Office.com. If necessary, install a Language Accessory Pack, then close and re-launch Word. You may need to reboot your computer, as well. After a language pack loads, go to the Word Options menu and choose that pack in the Display Language and Help Language lists.
Select Set as Default for both the Display Language and the Help Language lists.
Select OK to save your changes.
How to Change the Editing Language in Word
The editing language—which governs spelling, grammar, and word sorting—can be changed in the Word Options screen. Go to the Choose Editing Languages section, and select a language from the list. If the language isn’t listed, select the Add additional editing languages drop-down arrow and choose a language.
To proofread in the selected language, highlight the text, then go to the Review tab and select Language > Set proofing language. Choose a language from the list. Word will consider the highlighted selection to be the non-default, selected language and will check the spelling and grammar accordingly.
How to Change Language in Word Online
Language options for Office Online are similar to those in desktop versions of Office. In Office Online, highlight the text for proofing in the non-default language. Select Review > Spelling and Grammar > Set Proofing Language, then choose your alternative language. All proofing in that selected block will be governed by the rules of the alternative language.
How to Change Language in Word for Mac
The display and keyboard layout languages used in Office for Mac are the same as the ones for the operating system. You cannot use separate languages for the OS and Office applications. However, you can specify a different proofing language for Office for Mac.
To change the proofing language in Office for Mac, select Tools > Language in Word or another Office application. To change the proofing language for new documents, select Default.
If you select OK instead of Default, the proofing language you chose will only apply to the current file.
Normally, Word defaults to the language of the operating system. As a rule, you should use Windows to install language files rather than rely on an application like Word to do it for you.
Creating and Editing Headings
- Select the Home tab from the ribbon.
- In your document, select the text to convert to a heading.
- Click on the appropriate heading level in the Styles in-ribbon gallery; e.g., Heading 1 .
- Headings 1, 2, or 3 can also be assigned using Control + Alt + 1 , 2 , or 3 , respectively.
Word documents with a true heading structure provide at least two benefits:
- The document retains this structure when correctly exported to HTML or PDF.
- The document’s readability is increased for all users.
Adding Alternative Text
- Right-click on the image and select Format Picture . A dialog box will appear.
- Select the Layout & Properties icon and choose Alt Text .
- Enter the appropriate alternative text only in the Description field, NOT the Title field.
Creating Tables
- Select the Insert tab on the ribbon, then select Table > Insert Table.
If your table has a column header(s), select Table Tools > Layout on the ribbon, then choose the Repeat Header Rows option in the Data group.
Do NOT create tables “by hand” with spaces or the Tab key.
Editing Hyperlinks
- Select a hyperlink, right-click, and select Edit Hyperlink or Ctrl + K .
- Change the text in the Text to display field to a more meaningful description.
Creating Lists
- Select the Home tab on the ribbon.
- Choose the Numbered List or Bulleted List option from the Paragraph group.
Creating Columns
- Select the Page Layout tab on the ribbon.
- Select Columns in the Page Setup group.
Using the Accessibility Checker
- Select File > Info > Check for Issues > Check Accessibility .
Saving as HTML
- Select File > Save As , designate the location (usually Computer ), and select a folder.
- Save as Web Page
- Save as Web Page, Filtered
Converting to PDF
Users can create PDF files with the Adobe Acrobat add-in (recommended), or by using Word to save the document as a PDF file.
Adobe Acrobat Add-in
- To export a PDF, select Create PDF from the Acrobat ribbon,
OR select File> Save as Adobe PDF .
- Select Preferences from the Acrobat ribbon.
- Ensure that the Enable Accessibility and Reflow with tagged Adobe PDF setting is checked in the Acrobat PDFMaker dialog.
Saving to PDF with Word
Accessible PDF files can be created without installing the Adobe Acrobat add-in:
- Select File > Save As .
- Under Save as Type , select PDF .
Before saving, select Options and ensure that the Document structure tags for accessibility option is selected.
Related Resources
- PowerPoint Accessibility
- PDF Accessibility
- OpenOffice.org Writer
©2022 WebAIM
Institute for Disability Research, Policy, and Practice
Utah State University
6807 Old Main Hill
Logan, UT 84322-6807
435.797.7024
- ‘)” data-event=”social share” data-info=”Pinterest” aria-label=”Share on Pinterest”>
- ‘)” data-event=”social share” data-info=”Reddit” aria-label=”Share on Reddit”>
- ‘)” data-event=”social share” data-info=”Flipboard” aria-label=”Share on Flipboard”>
Related
- How to Edit an XPS File
- How to Open a Word Document in Print Layout
- How to Edit a DAT File
- How to Open a WI File
- How to Change the Monitor Resolution on a PC
When you open one of your business documents in Microsoft Word 2010, it is displayed in the Print Layout view, which is the default view. You can change the view at any time. If you find that you are having to change the view every time you open a document, you can save time by modifying the default open view in Word. To change the open view, you’ll need to edit Word’s default template file.
Click “Start” and select “Computer” from the Start menu to launch the Windows file manager.
Navigate to “SystemDrive:\Users\UserName\AppData\Roaming\Microsoft\Templates”, where “SystemDrive” is the drive on which you installed Windows and “UserName” is your Windows username.
Right-click the “Normal.dotm” file and select “Open” from the context menu to open the default template in Word 2010.
Type a letter in the document and then press “Delete” to delete it. This step allows you to save and overwrite the default template.
Click “View” near the top of the Word application window and select a view from the Document Views group near the top.
Press “Ctrl-S” to save the default template, overwriting the old version.


