Introduction
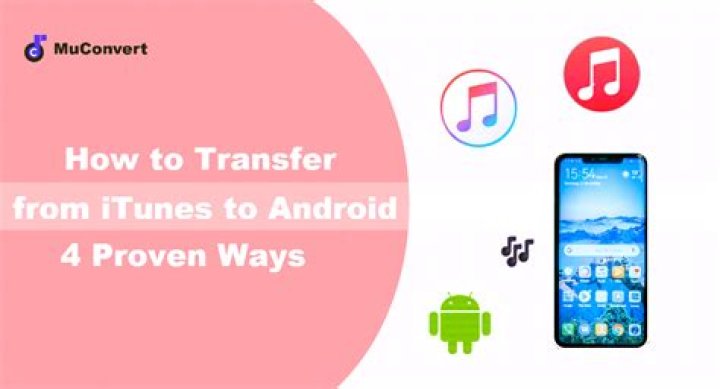
If you have been using iTunes to manage your music collection over the years but have recently moved to using an Android device, this article will help transfer your iTunes music library to Android. iTunes is great for managing your music on Apple device’s, but you can use iTunes on Android.
The application which can assist you to sync iTunes to Android is Droid Transfer, which not only transfers music from your iTunes to your Android phone, but also keeps the media on your Android Phone in sync with your iTunes library as you continue to add music to either iTunes or your Android device.
If you prefer not to use iTunes, Droid Transfer also enables you to sync music between Android and your computer without iTunes.
Summary
To sync music between iTunes and Android, follow these steps.
- Download and install Droid Transfer on your Windows PC
- Download and run the Transfer Companion App on your Android device
- Connect your Android Device and your PC over WiFi or USB as per our Quick Start Guide
- Click Music in the features listed in Droid Transfer
- Click ‘Sync with iTunes’
- Droid Transfer compares your iTunes music with that on your device. Select to transfer from Android to iTunes or from iTunes to Android (or both!)
You can get the Transfer Companion app completely free on the Google Play Store, while Droid Transfer for PC is available as a free trial download. Both apps are needed to sync your Android device with iTunes. The free version of Droid Transfer allows you to copy up to 50 songs to and from your Android device, while the full version is unlimited.
Detailed Instructions
Run Droid Transfer on your PC and connect to your Android Device running Transfer Companion as described in our Setup Guide.
In Droid Transfer Click the Music Icon – Droid Transfer lists the music currently on your Android Device.
View Android music on computer
Click the “Sync with iTunes” button on the control bar.
Droid Transfer will run iTunes and read your iTunes contents. Droid Transfer will compare the music on your Android device and compare it with your iTunes music library.
Sync Music from Android to iTunes
Droid Transfer will show how many tracks are on your Android device that are not in iTunes. Click “Copy tracks to iTunes”.
Droid Transfer will begin to transfer the missing iTunes tracks from your Android device.
Sync Music from iTunes to Android
Droid Transfer shows how many tracks are in iTunes that are not currently on your Android device. You will also see the total file size of those music files. If your Android device has enough free (internal) memory space to hold all of the music, click “Copy Tracks to Android” to transfer all the tracks to your Android device.
If you do not have enough space on your Android device to hold all of your music in iTunes – Droid Transfer will tell you so. You have the option of selecting the music you wish to copy over from iTunes. See “Using Advanced iTunes Sync Mode”
See it in Action!
Keeping in Sync
Now that you have copied music to and from the Android device and iTunes – the music collection on your Android device and your iTunes library should be the same. If you add music to your iTunes library later on – run Droid Transfer again to copy that new music over to your Android device.
Using Advanced iTunes Sync Mode
Advanced Syncing allows you to see which tracks will be copied from and to iTunes before any syncing takes place. You can also select which tracks to copy to your Android device if you do not have enough space on your device to hold all of your iTunes music.
To start Advanced Mode – click the link “Click here to view and select which tracks to copy (Advanced Mode)”. This will open the Advanced sync view.
iTunes on Android – Sync music to Android
Don’t forget to like & share with your friends!
Read Next: How to Backup Android Messages to PC >
As we all know there are no iTunes on Android only Google Play Store and while this is not a huge deal for the average music lover, it could be a disaster for music aficionados who are only able to find song downloads through iTunes. Some artists and game developers even prioritize the release of their work via iTunes, which possibly made way to apps that will allow users to install iTunes for Android. Use the steps below to quickly and easily install iTunes for Android!
Download & Install iTunes for Android (iSyncr) FREE
Install iTunes for Android using iSyncr app
If you have an iTunes account but would like to access it and listen to your songs via PC or Mac or on an Android device, use this method to listen to and install iTunes for Android smartphones. Developed by JRT Studio, the iSyncr app app will be able to access your iTunes playlist, podcasts, music, videos and more. iSyncr now has 500,000 to 1,000,000 installs/downloads and with 4 out of 5 stars rating.
- Click Google Play Store in your Android phone or tablet and find iSyncr from the search box. This app is under Music & Audio.
- Click Installand then allow any permissions asked by the app.
- Wait for iSyncr to download, usually it is done in just a few minutes. Once it’s over, launch it by clicking open.
- Sync media over Wi-Fi or USB
- Since this syncs your iTunes account it will feature album art, play count, ratings, last played songs, last skipped songs and more. iTunes content will access internal or SD card storage over MTP/USB or Wi-Fi. This app on the other hand will not sync iTunes copy protected content. It will give you an alert if there is a DRM content.
Install iTunes for Android using the steps above!
Sync everything with iSyncr
You can sync your stats so you can enjoy seamless music enjoyment from all devices. Sync Album Art, Live Lists, Playcounts and Ratings. You won’t have to miss out on any iTunes feature just because you are moving to Android. Use the steps above to install iTunes for Android – then take a look at the features of the free iSyncr app to make sure you get the most out of your Android iTunes experience.
WARNING FIRESTICK USERS
YOUR INFORMATION IS EXPOSED
Your location is: Krasnodar KDA
Your current IP address is: 2001:4455:2f7:b700:f880:7bad:b46b:1768
You can stream and download anonymously through your PC, Mac, Android, and iPhone through IP Vanish.
You have the option to sync using Wi-Fi or USB whichever is better and more convenient. If you have music or albums found on multiple computers then you an also use iSyncr to sync from any computer as long as the PC has iSyncr Desktop installed and running. Auto sync feature therefore allows you to enjoy music at home or even at work, no matter where you are as long as there is a computer that you use.
Google trackers are lurking on 75% of websites. Cover your tracks to protect yourself.
Features of iSyncr that you must check out before installing
To run on your PC, iSyncr needs iSyncr Desktop which is free. It has to run so that iSyncr can sync with iTunes. This needs iTunes for Windows, or iTunes for Mac OS 10.5+ is needed. iSyncr Desktop is free and is limited to 100 songs per playlist with only one playlist at a time.
Features of iSyncr
iSyncr version 5.10.4 is the current build with multiple language fix for Android 7.0 so this means its Nougat ready! Previous fixes of iSyncr included support for Blu devices, smaller and compact app size, battery usage fixes, fixes for live lists, tablet fixes, fixes for ratings widget and more.
The last update was made in October 10, 2016 in line with release of Google Nougat. Developed by JRT Studio in Austin, Texas, users are encouraged to email their suggestions to [email protected] .
Where to get iSyncr?
The best place to get genuine and safe Android apps is from Google Play Store but since iSyncr is so popular, it is also available via Amazon and PayPal. iSyncr is included in Time Magazine’s 50 best apps in 2013 and 2014 and has gathered a lot of positive reviews online making it a reliable and efficient app to install iTunes on Android.
This tutorial will guide you step by step through the process of adding audio files (mp3, ogg, wma, etc) from your Windows PC to your Android phone.
Note: the steps and screenshots in this tutorial are specific to the G1 Android phone. They will likely be similar if not identical as new Android devices reach the marketplace.
Note 2: while the steps below work perfectly, and still do, this tutorial will show you how to transfer any file – music or otherwise – using just a web browser and one free App on your phone. And it’s not restricted to just Windows – it works. It does require a 3G or WiFi connection – unlike the tutorial below – which uses your USB cable to transfer files.
- In order to add music to your Android phone you’ll need to plug it into your PC using a USB cable. Once it’s connected to your PC, you should see a small USB icon in the upper left corner of your phone.
Drag the “menu bar” down and there will be an entry titled USB connected. Tap (or click) it.
Now tap the Mount button.
Depending on how you have Windows configured to react when a new drive is detected, you may see a Removable Disk screen similar to the one below. If you do, select Open folder to view files using Windows Explorer, click OK and skip the next step. If you don’t see a Removable Disk window, proceed to the next step (#5).
Double-click the My Computer icon on your Desktop, or open My Computer from your Start menu. There will be a new drive listed – double click it.
You’re now viewing the contents of the SD card in your Android device. There should be a folder titled Music – but if there isn’t don’t worry – just create it.
Now navigate to the location you store your audio files on your PC. Select the ones you want to copy to your Android phone/device and copy them by clicking Ctrl+c or right-clicking on them and selecting Copy.
Return to the Music folder on your phones SD card and paste the files into it (click ctrl+v or right-click and select Paste).
Your music/audio files will now copy over.
Once you’ve finished adding files to your phones Music folder, double-click the Safely Remove Hardware icon in your system tray.
Select the USB Mass Storage Device and then click the Stop button.
Select the drive that represents your Android phone (in my case it was F: drive, as indicated in the screenshot below) and click the OK button.
Windows should now prompt you that it’s OK to remove the device (your Android phone). But before you disconnect the USB cable, keep reading.
Back on your phone, pull down the top menu bar again, if it isn’t still being displayed. Tap (click) the Turn off USB storage entry.
Now tap the Turn Off button.
At this point you can disconnect your Android phone from your PC. To listen to the files you just added, go to your Applications screen and select the Music app.
Tap either the Artists, Albums, Songs or (if you added them) Playlists button.
And now you’ll be able to play your songs and/or audio files on your Android phone!