I have been using Intel 520 SSD 180GB on my Dell Inspiron 11z-1121 laptop for a while and get great speed. However, if you want to tweak and optimize your SSD for Ubuntu, Linux Mint, Debian or any linux distribution to make your SSD run even faster and live longer, here how I do my ubuntu ssd tweak.
Note: this article will help both SSD and mechanical hard drive performance. If you want to improve and tweak your Ubuntu, Linux Mint, Fedora, Centos or any linux distribution, this article will help you.
SSD benefits
- Faster than traditional HDD, about 2-3 times faster than SATA2 7200 RPM HDD
- No moving parts
- Lower heat during operating
- Uses less power
- Higher reliability
Update your SSD firmware
SSD manufactures (Intel, Samsung, SanDisk, Plextor, Corsair, Crucial…) often public new firmwares for their SSD to improve
improve performance, reliability, and system compatibility, fix technical issues, bugs). Check your SSD’s manufacture often to make sure you have the latest firmware for your SSD. *** Always backup before you do anything ***
Use EXT4 file system
Most modern new linux distributions default file system is EXT4. EXT4 gives you good speed and reliable for your SSD, EXT4 also supports TRIM. EXT4 is matured for SSD usage since linux kernel 2.6.28. If you have older linux distributions, you may have an option to choose EXT4 as file system, but newer linux distributions will install with EXT4 as default so you don’t need to worry about.
Enable TRIM
TRIM (Trim command let an OS know which SSD blocks are not being used and can be cleared)
Back up fstab first in case something wrong happen.
Edit fstab file
Add discard to your ssd drives or partitions, after ext4
Adding noatime and nodiratime
noatime and nodiratime are mount options in linux for linux file system. noatime disables atime updates on file system, and nodiratime will disables atime updates on directory system. By adding noatime and nodiratime will greatly reduce ssd load means performance gains.
Edit fstab file
Add noatime,nodiratime to your ssd drives or partitions, after ext4
Disable hibernation
Hibernate and suspend sometimes don’t work depends on the hardware you have for your system. Sometimes they make your system crash and unstable. Plus hibernation will put a lot of writes to your SSD which will shorten your SSD life.
Change from “yes” to “no”, there are two, one for hibernation, and another one for suspend. If you have to disable them both, make sure to replace them both from yes to no.
Tmpfs
Files and directories store in tmpfs is temporary, tmpfs keeps everything in virtual memory (kernel internal caches), nothing will be saved on your hard drive or SSD. Once your system is restarted, everything in tmpfs will be gone. Normally linux system cache stores in /tmp directory. To reduce writes on SSD, you can mount /tmp to tmpfs.
Edit fstab file
Add the line to the end of fstab file
If logs aren’t important for you (laptop or desktop), you can also mount /var/log to tmpfs. Add the line to the end of fstab file
Preload
Preload is a Linux software developed by Behdad Esfahbod. Preload learns programs that users use often, records statics using Markov chains, analyzes, and predicts what programs will be most used. Preload then will load those programs, binaries, and dependencies into memory or ram. By having programs already in RAM or memory, it will take less time when you actually start that program or programs.
To install preload on Ubuntu, Linux Mint or debian based distributions
To install preload on Fedora, Centos or Redhat based distributions
Swap and Swapiness
Swappiness is a part of Linux kernel that let you control how much swap (virtual memory) file is being used. Swappiness values can be changed from 0 to 100. The higher swappiness values the more Linux kernel will try to use swap space, the lower swappiness values means linux kernel will useless or try not to use swap space depends on our setting. The default swappiness value from linux kernel is 60, if your system have plenty have RAM, you should avoid using swap space which writes and reads will be on your SSD or hard drive. For system with 4 GB or more RAM, I would suggest to reduce the usage of swap by changing swappiness settings to between 10 even 0.
To check your swappiness setting on your system, you should see the value of 60 as default.
The value is up to you to decide. Here is my suggestion
- 2 GB = 30
- 4 GB = 10
- 6 GB or more = 0
What steps should be taken before/during/after installation of Ubuntu on a Solid State Drive to optimize performance and ensure maximum durability of the drive?
13 Answers 13
I have successfully used several different techniques to improve the way Ubuntu uses the storage device, whether that be solid state or traditional drive.
For SSD’s you are looking to minimise the number of times the drive is written too, as reads should not add wear to the drive.
1) Manage the swap file
If you do not hibernate your computer and you have ample RAM memory to run all your applications, then in theory you do not need a swap partition.
If you have a mix of SSD and hard drives, place your swap partition on the hard drives only.
2) No Writes for Read Timestamps (suitable for SSD’s and hard drives)
Mounting your partitions with the options noatime and nodiratime will stop timestamp writes when you read files and folders. These timestamp writes are not generally required unless you use a local mail server client such as mutt. The reason this is generally a bad idea, is because every read will produce a write when updating the timestamps. This decreases the life of the SSD.
Edit your /etc/fstab configuration file (carefully – take a backup to be sure as breaking your fstab configuration can prevent you system from working):
Edit the mounting options for your partitions by adding the text noatime and nodiratime to the lines defining your root (/) and other partitions if you have them (/home) – Note: if you have a /home partition, start with that just changing that partition if you are concerned about breaking something
You will need to reboot your machine before these changes take effect
3) Minimising writes from the OS and applications
Assuming that you are not running a mission critical product server, most people do not look at logs should something go wrong (especially as serious errors are rare for most Ubuntu users). Therefore you can configure Ubuntu so all logs get written to RAM memory rather than the SSD.
Note: only make the following changes when you have installed all software you are going to use (especially things like Apache web server), otherwise you may experience some issues with missing directories in /var/log
Open /etc/fstab with an editor (assuming you have backed up the /etc/fstab file)
Add the following lines at the end of the fstab file and save:
You will need to reboot your machine before these changes take effect
I know EXT4 is the fastest by 3y already checking test blog posts from different authors But theres also other settings that make SSD faster i found in
why only noatime? And how to know if disk is without journaling from installation? And whats faster? No Jornaling or opposite? And diff no journaling data=writeback or journaled data=ordered?
And why tmpfs /tmp differs in both arcticles and how they dffer and witch is better and why?
All of this is about SSD but can i use same settings in HDD? I want to find answer for HDD and SSD as ive made one time scripts for setting it up in my
4 Answers 4
The howtogeek site is the more responsible of the two sites you mentioned. The atime tweaks are just metadata optimization that pipeline when a file will receive a certain timestamp update. It’s applicable regardless of the media you use, it also depends on how sensitive your application is to the coherency of that metadata. Most desktop users won’t miss it.
Now as for disabling journaling. that’s just crazy. That’s the whole point of using these advanced file systems: better performance while securing data integrity. Understand that if you make this trade you’re exchanging your personal data for a modest increase in speed. I personally wouldn’t recommend it. Most people don’t keep good backup’s to begin with to compensate for taking this risk.
Partition alignment does matter but not tweaking that bit won’t kill you either. It really depends on how heavily the disk is accessed. Assuming it’s unaligned, if you had tons of I/O going on a regular basis (server) you would see an improvement. On average desktop usage, who knows, probably not appreciable.
I would disregard that Ubuntu wiki you mentioned except for the notion that partition alignment is valuable. Here’s a more responsible link:
Some of the recommendations in that Ubuntu wiki are just plain wrong, like the reconfiguration of tmpfs using “nodev”. It’s already a RAMFS!
Moving firefox cache to /tmp may increase speed in your current session. Though it might be a security hazard (not secured in your home anymore) and it will be rebuilt on each boot since tmpfs isn’t persistent.
Adding discard to ext4 options is prudent, writeback is the default mode, leave journaling settings alone, the atime tweaks are fine, and the switch to deadline or nop scheduler might also be useful, partition alignment is optional. The rest is bunk.
these are the random things I do….
13 Thursday Jun 2013
I have been using Intel 520 SSD 180GB on my laptop for a while with great results. However, if you want to optimize your Linux SSD for Ubuntu, Linux Mint, Debian or any linux distribution to make your SSD run even faster and live longer, here how I do my Ubuntu SSD tweak.
SSD benefits
- Faster than HDD, about 2-3 times faster than SATA2 7200 RPM
- No moving parts
- Lower heat during operating
- Uses less power
- Higher reliability
Always make a backup FIRST!
Update your SSD firmware
SSD manufactures (Intel, Samsung, SanDisk, Plextor, Corsair, Crucial…) often public new firmwares for their SSD to improve performance, reliability, and system compatibility, fix technical issues, bugs). Check your SSD’s manufacture often to make sure you have the latest firmware for your SSD.
Use EXT4 file system
Enable TRIM
TRIM lets an OS know which SSD blocks are not being used and can be cleared
Create a cron job for trim
monitor the expected life-time with smartctl
Your disk will not run forever. It has an expected life-time and you should probably monitor it
smartctl -data -A /dev/sda
This will output something like this:
At ID# 233 you see the MWI. This is a value starting at 100 and when it reaches values below 10 you should start to worry. Note that different manufacturers may have different names and numbers for this indicator.
more helpful hints to maximize SSD life
Edit fstab file, add discard to your SSD drives or partitions (after ext4)
noatime mount option
noatime is a mount option in linux. noatime disables atime updates on the file system. By adding noatime, you greatly reduce SSD load which translates to longer SSD life and performance gains.
Edit fstab file, add noatime to your SSD drives or partitions, after ext4
Disable hibernation
Hibernate and suspend don’t always work as expected and can make your system crash and/or unstable. Plus hibernation will put a lot of writes to your SSD which will shorten your SSD life.
Tmpfs
Files and directories stored in tmpfs are temporary. tmpfs keeps everything in virtual memory so nothing will be saved on your hard drive or SSD. Once your system is restarted, everything in tmpfs will be gone. To reduce writes on SSD, you can mount /tmp to tmpfs. (it may be the default on your distro)
Edit fstab file, add the following line to the end
Swap and Swapiness
Swappiness is a setting in the Linux kernel that let you control how much swap (virtual memory) is being used. Swappiness values can be changed from 0 to 100. The higher swappiness values the more Linux will try to use swap space. If your system has plenty have RAM, you should avoid using swap space. For systems with 4 GB or more RAM, I would suggest reducing swap by changing swappiness settings to 10 or even 0.
To check your swappiness setting on your system, you should see the value of 60 as default.
Here are my suggested settings depending on your RAM:
2 GB = 30
4 GB = 10
6 GB or more = 0
To change swappiness setting, add the following line into sysctl.conf
dirty_background_ratio and vm.dirty_ratio
dirty_background_ratio is the maximum percentage of dirty pages stores in total system memory before need to be written to disk when pdflush/flush/kdmflush or kernel flusher threads kick in. The default value of dirty_background_ratio depends on your linux distribution, but we are going to decrease its value to prevent heavy disk I/O.
vm.dirty_ratio is the percentage of total system memory to store dirty pages. Low vm.dirty_ratio means the kernel will flush dirty data to disk more often with smaller writes, and higher vm.dirty_ratio will allow kernel to flush dirty data to disk less often with bigger writes. We want to set vm.dirty_ratio high.
To check your current settings
To change them, add the following to sysctl.conf
Move Firefox cache to RAM
Firefox saves its cache to HDD or SSD, if you want to reduce writes to your SSD to increase SSD’s life, well move all firefox cache to RAM which will speed up firefox a little bit but all the cache will be gone after you restart your computer.
Open firefox, in the address bar type in
Ignore the WARNING. You can move on and click on “I will be careful, I promise”.
In the search bar (the about:config search bar, not the regular firefox search bar), type in
If the search result is blank it means your firefox does not have that string.
To create one, right click on firefox empty white space, click New > String – the value name is
Click Ok – The next box is the cache location, type in
Solid-state drives are trending in all the branded PCs and Laptops for their performance however there can be several reasons responsible for slow performance or reduced response time. A slow SSD will annoy us as it affects the computer’s performance. With a fast SSD, you can speed-up the booting process whereas a slow SSD drive will eventually reduce the boot time. This post will focus on the manual methods to boost your SSD. However, you can also speed up your SSD with some downloadable tools available.
SpeedUp SSD for Optimum Output
1. TRIM Command
Trim command is necessary for the smooth performance of your solid state drive. TRIM command will help you in removing unused data from your SSD. If you find your SSD to be slow, the first thing you should check is the TRIM command. With the following steps, you can ensure that the TRIM command is enabled on your computer.
- Invoke the Run tab from the start menu.
- Type ‘CMD’ in the run tab to open the command prompt.
- Give “fsutil behavior query DisableDeleteNotify” as input in the cmd.
- TRIM command is activated already if you get “0” as a reply.
- But if you get “1” the TRIM command is not activated.
- Type “fsutil behavior query DisableDeleteNotify0” in the command prompt to enable the TRIM command.
2. Optimize Drivers
An optimized driver can enhance your system performance. The memory space of Solid-state drives gets filled up with unwanted junk files and fragmented files as we keep on using it. You can clean up your drive by optimizing it. You can delete junks with the following steps.
Disk Clean Up
- Locate the SSD drive in my computer.
- Right-click on the drive and access the general setting.
- Choose “disk clean up” option to erase junk files.
Disk Defragmenter
- Right-click on the SSD and select properties menu
- Choose the tools option available.
- Click-on “defragment now” option.
- Select the “Analyze disk” option to analyze fragmented percentages.
- Select the “defragment disk” option to merge fragmented files.
3. Enable the AHCI Mode
AHCI mode should be enabled to get the best out of your SSD hard drive. If your drive is slow, it is better to ensure that your AHCI is enabled with the following procedure.
- Access device manager from the control panel
- Open IDE/ATAPI controllers.
- If the AHCI controller is available on the list and enabled.
- If you can’t locate the AHCI controller you have to enable it manually.
- You can enable AHCI from BiOS settings.
- Locate On-chip SATA Type in the boot menu and enable AHCI.
4. Disable Onboard VGA
Sometimes using Onboard VGA may affect the performance of the SSD. This can be avoided by disabling the Onboard VGA option using the following steps.
- Enter into BIOS mode by restarting your computer.
- Select Advanced BIOS options.
- Locate Onboard VGA and disable it.
5. Configure Boot Order
Improper sequence of boot order may affect the performance of your SSD hard drive. You can configure your boot sequence with the following sequence.
- Reboot your computer and enter into BIOS mode.
- Select SSD as a preferred boot device followed by USB and DVD Drive.
- Save and exit the BIOS menu.
6. Check the SATA Port
The speed of your external SSD may get reduced when you choose the wrong SATA port. Most of the motherboards will have 3 and 6Gbps SATA ports. Use a 6Gbps SATA controller to ensure the high speed of the SSD.
7. Verify the SATA Cable
Sometimes your external SSD will perform slowly when the SATA cable connection is not proper. Improper or defective SATA cable will hamper the performance of the SSD. Frequent checking of the SATA Cable will help you to maintain the constant performance of your drive.
8. Update Your Firmware
Keeping your SSD up to date is another effective method of optimizing your drive’s performance. This update can identify and quarantine problems available in the SSD. You can locate updates for your SSD firmware from the manufacturer’s website or go to device manager and right click on the Firmware and select ‘Update Driver’.
9. Choose the High Power Plan
Usually, the OS will choose a balanced power plan for system operation. This may sometimes slow down the performance of your SSD. For a better operation of the drive, it is preferable to choose a high power plan for the system.
10. RAM Capacity
With smaller RAM capacity, all the computer operations will be slowed down including the performance of the external SSD. To elevate the performance of the drive, we need high capacity RAM. A RAM with a minimum capacity of 6GB will be optimal for fast system performance.
Conclusion
The SSD is generally used for the high-speed performance of the system. With increased storage and fast boot-up, external SSDs are available in almost all branded computers. An improper solid-state drive will affect the boot speed of the computer. Here we have collated some manual methods of how to speed up SSD performance. With the above-mentioned methods, you can try formatting your SSD drive, to elevate the performance of the drive.
help ubuntu linux install, maintain, repair
nedjelja, 27. veljače 2011.
Four Tweaks for Using Ubuntu with SSD
SSDs (solid state drives) are great. They’re shock resistant, consume less power, produce less heat, and have very fast seek times. If you have a Ubuntu computer with an SSD, such as an Eee PC, there are some tweaks you can make to increase performance and extend the life of the disk.
- The simplest tweak is to mount volumes using the noatime option. By default Linux will write the last accessed time attribute to files. This can reduce the life of your SSD by causing a lot of writes. The noatime mount option turns this off. Open your fstab file:
Ubuntu uses the relatime option by default. For your SSD partitions (formatted as ext3), replace relatime with noatime in fstab. Reboot for the changes to take effect. - Using a ramdisk instead of the Ubuntu SSD to store temporary files will speed things up, but will cost you a few megabytes of RAM. Open your fstab file:
Add this line to fstab to mount /tmp (temporary files) as tmpfs (temporary file system):
Reboot for the changes to take effect. Running df, you should see a new line with /tmp mounted on tmpfs: - Firefox puts its cache in your home partition. By moving this cache in RAM you can speed up Firefox and reduce disk writes. Complete the previous tweak to mount /tmp in RAM, and you can put the cache there as well. Open about:config in Firefox. Right click in an open area and create a new string value called browser.cache.disk.parent_directory. Set the value to /tmp.
- An I/O scheduler decides which applications get to write to the disk when. Because SSDs are so different than a spinning hard drive, not all I/O schedulers work well with SSDs. The default I/O scheduler in Linux is cfq, completely fair queuing. cfq is works well on hard disks, but I’ve found it to cause problems on my Eee PC’s SSD. While writing a large file to disk, any other application which tries to write hang until the other write finishes.
The I/O scheduler can be changed on a per-drive basis without rebooting. Run this command to get the current scheduler for a disk and the alternative options:
You’ll probably have four options, the one in brackets is currently being used by the disk specified in the previous command:
Two of these are better suited to SSD drives: noop and deadline. Using one of these in the same situation, the application will still hang but only for a few seconds instead of until the disk is free again. Not great, but much better than cfq.
Here’s how to change the I/O scheduler of a disk to deadline:
(Note: the above command needs to be run as root, but sudo does not work with it on my system. Run sudo -i if you have a problem to get a root prompt.)
You can replace sda with the disk you want to change, and deadline with any of the available schedulers. This change is temporary and will be reset when you reboot.
If you’re using the deadline scheduler, there’s another option you can change for the SSD in Ubuntu. This command is also temporary and also is a per-disk option:
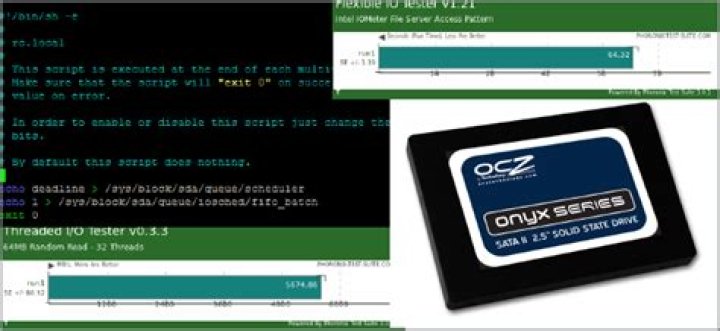
You can apply the scheduler you want to all your drives by adding a boot parameter in GRUB. The menu.lst file is regenerated whenever the kernel is updated, which would wipe out your change. Instead of this way, I added commands to rc.local to do the same thing.
Open rc.local:
Put any lines you add before the exit 0. I added six lines for my Eee PC, three to change sda (small SSD), sdb (large SSD), and sdc (SD card) to deadline, and three to get the fifo_batch option on each:
Reboot to run the new rc.local file.
It’s possible to add boot parameters to menu.lst that won’t be wiped out by an upgrade. Open menu.lst (Remember to make a backup of this file before you edit it):
The kopt line gives the default parameters to boot Linux with. Mine looks like this:
Don’t uncomment this line. Just add any extra parameters you would like. To change the I/O scheduler, use the elevator option:
Append that to the end of the kopt line. Save and close menu.lst. Then you need to run update-grub to apply your change to the whole menu:
Want to know how fast your SSD or other storage device is? Using hdparm you can test the read performance of your disk:
The 4 GB SSD on my Eee PC 901 gets about 33 MB/s. My desktop PC’s hard drive gets about 78 MB/s. (What hdparm doesn’t show is that the seek time for an SSD is much, much lower than a hard disk.)
Have any other suggestions for SSDs, or disagree with any of these? Leave a comment to let me know.
1 komentar:
Preload is a Linux software developed by Behdad Esfahbod. Preload learns programs that users use often, records statics using Markov chains, analyzes, and predicts what programs will be most used. Preload then will load those programs, binaries, and dependencies into memory or ram. By having programs already in RAM or memory, it will take less time when you actually start that program or programs.
To install preload on Ubuntu, Linux Mint or debian based distributions
# apt-get update && apt-get install preload
To install preload on Fedora, Centos or Redhat based distributions
# yum install preload
Swap and Swapiness
Swappiness is a part of Linux kernel that let you control how much swap (virtual memory) file is being used. Swappiness values can be changed from 0 to 100. The higher swappiness values the more Linux kernel will try to use swap space, the lower swappiness values means linux kernel will useless or try not to use swap space depends on our setting. The default swappiness value from linux kernel is 60, if your system have plenty have RAM, you should avoid using swap space which writes and reads will be on your SSD or hard drive. For system with 4 GB or more RAM, I would suggest to reduce the usage of swap by changing swappiness settings to between 10 even 0.
To check your swappiness setting on your system, you should see the value of 60 as default.
$ cat /proc/sys/vm/swappiness
The value is up to you to decide. Here is my suggestion
2 GB = 30
4 GB = 10
6 GB or more = 0
An SSD (Solid State Drive) will really speed up your computer. It will significantly reduce the boot time and increase the response of most software applications.
Every write action to a SSD will result in the undesirable phenomenon known as write amplification. This may shorten the life of the SSD.
Ubuntu 16.04 seems to be ready for SSD drives. Here are some steps you should take to extend the life of your SSD drive. The keypoint is to reduce write actions.
- add noatime to fstab
- run fstrim periodically (default on Ubuntu)
- reduce the use of swap (optionally in systems with enough RAM)
- avoid hibernation (“disabled” on Ubuntu)
1. Add noatime to fstab
Every time you access a file, Linux makes a write action with access date and time. This is known as “access time stamp”. With noatime option you disable the “access time stamp”.
You must add the option noatime in fstab . fstab (File System Table) describes the disk partitions and their parameters. This file is read at boot time, so Linux mounts partitions automatically.
In my workstation I have an INTEL SSD 240GB. The full model name is “ SSD INTEL 540S SERIES SSDSC2KW240H6X1 240GB 2.5” SATA3 TLC SINGLE PACK (S.M.A.R.T. enabled) “. Here are the partitions I have created:
First things first. Create a backup of your fstab
Then, edit fstab using your favorite text editor ( nano in my case)
Add noatime to partitions definition. I added noatime option to root (/) and data partition:
Reboot your system. Use the top desktop menu or command line:
2. Run fstrim periodically
fstrim is used on a mounted filesystem to discard (or “trim”) blocks which are not in use by the filesystem. This is useful for solid-state drives (SSDs) and thinly-provisioned storage. By default, fstrim will discard all unused blocks in the filesystem. Options may be used to modify this behavior based on range or size, as explained below.
Before use trim , ensure your SSD supports it. Run:
here is the result in my case
Non-zero values for DISC-GRAN and DISC-MAX indicate TRIM support.
Ubuntu has already created a weekly cron job /etc/ . If not, create it by yourself:
3. Reduce the use of swap
Modern systems have enough RAM (4GB or more), so they use swap memory very rarely. In this case, you have nothing to do. Otherwise:
Using your favorite text editor ( nano in my case)
Reboot your system. Use the top desktop menu or command line:
4. Avoid hibernation
In Ubuntu, hibernation does not exist in shutdown options. However, avoid hibernation as it causes a large number of write actions on the disc. So, in the long term, it may affect your SSD speed.
Entrepreneur | Full-stack developer | Founder of MediSign Ltd. I have over 15 years of professional experience designing and developing web applications. I am also very experienced in managing (web) projects.
for computer users who just want to use Linux to get things done
5 Tweaks to Make After Installing an SSD Drive
First, you may be wondering how I came to add a solid-state drive (SSD) to my existing notebook computer. If not, click here to skip to the recommendations.
This past holiday season, I decided to spend some money on myself and update my computer hardware. I wanted the speed of an solid-state drive (SSD) and lots of RAM, the weight of an ultrabook and the long battery life afforded by the latest mobile processor technology. After toying with replacing my two year old notebook with a thin, light, sexy ultrabook with Linux pre-installed, I decided to upgrade my existing computer instead. What I realized is that, with a couple of upgrades, my existing notebook computer could match most of the specs of what pass for ultrabooks these days. I would have to give up a 6 hour battery of course, and my i5 processor wouldn’t have the capabilities of the newest mobile processors, but those were almost the only tradoffs.
During my research for a wholesale replacement, boasting a 6 hour battery life and weighing-in at a mere 3.25 pounds, ZaReason’s UltraLap 430 easily beat the competition. Maxed-out, I could get a 14.1″ ultrabook with an i5-3317U processor, 16GB RAM, 512GB SSD and a one year warranty for about $1,500. The runner-up was the 14.1″ System76 Lemur Ultra with an i5-310M processor, 16GB RAM, a 512GB SSD drive and a 1 year warranty for under $1,200. What I realized was that the System76, and most of the other “ultrabooks” with Linux pre-installed were about the same weight as my current computer, 4.5 pounds. If I was going to spend over $1,000 on an ultrabook, I wanted it to be an ultra-lightweight ultrabook with ultra-long battery life. It would be the UltraLap 430 or nothing. So now it was time to compare replacing, with upgrading, my existing hardware.
My 14.1″ HP Pavilion dm4-1063cl is just out of warranty after a little over 2 years of use. With a meager 4GB of RAM and with the battery already upgraded a year ago to a 9-cell version, I am getting a respectable 2 hours of battery life. It’s i5-M430 processor clocks in at an also respectable maximum speed of 2.53GHZ. The cost of maxing-out the RAM to 8GB and replacing the 500GB spinning drive with a 512GB SSD came out to 1/3 of that sexy UltraLap 430! When I realized that I could upgrade my trusty notebook to almost the same specs as the the Lemur Ultra for 1/2 of its price, my decision was made. I would give up the longer battery life and settle for half the RAM, but I would end up with my high-performance dream machine. I’m willing to wait another couple of years for the technology to advance even further before replacing the HP outright.
After I ordered the 8GB of RAM and the 512GB M4 Series SSD drive recommended for my HP Pavilion dm4-1063cl notebook on the Crucial website, I began to look into what special considerations I would need when using an SSD drive on a Linux-powered notebook. I had read that SSD drives can read data 2-3 times faster than spinning SATA drives, that they boot and shut down faster, and that they are more reliable, quieter and cooler because they have no moving parts. I also read that SSD drives have a limited number of writes – 3,000-10,000 depending on design. So I did some research and found a handful of things you need to do to optimize a Linux notebook for an SSD drive.
Five tweaks to make to optimize your Linux computer for a solid-state drive
- Enable the TRIM command to clean up garbage on the drive. You can do this as long as the Linux kernel is 2.6.33 or later, and you are use ext4 or other TRIM-friendly file systems.
- Stop the system from recording every time files are accessed. By default Linux writes this information onto the drive for each file your system touches – every time it touches a file!
- Use RAM instead of the SSD drive for storing temp and log files.
- Swap more to RAM instead of the SSD.
- Prioritize “reads” over “writes”.
Enable TRIM and reduce writes to the hard drive
The first three tweaks are made by editing /etc/fstab. You use these flags to reduce SSD writes:
noatime,nodiratime,discard
- Edit the fstab file as an administrator. On Mint, I open a terminal window and type the command:
Reduce swappiness
Add these two lines to /etc/sysctl.conf to make the system swap more to RAM.
Prioritize “reads” over “writes”
Edit your GRUB boot loader’s configuration file to organize the I/O scheduler to maximize performance:
- Run this command to check the currently active scheduler:
The active scheduler appears in brackets.
‘noop‘ is essentially no scheduler at all. It uses a first-in, first-out (FIFO) prioritization.
‘deadline‘ prioritizes reads over writes. This is what you want for SSD drives.
‘cfq‘ completely fair queuing is the default and is designed for traditional rotating drives.
Before you make the change to grub, ensure that you use the command above to determine which scheduler is active. On my Mint 14 64-bit system, the active scheduler was already set to “deadline” even though the grub file does not reflect the edits I’ll detail below. Mint 14 appears to have detected the presence of the new SSD on its own and automatically switched itself to use “deadline”.
For Ubuntu and other distributions using GRUB2:
With increased RAM, a solid-state drive and these 5 tweaks, my two year old HP dm4 has become a fast booting, high-performance dream machine.
References:
Theme music for the Going Linux podcast is generously provided by Mark Blasco.
Going Linux Podcast by Larry Bushey is licensed under a Creative Commons Attribution 4.0 International License.
Dec 15, 2017
Comment
SSDs are getting more and more support for Linux these days, and more and more users are getting their hands on them. Despite this, not many Linux users know what the correct file system is that they should use, how file system TRIM works, or even why they should be careful about read/writes. That’s why in this article we’re going to break down everything there is to know about optimizing an SSD on Linux. We’ll go over the best file systems to use. In addition to this, we’ll go over how to enable TRIM, and more!
SPOILER ALERT: Scroll down and watch the video tutorial at the end of this article.
File System For SSD
Solid State Drives are very modern. They take advantage of NAND technology to ensure that your data is read and written in the fastest way possible. It is because of this speed, solid state drives tend to be really fast no matter what type of file system you put on it. That said, if you’re looking to get the most out of your SSD on Linux, your best bet is to choose the best file-system for it. Let’s go over the file systems available for Linux, and discuss what ones are best to use on an SSD.
Extended 4
The Extended 4 file system is the file system of choice for most Linux distributions for a reason. It’s reliable, and has pretty good features for a variety of use-cases. Ext4 is generally an “all-purpose” file system, meaning that it’s expected to be in use on a variety of different storage devices. It’s not specifically designed just for an SSD, but don’t let that scare you. It has a lot of improvements specifically for SSD owners like TRIM support, and features that allow the reduction of read/writes to improve longevity.
If you’re not sure what you want out of your SSD go with this file system. It’s well rounded and will get the job done.
The XFS file system is an older file system with a lot of different use-cases. Like Ext4, the XFS file system supports things like TRIM, which will keep your SSD healthy on Linux. In addition to this, it has some really great features, including a file-system defragmentation tool, and the ability to disable file system journaling (which is critical when trying to maximize the longevity of your SSD).
Overall, XFS is a great file system for SSDs, if you’re looking to get the absolute best performance possible. The XFS file system is select-able from most Linux distribution installation tools.
Enable TRIM Support
FS-TRIM is a tool for file systems that goes through and discards unused blocks. Due to the nature of flash memory and NAND in general, the more blocks that pop up, the slower an SSD can become over time. This is very important for the health of a Solid State Drive that you enable this feature.
For the most part, Linux distributions (like Ubuntu, and etc) will enable it for you. However, not every Linux distribution is created equal, and some do not enable this feature by default. Here’s how to do it:
Ubuntu
Debian
Arch Linux
Fedora
OpenSUSE
With the util software installed, enable the systemd services to ensure FS-TRIM runs.
Then, start the two services right away with systemctl start.
Reduce Read And Writing On SSD
Solid State Drives do not work the same way as a traditional, spinning hard drive. Unlike RPM drives, SSDs have a finite amount of writes they can perform. Once the user reaches the maximum writes possible, the drive will become read-only and start to fail (or worse). To mitigate this, do the following.
First, do not create a swap partition on your SSD. Giving an entire partition to swap on an SSD means that the solid state drive is constantly reading and writing data. This can quickly degrade the health and life of the drive. Instead, consider making a swap file, or forgoing swap altogether.
Using a swap file rather than a partition is still iffy, but it’ll ultimately be better, because a swap file is still just a file and not an entire partition the system can use. In addition, swap files are easy to turn off and on. A user can easily turn on swap when needed, and turn it off right away when done, resize it and etc. Swap partitions are less flexible.
Another good practice to mitigate read/writes on your SSD is to disable journaling with your file system. It’s not critical, but if you do it you’ll read/write significantly less. To do this, search your Linux distribution’s manual for any information they may have on this specific to your operating system.
Lastly, always try to update your SSD’s firmware. Believe it or not, but SSDs get updates like any other component on your PC. If you don’t update the firmware, you miss out on improvements from the manufacturer that make it more efficient, read/write less and handle data better. To update your drive’s firmware, it’s best to refer to the manual that comes with your SSD. Alternatively, search for the manufacturer’s website, or look through your Linux distribution’s Wiki for instructions.


