Over the past few years, Amazon has delivered some of the first and favorite Smart Home devices. Alexa is now a household name when it comes to voice assistants, and many people around the world want to get their hands on their devices. They’re great tools to help manage your home and interact with your appliances—and other household members.
When it comes to managing these devices, it’s important to know how to manage the users who can access them. How do you change the owner of your Alexa devices? In order to change the owner of Alexa devices, you first have to deregister the device from the original Owner’s Amazon account.
Read on to learn more about some of the most popular Amazon Alexa devices and how you can manage the Owner account and other users in your Amazon Household.
Changing the Owner of Alexa Devices
If you decide to return, sell, or give away your device, you’ll need to remove your Amazon account to prepare for a new owner. This will remove your current data and settings, so the new owner can start over to manage their own settings. To allow a new Owner to take over the device, you must first deregister the device from your account.
To deregister a device from your Amazon account, follow these steps in the Alexa app:
- Tap Settings on the left-hand side.
- Click on the name of the device you wish to deregister.
- Tap Deregister and Confirm.
Some Alexa devices do not have the option to deregister in the Alexa app. In these cases, you’ll have to visit the Amazon website on your web browser to make the changes.
- Under the Accounts & Lists menu, select Manage Your Content & Devices.
- Select Your Devices.
- To the left of each device, you should see an ellipses (…).
- Find the device you wish to deregister and Tap on the three dots.
- Click Deregister, then select again to confirm.
Interested in how to add Alexa to your car? Check out our post here to find out more.
Creating Your Amazon Household
If you have a family where multiple people will be accessing and using your Alexa devices, you may want to set up an Amazon Household. This allows you to act as Owner and choose Household members who can also browse and utilize your devices.
When you create your Amazon Household and invite other users, you can share content, manage certain account features, and access customized information on compatible Alexa devices. You can create a Household in the Alexa app or on your computer by selecting Manage Your Household in your Settings.
To add a person to your Amazon Household, he or she must be present with you. Then, follow these steps in the Alexa app:
- Select Settings on the menu.
- Tap Alexa Account and then select Amazon Household.
- Follow the on-screen instructions to add a new member.
It’s important to remember that when you add an adult to your Amazon Household, you authorize that he or she can use the payment method associated with your account. For added security, you can choose to require a confirmation code for voice purchases in the Alexa app.
Also, on Echo devices with a screen, you authorize other adult users in your Household to access and view your Prime Photos. On the Echo Look (Note: discontinuing as of July 2020), only you can see and delete the photos in your account. Alexa will identify which account is active when you ask her to take a picture.
How do you change Alexa’s name, voice, or accent? Jump over to our post here to learn more.
If another adult is added to your Amazon Household, he or she can link their calendar to Alexa. You will be able to hear events from all linked calendars when you ask Alexa about your upcoming events.
Switching to Another Profile
Once you finish setting up your Amazon Household, you can switch between adult users on compatible Alexa devices. To do so, all you have to do is tell Alexa to “Switch accounts.” If you ever need to check which account you’re currently using, you can ask Alexa, “Which account is this?” and she will let you know who is currently logged on and active.
When you’re browsing in a content library in the Alexa app, use the drop-down menu to navigate between user libraries.
Removing an Adult from Your Amazon Household
When people move out of your home, or if you no longer wish them to have access to your devices, you can remove a user from your Household.
If you want to remove a member from your Amazon Household, the process is also pretty simple. Follow these steps in the Alexa app:
- Start by visiting your Household settings.
- Select Remove next to the user you’d like to remove.
- If you are removing your own account, Select Leave.
Be careful when removing users from your Amazon Household. It’s important to note that once you remove an adult from your Household, you cannot add either user account to another Household for 180 days. If you remove an account by accident, it’s recommended that you contact Amazon Customer Service to add the user account back to your Household.
Exploring Some of Our Favorite Alexa Devices
Alexa is Amazon’s voice assistant that you can access through Alexa smart speakers and displays. You can wake the device by simply saying, “Alexa.” Then, you can tell her to perform various tasks like setting an alarm, performing an online search, checking the weather, and more. Recently, one of the most common commands is having Alexa control your other Smart Home devices like a video doorbell or smart lock.
Over the past few years, Amazon has released many popular Smart Home devices that are all compatible with Alexa. Here are some of our favorites:
- The Amazon Echo Dot is an Alexa speaker that’s currently in its third generation. The improved design includes better sound than previous models at a pretty affordable price.
- The Amazon Echo Show is a smart display with a built-in Alexa speaker. It’s compatible with Alexa-enabled security cameras like your Smart doorbell.
- The Ring Peephole Camera is a smart doorbell that attaches to your front door’s traditional peephole.
- The August Smart Lock allows you to remotely lock and unlock your door. It also gives you status updates for when your door is opened and closed.
- The Amazon Fire TV Stick allows you to scroll through television programs and select things to watch with your voice.
- Simpli Safe is a do-it-yourself home security system. It works with Alexa, so you can arm and manage the system with voice commands.
Get Smart with Other Amazon Alexa-compatible Devices
Amazon is pretty much everyone’s favorite online shopping platform. And they’re arguably one of the best manufacturers of Smart Home products. They allow you to manage many different aspects of your home and stay connected to your house while you’re away.
When you’re entering into the world of Smart Home technology, the Amazon Alexa devices are a great place to start. That way, you can simply continue your journey by adding devices that are compatible with Alexa to fully integrate your appliances and devices.
We’ve previously covered here how to transfer Adobe software products (like Creative Cloud, CS6, Photoshop, Lightroom, Elements, or Acrobat) between two computers, including from PC to Mac or vice versa. In this article we’re going to focus on transferring the actual legal license from one person or company to another, like transferring the title to a car or home between two people.
Moving the software physically is mostly a technical task, but doesn’t cover what happens if the recipient has problems, needs customer support or updates, wants to be registered with Adobe, and be recognized as the new rightful owner and user of the tools. To address those needs, you can follow the transfer process described below to “unregister” the program from the old owner and re-register for the new one.
Not all Adobe software is transferable. In particular, memberships like the Creative Cloud – e.g., individual CC subscriptions – cannot be transferred. However, for groups of people there is a solution to easily manage users and flexibly reassign seats with the Creative Cloud for Teams option. To get this capability, you can purchase an upgrade from an individual CC membership to a teams membership at any time without penalty.
For a standalone/perpetual license, you can use transfer instructions below to give or sell it to a friend or family member. In fact, transferring your Adobe software can be a great strategy in certain situations… Say for example you are thinking of getting the Creative Cloud (CC), and so you’d have an older Creative Suite (CS) tool that you wouldn’t use anymore… You can simply transfer that to someone else you know, perhaps make some money, and then sign up for the Creative Cloud instead – and this is exactly what customers do.
Install now: Get all new Creative Cloud 2021 direct download links and free trials.
So all you have to do is download Adobe’s Transfer of License form, fill it out and return to them to effect the change in ownership. Note importantly though that Adobe’s Education (including the Student & Teacher) products are not eligible for a transfer of license – they cannot be resold or given away… Read more about the various limitations of the academic products.
OK, so the transfer form itself is pretty straightforward – just things like the name, version, and serial number of the product, plus the names, contact info, and signatures for both the transferor and the recipient. Note that the transferor must have the software registered with Adobe, which can be done electronically and just takes a minute. In other words, the serial number has to be registered to the customer’s account prior to the transfer. If the license is pirated or invalid/revoked, then it would not be possible to register it so the transfer could not be done. Once submitted, Adobe then takes a few weeks to process the transfer request, at which point the recipient becomes the new registered owner of the software and the legal licensee who can receive service and support.
If you can’t find or no longer have access to your product’s serial number, then you may be able to retrieve it from the computer itself using a free utility like Belarc Advisor (Windows) or Product Key Finder (Mac) – which will recover and tell you the activation keys for the programs installed on your system.
Keep in mind that you can’t transfer individual components of a collection like Creative Suite – it only goes for the whole package… Single tools within a suite are not eligible for a transfer. Also, the transfer of a license includes all versions connected with the product – so for example if you used your copy of CS4 or CS5 to get a discounted upgrade to CS6, then you couldn’t later give or sell your old copy of CS4/CS5 to someone else – it won’t work. See more about the allowed uses of previous versions when upgrading Adobe tools.
One last thing that sometimes trips people up is the case number: Both the transferor and the transferee need to get a case number from Adobe and each party has to officially submit a transfer of license form. In other words, both the buyer and the seller must obtain their own case numbers so that each party can complete a transfer of license form. You then upload or fax the form to your online case.
Special: Legally download dozens of free Adobe books for a limited time!
OK, ready? Be sure to read the (important!) full instructions to make a transfer, including step-by-step on what you need to do and include together with the official form… Those instructions ask you to contact Adobe to get your initial case number, and the best and fastest way to do that is usually via live online chat (if available in your area):
Note that Adobe does not limit how many times their software can be legally transferred, although it used to be that each customer could initiate a maximum of four transfers in their lifetime. Also, if there are any support contracts attached to a license, those won’t transfer to the other party.
Finally, before you submit the transfer, be sure to deactivate and uninstall the software on all your own systems.
[ Learn about how many machines you can run Adobe software on. ]
Hope this information helps… but please post any questions you may have and we’ll get you answers fast!
If you’d like to move away from shuffling serial numbers altogether, consider Adobe teams/group licensing to simplify management and reassign seats flexibly instead of one-at-a-time copies…
See Also
- What are the differences between Adobe CC vs. CS6?
- The 10 most common myths about Creative Cloud
- How to save 60% with the Student & Teacher Editions
- Download free Adobe books (choose over 30 titles)
- Don’t need full Cloud? Get PS + LR for $9.99/month
- How to join Adobe’s Creative Cloud for free
Keep up with the latest on Adobe software — follow us on Facebook or Twitter, or subscribe to our RSS feed… You can also enter your email and have new articles sent directly to your Inbox. We are reader-supported; when you buy through links on our site, we may earn an affiliate commission.
GET FREE ADOBE BOOKS
Sign up for our popular newsletter and we’ll send you 30 great ebooks to learn all major Adobe tools at no cost!
Thank you for subscribing! We hope you enjoy the newsletter and your free Adobe books. Click here to see the books now, and start downloading and reading!
Sorry, something went wrong. Please try again.
We respect your privacy and take protecting it seriously.
If you’re selling or returning your Alexa device, you need to first deregister the device from your Amazon account. For some Alexa devices, the process isn’t so straightforward.
In most cases, you will never need to remove one of your Alexa devices from your account. At most, if you’re having technical issues, you might need to factory data reset the device.
That said, if you plan on returning, selling your Alexa speaker or switching the Amazon account it’s connected to, you’ll want to remove it from your account entirely. Here’s how to deregister your Alexa devices.
Remove Alexa devices from your account
Deregistering officially supported hardware is quite simple. All of your registered Alexa devices are listed in the Alexa app for iOS or Android, as well as the web portal at alexa.amazon.com.
To deregister one of the devices:
- Open the Alexa mobile app or go to alexa.amazon.com in a web browser.
- Click on Settings in the left side menu.
- Click on the name of the device you wish to deregister.
- For official hardware, you should see a Deregister button to the right of **Device is registered to: [your name].”
- Click Deregister and confirm the action.
Remove other Alexa devices from your account
In some cases, there will not be a Deregister button in this settings menu. Such is the case for DIY Alexa speakers or software emulations, such as Echosim.io or Roger.
To deregister another type of Alexa device:
- Go to amazon.com in a web browser and login.
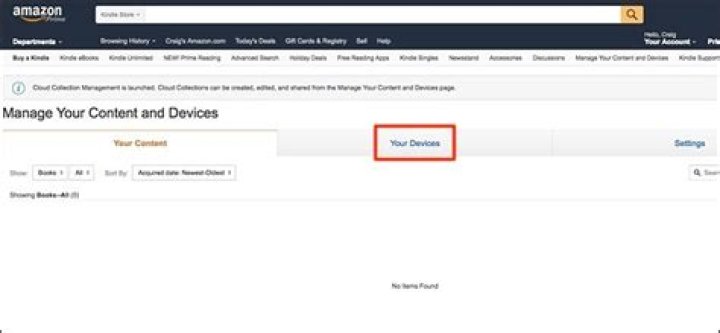
- Hover over Accounts & Lists and click Manage Your Content and Devices.
- Click to open the Your Devices tab.
- To the left of each device is a . * button.
- Click on this button for the device you wish to remove and click Deregsiter.
- Click Deregister again to confirm.
The device or emulator will be removed from your account. If you want to use it again in the future, you will need to reauthorize it with your Amazon account.
For some this goes without saying, but many people have no idea you need to/should RESET YOUR ROKU device before you give it away or sell it. That is, if you don’t want someone else subscribing to channels or renting videos on your dime and/or knowing what YOU watch.
I wanted a Roku I to use for testing the Standard Definition (SD) video output of the channels we develop, so I turned to Craigslist where I found one for $20. I met the seller at the local quickee mart, we made the exchange, and within an hour I had that bad boy hooked up and working. Right away, however, we noticed something…
The previous owner never RESET the device! His Netflix account, his Hulu account, and a few other channels he paid-for, were all right there for us to use. Sine Roku stored all of his login info for those channels, we could have cancelled our own account and just used his for as long as we could — at least until he changed his password.
I promptly reset the device, BUT the next guy may not, so heed this warning: If you are upgrading to a new Roku device, be sure to wipe clean your old one before you sell it or pass it on to a friend. Otherwise, the new owner may be enjoying Netflix and Hulu and whatever else you subscribe to, on your dime!
I recently passed a Roku XD on to our son in college. I didn’t bother doing the Factory Reset because I figured he could use our Netflix and Hulu accounts. Only problem was, he started adding new channels left and right — and removed some existing ones! So everything we turned on OUR Roku, new channels were added and some of our old favorites removed!
Not to mention, that device was still linked to our M-go and credit card accounts! Even though he set up a new Roku account with HIS credit card, he forgot to link the device. So he was charging movies thinking he was paying for him, when they were being charged to me. No big deal because it was my son, but what if that was a stranger I had sold the device to? Or a friend or colleague I had passed it on to?
Again, don’t forget to do the Factory Reset!
From your Roku Home screen, scroll up one to Settings, then move right and up one to System, then move right and down to Factory Reset. It then gives you the option to Factory Reset Everything. Click that and the instructions for resetting will appear on the screen.
That’s it! The reset process is very simple therefore there should be no excuses for NOT doing it. (Remember that when you’re wondering who charged all the movies to your M-go account.)
Don’t compromise your credit card OR your privacy. Your credit card goes without saying, but your channel selection is your own private business, too.
If you don’t want family members, friends or colleagues — or complete strangers, for that matter — knowing you enjoy Weed TV or Nowhere Porn, be sure to RESET YOUR ROKU before you give it away or sell it.
If you want to sell your Kindle Fire or give it to someone else. Take these steps to make sure your data is wiped and it’s not tied to your Amazon account.
If you bought a new Kindle Fire HD,want you might want to sell your old one or give it to someone else. Take these steps to make sure your data is wiped and it’s not tied to your Amazon account.
Backup Kindle Fire Data
Of course the first thing you’ll need to do is back up any data that’s on your Fire. Anything you have stored on Amazon servers – books, movies, music – will be automatically served up to your new device when you activate it. But if you’ve put your own videos, music or other files on it, make sure to back them up to your computer or Amazon Cloud Drive first.
Connect your Kindle Fire to your computer and open the device folder and transfer your files from it to a your hard drive.
Reset Kindle Fire to Factory Settings
After you have the data you need backed up, go into device settings and follow the onscreen instructions to reset Kindle Fire to factory settings. This process will erase your data from the Kindle and deregister it from your Amazon account.
After it’s set back to factory settings, Log into your Amazon account, click the Your Account dropdown menu and select Manage Your Kindle.
Then click Manage Your Devices under Your Kindle Account on the left of the screen.
Under you list of devices, make sure it’s no longer listed – which it shouldn’t be after doing the factory reset.
Clean it up so it looks nice, package it and send it off to its new home.
1/ Navigate to the Reinstalling & Reselling contact form:
From the Arturia website, go the to Support section > Ask for Help and click on:
- Reinstalling & Reselling
2/ Provide your product informations:
3/ Provide the required informations about your request:
- Precise the type of request: I want to resell my product
Mail of the new owner
4/ Submit & let the support team take care of your request
Once all the informations provided, the support team will be able to unregister the product from your account,
and then directly transfer it on the future owner one.
If the new owner’s informations are missing, the support team will just unregister the product form your account,
=> In this case, you will have to provide the Serial & Unlock code to the future owner.
He will then be able to register the product himself through this page:
Warning: When selling hardware products all the bundled licenses delivered along with it will be transferred as well
- Frontpage
Return home - Browse
By topic - Subscribe
RSS feed
- Desktop
- Livescribe
- Smartpen
August 21, 2010 • 10:49 AM
Livescribe Pulse (Echo) smartpen Registered to someone else.
You were stumbling around the internet, saw a cool add on Facebook about this ‘Pulse smartpen’ from Livescribe, and thought it looked cool. Or, maybe you were in school and saw someone else with a really weird looking pen and asked them what it was. They told you it was a Livescribe Echo Smartpen, and showed you what it could do.
For whatever reason, you decided to pick one up for yourself. You looked in the stores, but they were pretty expensive. For a pen, 200 bucks is a hefty about to throw down. So, instead, you checked out EBay, and Amazon, and all those other sites.
But wait! You found someone selling a Pulse (Echo) smartpen (4GB Titanium? 2GB Charcoal-Blue?) for cheap! You don’t know why, but it’s your lucky day. You make the executive decision, scrounge around for the spare change (or just withdraw it from the bank) and meet up with that person.
Cash and Pulse change hands, and next thing you know, you are now the proud owner of a Livescribe Pulse Smartpen! Congrats!
You rush home and take out your new Livescribe smartpen, confirm everything’s there, and then read the Owner’s Manual. Okay, so you skim it. (RTFM, it’ll help a lot.) Then you get ready to use your Pulse (Echo) smartpen!
First you download the Livescribe Desktop, just like the manual says. Then, you get ready to play with your toy.
You jot down a few notes in the Livescribe Starter Notebook (With its odd dot matrix pattern on the background) and put your Livescribe smartpen in the cradle and a prompted to authorize the pen.
Bad news! It’s registered to someone else! What to do?!
First, let me explain why. When the Pulse (Echo) smartpen is registered, it places a certificate on the Livescribe smartpen to tell the Livescribe smartpen not to talk to any Livescribe Desktop, except the one that has the username that the registration certificate references. It’s to keep your data safe.
There are a couple things you can do in this scenario, to make your Livescribe smartpen work for you.
First, you can contact the person you bought the Pulse (Echo) smartpen off of, and explain the situation, and ask them to unlink it from their account. It should be a relatively painless process.
Or, you could also ask that they change their account name to whatever you want yours to be, and give you their password. You can change the password with little trouble, and they can recreate their account afterwards.
But, say they’re not responding, or you don’t have a way to contact them? Then, you’re going to need to contact Livescribe Customer Support (877.727.4239 – 877.SCRIBE9 or [email protected]) and explain the situation.
They’re going to ask for the Serial Number of your Livescribe smartpen, and then they’re going to tell you they need to check with the original owner of the Pulse (Echo) smartpen. Don’t get offended, it’s just protocol, nothing personal.
Then, you get a notice a little while later that your Pulse (Echo) Smartpen has been unlinked and some instructions on how to Master Reset your Livescribe smartpen.
Done with that, you can use your Pulse (Echo) smartpen with utter freedom, the way it was meant to be used.
So, if you do get a second hand Pulse (Echo) smartpen, be sure that you’ve taken care of registration before you record important information on your Livescribe smartpen, otherwise it could be a headache and some lost data.
On a side note.You can get more information about the errors on the Livescribe Website, in their Knowledge base.
One is for if you own the Pulse (Echo) smartpen already and are re-authorizing it to your computer and Livescribe Desktop, the other is if you bought the Livescribe smartpen off someone else and need to unregister it from them and to yourself.
Smart technology is taking over many homes around the nation. These tools and devices help individuals and families stay connected and protect the people and things they find most dear. The Nest Camera is a smart security camera that helps you see who’s in your home and what’s going on—24/7!
How do you change the owner of a Nest Camera? Changing the owner on the Nest Cam requires you to remove the product from your account first. Then, a new user can add the device to their Nest account.
This article will give you some more information on the Nest smart security Camera and how you can manage users on your device.
What Does the Nest Camera Do?
The Nest smart security Camera is a great tool for families who want to stay connected to their home no matter where they are. The camera helps you look after your family—all from your smartphone. The camera offers live streaming 24 hours a day in high-quality 1080p video. Nest offers both indoor and outdoor options for their security cameras, and each have the capability to use night vision.
If the camera detects movement or suspicious sounds, it will send notifications to your smartphone through the Nest app. And, if you sign up to their subscription, Nest Aware, you’ll have access to a log of the past three days’ full videos to reference what’s been happening in your home.
There are many possibilities for using the Nest Cam. For instance, users can see if there is a stranger approaching their home and be able to notify the authorities at the right time. They can also monitor their baby when they’re away from the nursery, making sure infants are safe and sound.
Nest Cam users can even watch the family dog to make sure he’s not jumping on the couch and tearing up pillows. The Nest app connects to the device at home and lets users speak through the microphone to communicate with whoever is home. Or, in this case, they can command the dog to get off the couch!
Changing the Owner of Your Nest Camera
If you decide to switch your Nest Cam to a different owner, the process is simple and easy. To change the owner of a Nest Camera, you must first remove your account from the device, which will free it up for another user to take over as the new owner.
Follow these steps to remove a Nest Cam from your account:
- Login to the Nest app. If you manage more than one household, select the home that has the product you’d like to remove.
- Tap the device you want to remove.
- Select Settings in the top right corner, then scroll down to select Remove Nest Camera.
- Confirm your choice.
Important: Do not unplug your Nest Cam until the light ring is pulsing blue. This light will start pulsing only after the removal is complete. If you unplug the camera too early, you will have to reset it to get it working again.
Ever wonder if the Nest Camera is compatible with Alexa? We cover everything in our article here.
If you do not plan on using the Nest Camera again, it’s recommended that you perform a factory reset on the device. This will clear your settings and data so the product is fresh and ready for the new owner.
Important Things to Know Before Removing Your Nest Cam
Before you remove your Nest Cam from your account, however, it’s important to keep a few things in mind.
- When you remove a camera from your account in the Nest app, it will permanently delete all of the camera’s recorded history. This is important to remember if you have any videos recorded that you’ll need to access in the future. However, if you have at least one active Nest Hello or Nest Cam device, your saved videos will be available online at home.nest.com.
- If you were invited to share the control of a Nest Home, you can remove cameras from the home, but only the Owner can cancel a Nest Aware subscription.
- To cancel a Nest Aware subscription, navigate through the Nest app. You can cancel the subscription even if you already removed the device from your account.
User Accounts for Google Nest Devices
When deciding to change the owner of your Nest Cam, it’s important to note that with a recent Google update, regular users have many of the same permissions as the Owner of the device.
Users with full access to the device can:
- Add or remove devices
- Use and change device settings
- Link other services
- Add or remove other members
Only Owners, however, can update billing information and delete and edit Homes in the app.
Want to know 17 Clever Tips and Tricks for your Nest Cameras? We explore all the best tricks here!
Google Recommends Users Migrate to a Google Account
How did you sign up with Nest? Google has recently encouraged Nest product owners to migrate their accounts to Google. If you already have a Google account, you can use that to login to the Nest app and manage your devices. If you do not already have a Google account, you’re recommended to create one. (But, if you’ve used Google platforms, like YouTube and Gmail, you probably already have one!)
When you switch to a Google account, you now will only need one unified login to access your products and manage their security. Google’s goal is to create a more seamless Smart Home experience when controlling and integrating Nest and Google Home products.
Also, once you migrate your account to a Google account, all members of your household will have similar access and control as you, the owner. So, it’s important to consider the people you are giving access to your Nest products. When adding new members to your household, make sure they are users you know and trust.
How to Add New Members to Your Nest Camera
After you change the Owner of your Nest Cam, you may want to add other users in your household to manage the device. You can do this by visiting the Settings in your Nest app.
Follow these steps:
- Select Family & Guests. Then, tap Add a Person.
- Type in the person’s name and tap Continue.
- Add the email address of the person you’d like to invite. You also have the ability to add this person from your Contacts.
- Tap Send.
They will receive an invitation to download the Nest app. Then, they will be able to follow the setup instructions to add the device to their account.
Thinking of getting a Nest Hello? Find out if its waterproof and how to protect it from water. Learn more here.
New Smart Home technology is giving homeowners and their families new ways to protect and interact with their home. Devices like the Nest Camera, Nest Thermostat, and other Google Home products are making it more fun and easy to manage your home. Visit the Google Store to learn more about these products and discover your opportunities to grow your Smart Home experience.
Use these steps to remove your personal information from a device, even if you don’t have it anymore. Or make sure that the watch that you’re about to buy from someone else is ready for you to use.
Before you sell, give away, or trade in your Apple Watch
You need to turn off Activation Lock and remove your personal information from your device. Here’s how:
- Keep your Apple Watch and iPhone close together.
- Open the Apple Watch app on your iPhone and tap the My Watch tab.
- Tap your watch’s name at the top of the screen, then tap the information button .
- Tap Unpair Apple Watch. For cellular models of Apple Watch, tap Remove [Carrier] Plan. If you aren’t going to pair with a different watch or iPhone, contact your carrier to cancel your cellular subscription. Carrier fees might apply.
- Enter your Apple ID password to turn off Activation Lock. If you forgot your Apple ID password, you can reset it.
- Tap again to confirm. When you unpair, your iPhone will try to create a backup of your Apple Watch. If you get a new Apple Watch, you can use the backup to set it up.
If you already gave away your Apple Watch, you can erase and turn off Activation Lock from iCloud.com. Here’s how:
- On a computer, go to Find My iPhone on iCloud.com and sign in with your Apple ID.
- Select All Devices, then click your Apple Watch.
- Click Erase Apple Watch. Select Next until the device is erased.
- Click the X button next to your Apple Watch.
When you erase your Apple Watch
When you erase all content and settings, it completely erases your device, including any cards you added for Apple Pay and any photos, contacts, music, or apps. It also turns off iCloud, iMessage, FaceTime, Game Center, and other services. Your content won’t be deleted from iCloud when you erase your device.
Before you buy a watch from a third-party
Before you buy an Apple Watch from someone other than Apple or an authorized Apple reseller, make sure that the device is no longer linked to the previous owner’s account.
- Identify the model of Apple Watch.
- Make sure that the previous owner removed Activation Lock from the watch and that the watch has been erased. They must unpair the watch and remove Activation Lock by entering their Apple ID password, so you can use the watch.
- If you see the passcode lock screen or the Home screen, the device needs to be erased.
- If you can, try to pair the watch with your iPhone. If you’re asked to enter the previous owner’s Apple ID password during setup, then Activation Lock is still on.
- For cellular models of Apple Watch, make sure that the previous owner removed and cancelled any active cellular plans.


