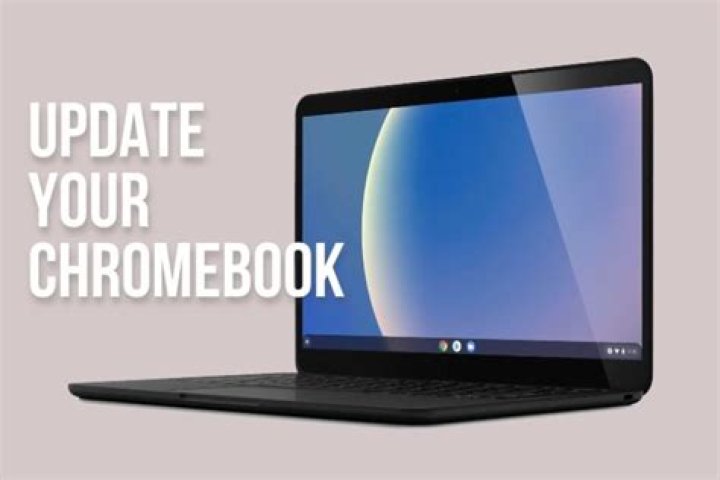
Chrome OS gets major updates every six weeks, with security patches coming more frequently. Updates are usually downloaded and installed automatically in the background, but here’s how to make sure your Chromebook is always running the latest build available.
First things first: you’ll get a notification whenever an update has been downloaded and installed, as you’ll need to restart your machine to complete the update process.
In the bottom right, click on the clock to open the system tray and notification panel. If an update is available, there will be a notification at the top of the menu—click “Restart to Update.” Easy peasy.
Make sure you save anything you’re working on before you click to restart your Chromebook. Any unsaved data could potentially be lost when your Chromebook restarts.
If you don’t see this notification, click the Settings cog.
Next, click the Hamburger menu, and then click on “About Chrome OS” at the bottom of the menu.
Click “Check for Updates.” If your Chromebook finds an update, it will start to download automatically.
After the update downloads, you will need to restart your device to complete the process. Click “Restart.”
If you’d rather wait to restart your Chromebook and finish up the work you’re doing, just close the menu, and your Chromebook will install the update the next time you restart it.
January 23, 2020 by Dinsan Francis | Updated: August 27, 2020 Leave a Comment
Chromebooks receive a new version of Chrome OS once every six weeks. To update a Chromebook all you have to do is to keep it connected to WiFi, let the update download and install and then restart the Chromebook to apply the changes. This article explains this process in detail.
Downloading Chromebook Update
Chrome OS, the operating system that powers your Chromebook gets a new version once every six weeks. If you keep your Chromebook connected to WiFi, this will be downloaded automatically in the background.
To trigger the download or to check if there is a download waiting for you:
Time needed: 3 minutes.
Check Chromebook download.
Open the Chrome OS Settings app.
Click About Chrome OS
Click About Chrome OS from the left pane.
Click “Check for updates”
If a new version of Chrome OS is available it will start downloading automatically. Click Check for updates to check again.
When the download is complete, click “Restart” to reboot the Chromebook and apply the changes. You might also see this notification in your notification area.
What is the Latest Version of Chrome OS?
To find out the latest Chrome OS version, check “cros – Stable” here.
Common Issues with Chromebook Update
If your Chromebook is not updating to the latest version, here are a few things that you can try:
- Ensure that your Chromebook isn’t End of Life.
- Make sure that you are connected to WiFi. If you are using a mobile LTE connection, Chrome OS may not download the update.
- Restart your Chromebook and check for the update again.
- Check the official community forum for any known issues with your Chromebook model.
- Reset (Powerwash) your Chromebook.
How Often Do You Get Chrome OS Updates?
Google updates Chrome OS very regularly. You will get a new version every six weeks. This is for the Stable channel.
Stable Channel – Every Six Weeks
Stable Channel, as the name suggests is the stable version of Chrome OS that is intended for regular use. Your Chromebook will a new version of Chrome OS every six weeks.
According to the official Google documentation, the Stable channel is updated every 2–3 weeks for minor changes, and every 6 weeks for major changes.
Beta Channel – Every Two Weeks
The beta version of Chrome OS is called the Beta channel. You can switch to the Beta channel from the Settings app. This version updates roughly every two weeks.
You will get new and upcoming features one month ahead of the Stable channel.
Dev Channel – Once or Twice Weekly
The Dev channel is less stable compared to the Beta channel. This version is not recommended for daily use or on your primary device.
The Dev channel updates once or twice weekly. This version is intended for developers to test their extensions and applications against the upcoming versions and features of Chrome OS.
Canary Channel – Daily
This is the most bleeding edge version of Chrome OS. This is highly unstable and might even break your Chromebook. This is where we at Chrome Story spend most of our time because new features show up on the Canary channel first.
If you are a Chromebook fan or enjoy experimenting with the latest versions of software, this is worth exploring. However, do not use your primary device for testing.
Chromebooks in the Canary channel receive updates almost every day.
Hope you find this guide useful. Share your questions in the comments section.
About Dinsan Francis
Content Strategist and Digital Minimalist. Loves testing new Chromebook features and writing about them. Favorite Chrome OS Channel is Canary. | Twitter
They don’t have the mass-market appeal of Macs or Windows machines, but Chromebooks are great alternatives. They boot up quickly, are safer, and are usually much less expensive than the competition. Chromebooks also have a leg-up on the competition in another area: updates. Not only is it easy to update your Chromebook, but updates only take a few minutes to download and install. By the time PCs and Macs finish updating, you’re up and running with your Chromebook. Here’s our step-by-step guide on how to perform a Chromebook update.
How to do a Chromebook update
- Connect your Chrome OS device to the internet over Wi-Fi or ethernet.
- Click on the settings tray in the bottom-right corner of the screen.
- Enter the settings using the gear icon.
- Click on About Chrome OS on the bottom of the left column.
- Select the Check for updates option.
- Once the update finishes downloading, click Restart.
Here’s some more Chromebook content you should check out!
- You can update your Chromebook by going through the About Chrome OS menu.
- Keeping your Chromebook updated is a vital part of keeping it protected, and checking for updates should take less than a minute.
- If an update is already in progress, you’ll see the option to restart your Chromebook. Otherwise, you can check for updates and start an automatic update, if one’s available.
- Visit Business Insider’s homepage for more stories.
Keeping your computer’s operating system up to date is a great way to make sure that you’re getting the most secure version of the OS.
And if you’re the type to repeatedly click “Remind me later,” it’s good to know that it’s easy to catch up with updates on your Chromebook.
Here’s everything you need to know about updating your Chromebook.
Check out the products mentioned in this article:
HP Chromebook (From $249 at Best Buy)
How to update a Chromebook
Before you try to check for updates, be sure that your Chromebook is connected to Wi-Fi.
Once that’s done, here’s what you’ll need to do to both check for updates and install available updates:
1. Click the time, located in the bottom-right corner of the screen, to open a menu.
2. Click on the gear icon to open the Settings menu.
3. In the left sidebar, select “About Chrome OS.”
4. If there’s an update in progress, you’ll see the option to restart your Chromebook once it’s complete.
5. If it’s not currently updating, click “Check for Updates” — if one is available, it will automatically download onto your Chromebook.
If you’re using your phone’s internet for your Chromebook, you’ll also get an alert about how much data the update will use.
Related coverage from How To Do Everything: Tech:
How to right-click on Chromebook in 2 simple ways
How to copy and paste on a Chromebook in 4 different ways
How to change the language on your Windows 10 device
How to turn off the touch screen on certain Windows 10 devices, or turn it back on
Get the latest Google stock price here.
Insider receives a commission when you buy through our links.
Troubleshooting powering up issues with Chrome OS laptops
- Tweet
- Share
If your Chromebook won’t turn on, you have a few options to fix it. Use this guide if you’re having the following Chromebook issues:
- Your device powers on, but the screen remains black.
- Your device powers on but immediately turns off.
- Your device boots Chrome OS, but you can’t log in to your account.
- You can log into your Chromebook, but the device keeps crashing.
- Nothing happens when you press the power button.
Information in this article applies to all Chrome OS devices regardless of the manufacturer (Acer, Dell, Google, HP, Lenovo, Samsung, Toshiba, etc.).
Causes of a Chromebook Not Turning On
Although dozens of manufacturers make Chromebooks, they are all prone to the same hardware and software issues. There could be a few reasons why your Chromebook won’t turn on including:
- Problems with the battery charger
- Problems with the internal hardware
- Issues with Chrome OS
- External hardware interference
If your Chromebook keeps freezing up, there are separate steps you can try to fix it.
How to Fix a Chromebook That Won’t Turn On
Try these steps in order until your Chromebook is working again:
Make sure your Chromebook is charging. You can tell if the charger is connected by looking at the small LED lights near the charging port. Depending on the manufacturer, you should see a solid blue or orange light while your Chromebook is charging.
Leave your Chromebook plugged in for 3.5 hours and try turning it on again. If you don’t see a light, try using a different charger. If the device still isn’t charging, then there’s likely a problem with the charging port or the internal battery, but you can try charging it without the charger just to be sure that’s not the problem.
Do a hard restart. If your device turns on but the screen stays black, hold down the Refresh key + Power to restart your Chromebook. A hard restart will clear your Chromebook’s RAM and any caches that could be preventing the OS from booting.
Remove all connected USB devices. Sometimes, external hardware can interfere with the Chrome OS boot process. If you have any devices plugged into your Chromebook’s USB ports, remove them and try starting your computer. For example, if you have a USB drive inserted, eject it and then try again.
Sign in as another user. If Chrome OS boots up, yet you can’t log in to your account, it could be due to a syncing issue between your laptop and your Google Account. Create a new user account for your Chromebook or try logging in as a guest.
Remove apps from Google Chrome. If your computer turns on but keeps crashing, remove any Google Chrome extensions and apps that were recently installed or updated.
Update the operating system. If your Chromebook turns on but keeps crashing, update Chrome OS to make sure you’re running the latest version of the operating system.
Powerwash your Chromebook. If you can access your Chromebook’s settings or the Chrome browser, you can powerwash your Chromebook to restore the device to its factory settings.
Anything that’s saved to your Chromebook’s hard drive will be lost during a powerwash.
Contact the manufacturer. If your device still has a valid warranty, you might be able to get it professionally serviced for free. If you have to pay to repair your Chromebook, you might want to consider upgrading to a Google Pixelbook.
Replace the internal battery yourself. If you’re comfortable navigating the inner workings of laptops, you can unscrew the back cover and replace the battery. Opening up your Chromebook might void the warranty, so save this step as a last resort.
YouTube Kids is one of the best options if you want to let your kids use the platform. Giving your child a Chromebook to enjoy YouTube Kids is also a great idea. However, the Chromebook isn’t your regular computer; it is great for browsing the web, viewing documents, etc.
Therefore, using the web version of YouTube Kids is the simplest solution. You can also download the Android app for YouTube Kids on the Chromebook if the laptop supports Android apps. The app will bring more options to the table than the website version, as well as a smoother viewing experience.
Read on for detailed instructions for both methods.
The Site Method
Watching YouTube Kids via your browser is a piece of cake on any device. The same goes for Chromebook, especially since it is running on Google’s Chrome operating system.
Here’s a fun fact – you don’t even have to sign in. That doesn’t mean that you shouldn’t. If you have a younger kid, you’ll want to customize their viewing experience to suit their age. Read on for instructions on watching YouTube Kids on Chromebook without signing up:
- Visit the YouTube Kids web page on your Chromebook and follow the instructions on your screen.
- Click on Skip when the page asks you to sign in.
- Read and agree with the privacy terms with “I Agree.”
- Select the content options suited for your child (preschool, younger, or older). YouTube’s age recommendations are pretty spot-on, feel free to choose based on them.
- Click Select to confirm the changes.
- Enable or disable the search bar (better off for younger children).
- Go through the parent tutorial on the site.
- Tap Done when you complete the tutorial.
Web Youtube Kids Sign Up
You don’t have to sign up for YouTube Kids, but we recommend that you do. Here is how:
- Visit youtubekids.com
- Enter your birth year and select to sign in.
- Log in if you already have an account. If not, click Add New Google Account.
- When you do that, click Sign In.
- Read the privacy terms and click Next.
- Set up an account password.
- Make a new YouTube profile. It is the viewing profile your kid will be using.
- Select the content options (previously explained).
- Enable or disable the search feature.
- Go through the parental guide.
- Select Done, and you are all set.
The App Method
The web version of YouTube Kids is very seamless and intuitive, but if you want the best experience, set up the Android app on your Chromebook. Here is how to do it:
- Make sure that you have the latest system updates for your Chromebook.
- Then, you need to enable the Google Play Store. Click on time in the bottom-right corner of the Home screen on your Chromebook.
- Click on Settings.
- Enable the Google Play Store (if you can’t see this tab, your Chromebook is not compatible with it, and you can’t use Android applications).
- Then, click on More, and read the TOS.
- Click on I agree, and you can begin using Android apps.
Now, you can get YouTube Kids from the Google Play Store. Some apps won’t work on Chromebooks, but YouTube Kids should (if your device supports Android apps). Follow the steps:
- On your Chromebook, and visit the Google Play Store.
- Search for the YouTube Kids app.
- Click on Install, which should be in the top-right corner of the screen.
- The app will download and install on your Chromebook.
When the app is ready, open it, and you will have to sign, just like on the web version. If you haven’t already, look at the instructions in the previous section and sign up for a YouTube Kids account. After that, customize your child’s viewing experience. Sign up is not obligatory, but it is beneficial.
Easy as a Pie
Watching YouTube Kids on the Chromebook is a piece of cake. Getting Android apps used to be much harder before, but now, they run smoothly on supported Chromebook devices. Getting the software updates is very important for running Android apps, including YouTube Kids.
If you need help with the Google Play Store setup, the updates, or you want to know which Chromebooks will support YouTube Kids, best visit the official Google Chromebook support page. You have all the answers you need right there.
Feel free to join the discussion in the comments section below.
NOTE: The old white HP 14 (G1) Chromebooks are no longer supported, and updates are no longer available.
As of December 2020, we are supporting Chrome OS Version 86 .
Updates for Chrome OS install automatically on all supported district Chromebooks and shouldn’t require any end user interaction. To find out what Chrome OS version a Chromebook is on, press ALT + V while on the logon screen and see the version in the upper right corner of the screen.
If you are not on Chrome OS Version 86, please update using the following steps.
- Restart the Chromebook (hold down the power button for 3 seconds, let go of the power button, wait for 3 seconds, then press and release the power button).
- Log in to the Chromebook using your [email protected] account and district password.
- Launch the Chrome Browser. In the address field, type: chrome://help
Most of the time, the update will start downloading automatically (be sure you are connected to NSDPrivate or your home Wi-Fi network). However, you may need to click on a “Check for updates“ button or “To see if your device is up to date, go to Chrome OS Settings“ link to trigger the download. You will see a progress bar showing how much of the update has downloaded. It will take several minutes for the Chromebook to update. When it is done, you will see a Restart button. Click it. Once the Chromebook restarts, it should have the latest supported Chrome OS installed
If you are updating from a very old version of Chrome OS, you may need to run through this process more than once to install incremental updates.
NOTE: Current Chrome OS versions are set by the Technology Department. If you are experiencing issues with your Chromebook or need a higher version of ChromeOS, please open a Web Help Desk work order ticket.
Last updated: October 24, 2020
If you own a Chromebook, you have already done the due diligence about its capabilities, right? For those considering a Chromebook, they run a Linux-based operating system called Chrome OS that uses the Google Chrome web browser as its primary user interface. Chromebooks utilize cloud-based storage centered around Google’s app suite. End users running the latest Chrome OS version add common apps to their Chromebooks from the Google Play Store. Devices running Chrome OS have multiple layers of built-in security like automatic updates, sandboxing, verified boot, data encryption, and recovery mode. Chromebooks are inexpensive because the operating system is free and the cloud-based applications don’t require a lot of local processing power or storage.
As stated, one layer of Chromebook built-in security is the automatic check and download of updates. This helps to ensure your device always runs the latest and most secure Chrome OS version. Google releases new Chrome OS versions on a 6-week cycle, with minor security and software updates coming every 2 to 3 weeks. When I hear of handy new features that improve productivity and workflow or make my Chromebook more secure, I like to update it right away. Follow the steps below to manually update your Chromebook instead of waiting for an automatic update.
Manually update your Chromebook
Step 1. Connect your Chromebook to the internet by turning on Wi-Fi or connecting an ethernet cable.
Step 2. In the bottom right corner of your display, select the time.
Step 3. In the new menu area, select Settings, which is the gear icon.
Step 4. In the left navigation of the Settings page, click About Chrome OS.
Step 5. In the About Chrome OS area, click the Check for updates button.
Step 6. Your Chromebook checks for an update. If an update exists, Updating your device displays.
Step 7. To complete the update, click the Restart your device button.
Step 8. Re-visit the About Chrome OS page. Your Chromebook is up to date now displays along with the new version number.
Finally, click on the notification or See what’s new link to check out what’s new with your Chromebook in the latest Chrome OS release.
Watch the companion video to see how to update your Chromebook on a step by step basis.
References for the October 22, 2020, release of Chrome OS 86 Update
- Release Updates from the Chrome Team:Stable Channel Update for Chrome OS
- What’s New With Your Chromebook?Chrome OS 85
- Get a new Chromebook
Thank you for visiting Tech Help Knowledgebase to learn how to update your Chromebook.
Henry Irvine, Contributing Technology Writer, translates more than a decade of internet technology experience in product and customer relationship management into practical help and how-to content. Look for him on Bay Area trails, music venues, or sausage shacks when he’s not writing. Don’t call him Hank if you see him. Seriously. Hank on Twitter
The Google Chromebook is going to be a popular item for the holiday season. And if you received one, you’ll definitely wan to make sure you keep it updated. By default each time you turn on your Chromebook, the system automatically checks for updates and applies what it finds. But you might want to manually check more often.
Update Google Chromebook
In the Chrome Browser, click the options menu in the upper right corner and choose Settings.
Alternately, you can also click on the time and account picture in the lower right corner of the desktop and select Settings.
Then select Help from the list on the right side of the screen. Then if there is an update available, it will be downloaded and installed. Here you can see the platform and firmware version is being updated.
Depending on what the update it, your Chromebook will restart. Go back to the section above and you’ll see it was successfully updated.
It’s also worth noting that you can select the Channel you want to update from. By default it’s set to the Stable Channel, which should be fine for most people and I recommend it unless you’re an experienced user.
To find out more about the different Channels and what they are, check out a more in our previous article: Google Chrome Beta vs. Stable: Which One Should I Use?
That’s all there is to updating your Chromebook. While the steps for updating it are virtually identical to the Chrome browser, remember that it’s updating the Chrome OS, not just the browser. Also, updates will differ depending on which device it’s running on.
What’s your take? Do you have a Google Chromebook? What do you think about it and how do you use it? Leave a comment below and tell us about it!