Jason Fitzpatrick is the Editor in Chief of LifeSavvy, How-To Geek’s sister site focused life hacks, tips, and tricks. He has over a decade of experience in publishing and has authored thousands of articles at Review Geek, How-To Geek, and Lifehacker. Jason served as Lifehacker’s Weekend Editor before he joined How-To Geek. Read more.
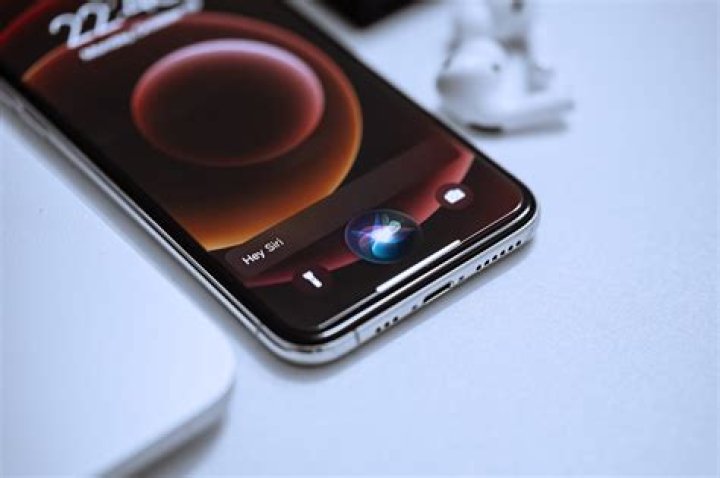
Thanks to Apple’s HomeKit home automation system and the versatility of Siri, you can now control your home lighting with nothing but your voice. Read on as we demonstrate this using Philips Hue.
In order to control your smart home lighting you need a handful of things. First and foremost, you need an iOS device that both runs Siri and is updated to at least iOS 8.1 or above for HomeKit support.
You’ll also need a HomeKit-enabled light system. For demonstration purposes we are using the Philips Hue 2nd-generation system (which features an updated bridge that supports HomeKit).
Note: If you were a Hue early adopter you can keep your existing Hue bulbs but you will need to upgrade your 1st-gen Hue Bridge to a 2nd-gen model.
How to Set Up Siri Control for Philips Hue
Make sure you set this up on the iOS device in your household that the owner/parent/person in control of the home automation stuff uses and is logged into, since HomeKit is linked to your iCloud login. You wouldn’t want to use your child’s iPad to set up your HomeKit settings (if that child has their own iCloud ID), because then you’d always need to return to their iPad to make changes and you would have to share their HomeKit configuration with your other devices (instead of you, the controlling agent, sharing the HomeKit setup with them). If you do accidentally set up your HomeKit system under the wrong Cloud ID, don’t panic, Simply reset the HomeKit configuration on the device you erroneously used to setup your system.
To link the Hue Bridge to HomeKit and enable Siri control, start by opening up the Hue app and tap the settings button in the upper-left corner of the screen.
From there, select “Siri voice control”.
At the bottom, tap on “Pair bridge”.
If you haven’t yet set up HomeKit, you’ll be prompted to create a “home” and name it whatever you want. Hit “Create home” when you’re done.
Next, you’ll be prompted to scan the number on the back of the Hue Bridge unit, but you can also manually enter in the number by tapping on “Enter Code Manually”. Since my Hue Bridge is all the way downstairs (as are most of my other hubs), I have the codes written down on my computer and I just type them in manually, which is easier and quicker than running all the way downstairs just to scan the number.
Once you scan or enter in the code, it will take a few seconds to pair it. Once it’s done, you’ll be taken the the Siri voice control screen where you can manage which lights, rooms, and scenes you want to use with Siri, and which ones you don’t. Some may not sync with Siri properly, and you’ll get an orange dot off to the right. Tap on that to fix it.
From there, tap on the check boxes next to the rooms that have orange exclamation points to fix the sync. However, if you don’t want these rooms connected to Siri, you can just leave them be.
Once you’re done, go back to the previous screen and tap “Done” in the top-right corner to save changes and finalize the Siri voice control.
Different HomeKit-enabled systems and apps will have different methods of selection, but the general rule is that you can always select groupings (called scenes, rooms, or zones depending on how they are organized within the app) and/or individual components of the system like the separate light bulbs or fixtures.
How to Control Your Lights
Once you’ve gone through the hassle of setting up the physical system and jumped through the minor hoop of linking the Hue app to your HomeKit system, it’s just a matter of kicking back and issuing commands to Siri.
One important note before we proceed, some names can be tricky for Siri because they are part of other common commands. Siri, for example, desperately wants to parse out names and dates into contact actions and calendar actions.
As such, it’s just asking for a headache to name the bedroom lamp on your spouse’s side of the bed “Nicole Lamp” because half the time you say “Nicole” in a voice command Siri will want to do something related to Nicole’s contact information. The same goes for any words that sound like they’re related to calendar actions (today, tonight, Tuesday, you get the idea). Siri is way happier when your potential commands are very clear. Naming a scene “Movie Mode” or just “Movies” is much safer, because it is very unlikely to cause any Siri-related confusion.
With that in mind, you can use the following commands to communicate with Siri and your Philips Hue light system:
- “Turn all lights [on/off]”
- “Turn [light name] [on/off]”
- “Turn the [room] lights [on/off]”
- “Set [scene name]
- ” Set lights to [X %] brightness”
- “Set lights [color]” (Hue color bulbs only)
- “Set scene [scene name]” (adding “scene” to the command works well if you have a scene name that is tripping Siri up)
There may be others (Hue’s documentation doesn’t even include all of the above commands), but these are some we’ve tested and confirmed to work. You may discover some others as you experiment.
The Philips Hue bridge adds Apple HomeKit compatibility. Besides HomeKit, the square Hue bridge offers all the existing features and compatibility with existing Hue lights, Hue taps, Hue wireless dimmer switches, Philips Hue apps for iOS and Android and the broad range of third party Hue apps. The square-shape Hue bridge is ready for the future as it has way more internal memory and more powerful processor than the round-shape Hue bridge.
The Philips Hue HomeKit functionality is restricted to Philips Hue and Friends of Hue products only.
Siri commands and used languages are being handled via Apple. For the best results we recommend that you use names for scenes and lights in the same language as you set Siri to.
For Siri to work please check if you have enabled following on your iPhone/iPad/iPod:
1. Keychain Access: Settings, iCloud, Keychain set to On.
2. Siri needs to be enabled: Settings, General, Siri, Allow
3. Internet connection must be active.
How to setup
In order to make sure that nothing was left out when trying to connect to SIRI, please follow these steps/instructions:
- Make sure all the 3 LED lights on the brige are on
- Please make sure that your router supports MDNS
- Make sure that your iPhone or iPad is connected to the same Wi-Fi router or modem as your Hue bridge and this router is connected to the internet
- You must have Keychain access enabled for HomeKit to work (Setting on your Iphone/Ipad-Icloud-Keychain-and here you can select keychain on)
- You must have Siri enabled (Voice Control is not able to control the lights)
- Make sure that you have the latest Philips Hue app
- Go to the Settings menu to pair your bridge to Siri- Tap ‘Siri voice control’
- In case the pairing via the camera does not work, you can manually pair the bridge by entering the code on the bottom of the bridge
You can see here a list of Siri commands (Apple) and more explanation how to use in general:
Siri Voice Commands must be unique. Duplicate names are not allowed and will be rejected when exporting.
Related Questions
The Philips Hue app tells me my Hue bridge is already paired when setting up Siri voice control
In order to gain access to the Hue bridge, ask the person who has setup the system to share control of HomeKit accessories. To share HomeKit control, open the Hue app, select Settings > Siri voice control > icon on the top right > Invite People. Note: Make sure you only share to trusted persons, since this will share control to all your HomeKit accessories, not limited to the Hue lights.
If you lost your iCloud credentials or no user was previously paired with your bridge, you can remove pairing by resetting Siri voice control on the bridge.
We made a web-based solution (at Hue labs) for this to prevent you from having to reset the bridge completely.
The website does guide you through the process of resetting Siri voice control on the bridge.
The reset Siri voice control website can be found on
Another option to remove the pairing is by pressing the factory restore button on the backside of the bridge.
Warning: disadvantage of factory reset is that all Hue settings including lights, devices, alarms & timers will be lost.
Home automation is all about convenience; the easier it is to execute a task, the better. This has been something of a conundrum for smart lighting, because unlocking your smart phone, finding the app, launching it and hitting the “on/off” button is far more cumbersome than simply flicking a light switch (although you do have to get off the couch to do that).
While there are automated solutions available that will turn your Wi-Fi enabled lights on and off at pre-set times or based on other actions occurring, sometimes you just want to say, “Lights, turn off ” and have it happen.
When I installed a set of Philips Hue lights in my living room, I quickly realized how helpful it would be to simply tell my phone to turn my lights on or off. For those not familiar, Philips Hue is a personal wireless lighting system that can replicate any color in the spectrum and be controlled remotely via a smartphone app. Along with the manufacturer’s app, there are hundreds of third-party apps that will do everything from turning your living room lighting into that of a movie theater to offering up the perfect color spectrum for your current mood. But none of them work with voice activation.
So, I turned to Siri, Apple’s digital personal assistant.
First, I just thought I’d ask her to turn the lights on and see what happened. Her response was “Hmm, I don’t see anything connected but I can help once you’ve set something up.” Intriguing. It turns out this was not a reference to my lack of technical ability, but a subtle reference to Apple’s soon-to-be released HomeKit.
HomeKit is Apple’s smart home protocol. Intended to help your smart home accessories connect with each other, HomeKit promises secure pairing, the ability to easily control individual or groups of devices throughout the house, and integration with Siri. For example, you will be able to tell Siri you are “going to bed” and it could dim the lights, lock your doors, close the garage door and set the thermostat.
Philips has already said it will work with HomeKit, so whenever it arrives (Apple says early 2015, so any day!), we should all be able to control our Hue bulbs via Siri.
But, like most techies, I’m impatient. I want to be able to turn my lights off with voice activation right now. So, I did some research and discovered a simple workaround, using IFTTT, text messaging and a little bit of set up.
Here’s my step-by-step guide to getting your Hue lights to turn on via Siri:
- Sign up for an account with IFTTT. If This Then That is a service that lets you connect your various devices and software together via the Internet in order to perform pre-set actions.
- Connect your Hue lights to IFTTT by creating a Hue Channel
- Connect your iPhone to IFTTT by creating an SMS channel.
- Next, search for this “recipe” (a recipe is a pre-configured action created by a member of the IFTTT community). You can also create your own recipes from scratch, but it is worth starting with one that has been proven to work and then modifying it to your needs. This recipe will turn your Hue lights “on” when you send a text message to IFTTT with the phrase #on.
- Customize the recipe by choosing the phrase you want to use and which lights you want the commands to activate.
- Next, add your IFTTT number (which will be shown in the recipe) to your phone’s contacts. I suggest naming it “Lights” for ease of use, but you can call it whatever you like (I would avoid Hue, especially if you have an uncle named Hugh.)
- Now all you need to do is ask Siri to “text Lights #ON.” Siri will then send a text message to IFTTT with the trigger to activate the Hue channel and turn your lights on. Here’s a video of me activating my lights via Siri.
Once you have this set up and working, go back in to your IFTTT account and create different versions of the recipe for the different actions you’d like to complete. Currently, the Hue IFTTT channel allows you to dim lights, change color, and turn on a color loop as well as a few other basic actions.
The only downside to this workaround is that it’s not instantaneous. The message has to be sent out to IFTTT servers over your cellphone carrier, then come back to your home through your Hue light’s Wi-Fi connection, and it can get tripped up or slowed down along any of those stages. So this is a bit of a roundabout process, but it is currently the only option for voice-activated control of your Philips Hue bulbs beyond some major tinkering. (By the way, you can also just ask Siri to launch the Hue App and it will open up to the screen where you just need to touch a button to turn it off-but this way is so much cooler, don’t you think?)
About Jennifer Tuohy
Jennifer Tuohy is a gadget lover who writes for The Home Depot about smart home technology. Her latest infatuation is with the smart LED light bulb and the cool things you can do with them from your phone. You can find the Hue LED light bulbs at The Home Depot.
When HomeKit was first announced, many people were very excited. Unfortunately, it wasn’t until recently that home automation makers have released HomeKit support for their products. Arguably one of the most popular home automation devices, Philips’ Hue, has recently been refreshed with HomeKit support. The downside, however, is that you need to buy a new bridge. And depending on where you live, you might not be able to buy the bridge stand-alone yet. But don’t worry! You can enable Siri support for your lights for just 3 dollars with some simple jailbreak tweaks! Here’s how:
How to use Siri to control Hue lights without Homekit
First, open Cydia and search for the package “Assistant+”. Then download the package for $1.99.
After you have downloaded that, search for “HueHueHue” in Cydia and download that for $0.99.
Now with those two packages downloaded, go the the Assistant+ app and select “Activator Listeners”. Press the “+” button in the corner to make a new action.
You will then be asked for a name. This is just for informational purposes for yourself to find it later. Name it whatever you like. I chose “Hue Lights On”. Now for the trigger. Start by typing in “.*” without the quotations. This is used in Assistant+ so you can say extra words at the beginning of your trigger (i.e. “Hey Siri” “Siri please” etc.). Now type in the sentence without a space between the “.*” that you want to activate your lights with. For example, this is what I have: “.*Turn my lights on”. If you press the “+” button in the corner, you can add another trigger.
Once you have entered an amount of triggers that you are satisfied, make sure the “Enabled” switch is on and then go to the application “Activator” (if you didn’t have it before, HueHueHue should have automatically installed it). Select “Anywhere” and find the “ASSISTANT+” section. Select the name that you typed in for you Activator Listener. Then select the HueHueHue action for your trigger. So if your sentence was “Turn the lights on”, select the “Turn lights on” selection.
And now for the big moment! Activate Siri, and say your trigger sentence. If you set everything up correctly, your lights will now behave according to your command! Just as a side note, if this is your first time setting up HueHueHue, when you activate a HueHueHue action, it might ask you to press the link button on your bridge. You will only need to do this once.
And that’s it! You know should be able to control your Hue lights with just Siri! This is great if getting a new bridge is not an option right now, or if your on an older iOS version that doesn’t support HomeKit.
Did this work for you? How do you like it? Let us know in the comments! And don’t forget to follow us on Facebook on Twitter for the latest updates on iOSHacker!
- Home
- Microsoft
- Windows
- Mobile
- Office
- Xbox One
- Apple
- iPhone
- iPhone Activity Center
- iPhone Apps
- iPad
- iPad Activity Center
- iPad Apps
- Mac OS X
- Apple Watch
- iPhone
- Google
- Google Services
- Android
- Reviews
- Wearables
- Web
- IoT
- Home Automation
- Developer Tools
- Deals
- More
- Apps
- Sprink
- Turn Off LCD
- Drive Icon Changer
- About Us
- Advertise
- Apps
How To Setup Siri Voice Control For Philips Hue Light Bulbs
Philips Hue light bulbs are growing in popularity as the range continues to grow. The relatively recent move across to the second-generation Hue Bridge with Apple HomeKit support has meant that the Hue range has found even more fans in those who want to interact with their lighting setup via Apple’s Siri on iPhone, iPad, iPod touch and Apple Watch.
In this post, we take you through a step-by-step guide on how to setup Siri voice control for your Hue bulbs. This is basically a follow up to our previous post where we showed you how to migrate or transfer your existing Hue bulbs to the new Hue Bridge 2.0 with HomeKit support.
How to setup Siri voice control for Philips Hue light bulbs:
Before beginning, make sure that you have transferred your Hue accessories from the older Hue Bridge to the new HomeKit-enabled Hue Bridge 2.0. Instructions on how to do that can be found here: Migrate Old Philips Hue Lights Bridge To HomeKit Bridge 2.0, Heres How.
With that out of the way, here’s what you need to do:
Step 1: First and foremost, launch the official Hue app on your iOS device. This could be on your iPhone, iPad, or iPod touch.
Step 2: Tap on the hamburger menu icon in the upper left corner of the app. This will provide you with a list of available options that exist within the Hue app.
Step 3: Tap Settings option from within the main menu. This will likely be towards the bottom of the available options.
Step 4: Now to set up the Philips Hue bulbs to work with Siri via the HomeKit compatibility, you’re going to want to tap on the Siri voice control option. The app will then prompt you to allow it to access your Home Data (which is basically your HomeKit profile in iOS found under Settings.app > HomeKit). Tap OK.
Step 5: Now tap Pair Bridge to start the process of connecting the iOS device with Hue Bridge.
Step 6: When the Bridge is located by the app, it will require a unique HomeKit setup code of the Bridge. You can either enter this manually, or scan it using the app. You can find this code either in the instructions manual, or at the backside of the Hue Bridge.
Step 7: Once the code has been entered, the app will then go through a process of adding the HomeKit accessory. When done, it will show “Accessory Added” message.
Step 8: On the following screen, Tap on ‘Set up’ to export your Hue scenes to HomeKit Bridge.
Step 9: Now simply select the scenes/lights that you wish to control via Siri and you’re done.
Now it’s simply a matter of relaxing and ordering Siri around. You can say things like “Hey Siri, turn on the lights.”, “Hey Siri, turn off the lights.”, “Hey Siri, turn lights to blue.”, “Hey Siri, set lights to Sunset scene.”, “Hey Siri, set brightness to 50%.” and so on.
You can follow us on Twitter, add us to your circle on Google+ or like our Facebook page to keep yourself updated on all the latest from Microsoft, Google, Apple and the Web.
The new Philips Hue Bridge 2.0 lets users tie into Apple’s HomeKit and control their lighting with Siri.
Philips Hue, the company’s smart home lighting platform, is getting support for Apple’s HomeKit and voice control with Siri.
The new Philips Hue Bridge 2.0, coupled with the new Philips Hue App 1.1, allows users to tie into Apple’s HomeKit and control their lighting with Siri. According to Philips, users will be able to bark commands at Siri and tell her to “dim the table lamp to 30 percent” or “turn on the bathroom light.” The feature is available in Apple’s iPhone, iPad, and iPod touch running iOS 9, as well as Apple Watch.
Apple’s HomeKit is the iPhone maker’s attempt to capitalize on what promises to be a massive smart home market in the coming years. Hardware and software developers can tie their products to HomeKit and let users to control their products through iOS. It currently works with a range of smart home products, including thermostats, locks, plugs, switches, and more.
Philips Hue has quickly become one of the leaders in the smart home lighting space. The company’s Hue platform includes a starter kit with two or three bulbs, as well as a Bridge that connects them and allows them to be wirelessly controlled. Earlier versions of the Bridge did not include HomeKit integration, but the company was quick to note that if current Hue owners buy Bridge 2.0, it will work with previously purchased lighting equipment. Philips Hue Bridge 2.0 also works with other HomeKit-enabled devices.
“You can ask Siri to ‘wake up’ your home, turning on your Philips Hue lights and setting the thermostat to a comfortable temperature helping you and your family have a pleasant start to the day,” the company said in a statement. “At night you can ask Siri to recall light scenes you’ve created using the Philips Hue app, or set your home to ‘night mode’ turning off your lights and locking your front door.”
Recommended by Our Editors
The new Philips Bridge 2.0 is launching in North America and Europe on Tuesday. Customers who already own a Bridge can buy the new version for $40. Customers looking for a new Kit will get a Bridge 2.0 and three lights for $200.
The new Philips Hue Bridge 2.0, coupled with the new Philips Hue App 1.1, allows users to tie into Apple’s HomeKit and control their lighting with Siri. According to Philips, users will be able to bark commands at Siri and tell her to \”dim the table lamp to 30 percent\” or \”turn on the bathroom light.\” The feature is available in Apple’s iPhone, iPad, and iPod touch running iOS 9 , as well as Apple Watch . \r\n\r\n
Apple’s HomeKit is the iPhone maker’s attempt to capitalize on what promises to be a massive smart home market in the coming years. Hardware and software developers can tie their products to HomeKit and let users to control their products through iOS. It currently works with a range of smart home products, including thermostats, locks, plugs, switches, and more. \r\n\r\n
\”You can ask Siri to ‘wake up’ your home, turning on your Philips Hue lights and setting the thermostat to a comfortable temperature helping you and your family have a pleasant start to the day,\” the company said in a statement. \”At night you can ask Siri to recall light scenes you’ve created using the Philips Hue app, or set your home to ‘night mode’ turning off your lights and locking your front door.\” \r\n\r\n
Philips wants to help you set the mood. \r\n\r\n
The company today introduced the Philips Hue wireless dimming kit—a no-installation, straight-out-of-the-box solution for dimmable light. \r\n\r\n
Each kit comes with a Philips Hue white light bulb and portable, battery-operated dimmer switch, so you don’t need to call an electrician, or even move from the sofa, to add a little mood lighting. \r\n\r\n
Just screw in the bulb and press the dimmer switch to adjust the brightness. The multi-use contraption also serves as a normal wall switch, or a remote control that can be placed anywhere in the house. \r\n\r\n
Plus, the new Philips Hue wireless dimming kit can control up to 10 Philips Hue white lights at the same time—even if the bulbs were already installed in your home. Using a Philips Hue bridge, consumers can connect any compatible products in their house to the new dimmer switch. \r\n\r\n
\”Not only does the kit show how simple it is to have clever products in your home, but like all Philips Hue products it is entirely future-proof,\” said Leonardo Avezzano, product marketing director of Philips Hue. \”With the kit, anyone is able to begin enjoying the simplicity of modern dimming.\” \r\n\r\n
The €39.95 ($45.65) Philips Hue wireless dimming kit is available next month in Europe; individual Philips Hue white bulbs will also be on sale for €19.95 ($22.79). \r\n\r\n
This newsletter may contain advertising, deals, or affiliate links. Subscribing to a newsletter indicates your consent to our Terms of Use and Privacy Policy. You may unsubscribe from the newsletters at any time.
Your subscription has been confirmed. Keep an eye on your inbox!
Works With HomeKit & Siri
Lucas Yamashita
Designed for iPad
- Free
- Offers In-App Purchases
Screenshots
Description
“Start Zen Mode.”
Just say this and let the relaxing sounds and lights flow into your home.
With Shortcuts for Hue you can control your lights by recording custom Siri Shortcuts to transform your house into a relaxing place, a romantic moment or a great party, using only your voice! You can even use Shortcuts app to automate multiple tasks combined with the in-app sounds and lights.
After launching the app and setting up your Philips Hue Bridge and Lights, go to settings app on your iPhone, Siri & Search, add the shortcut “Custom Shortcut for Zen, Love or Party Mode” and record your personalized command. After this, every time you say this command to Siri, the app will launch and execute the proper sound and light effects! Note that the last used mode will be the one executed (marked with a green tick).
You can also use Shortcuts app to automate multiple tasks. Just add the “Custom Shortcut for Zen, Love or Party Mode” action with another tasks, like do something based on your current location, etc to your shortcut flow and let the magic begin!
Download Shortcuts fot Hue Lights now!
*Optional Subscription:
– Shortcuts For Hue Lights offers a PRO monthly subscription at USD $2.99 and a 3-month at $9.99, please note prices may vary depending on sales taxes or countries.
– You will be asked to login to your iTunes account (if not already) prior to the purchase and the payment will be charged to iTunes Account at confirmation of purchase.
– Additional information is provided stating that subscription automatically renews unless auto-renew is turned off at least 24-hours before the end of the current period.
– Subscriptions may be managed by the user and auto-renewal may be turned off by going to the user’s Account Settings after purchase.
– The account will be charged for renewal within 24-hours prior to the end of the current period.
– No cancellation of the current subscription is allowed during active subscription period.
– Any unused portion of a free trial period, if offered, will be forfeited when the user purchases a subscription to that publication.
In this post we will cover how you can get your Philips Hue lights connected to Siri and your Apple Homekit or Homepod. For a quick background, the Apple Homekit is what existed before the Apple Homepod was released. Because Siri is only with IOS devices, we will only include Apple products.
Process of Connecting Them
You can connect your Hue Lights to siri by interfacing it with Apple products that have Siri. This is done by connecting your Apple Homekit or the relatively new (at the time of writing this post) Apple Homepod. So you’ll need either an Apple Homekit or Apple Homepod, as well as a second generation Philips Hue Bridge to get this done properly.
You can pair your IOS mobile device with an App and Hue Bridge as well — and from there connect Siri to your Hue lights. Using the app you can select “Homekit and Siri”. At this point your lights will be paired with Siri as well as
What Can I do With My Philips Hue and Siri?
You can do most what you can with the Amazon Alexa/Echo and Google Home. Check out the Commands below to see exactly what you can do. There might also be more out there or might come in an update, so be on the lookout for new commands.
You are also able to control your Philips Hue lights from both Siri on your phone and your Apple Homekit/Homepod. The app makes integration very straightforward and simple.
Siri Commands for Philips Hue
After you’ve set up your Philips Hue Setup with your Siri and Apple Homekit or Homepod there are a number of commands that you can use a lot like the Amazon Alexa/Echo and the Google Home.
Turn all Hue Lights On/Off: “Siri, Turn all lights ”
Example: “Siri, Turn all lights on”
Turn one light off or on: “Siri, Turn ”
Example: “Siri, Turn the kitchen light off”
Turn off all lights in a room: “Siri, Turn the lights ”
Example: “Siri, Turn the bathroom lights on”
Change the scene: “Siri, Set ”
Example: “Siri, Set Halloween Lights”
Change Brightness:”Siri, Set lights to
Example: ”Siri, Set lights to 20% brightness”
Change the color of lights: “Siri, Set lights ”
Example: “Siri, Set lights blue”
Command:“Siri, Set scene ”
Example: “Siri, Set Scene Sunset”
There are also more commands that are there if you feel like going that far with it — and there’s a whole lot more you can do as well if you explore around the Philips Hue section of the site.
To revist this article, visit My Profile, then View saved stories.
To revist this article, visit My Profile, then View saved stories.
In today’s smart home, a separate hardware bridge may seem like a cumbersome piece of clutter. Take light bulbs, for example: There are app-controlled color-changing lights from Lifx that don’t require a bridge for your mobile device to communicate with the bulb. You just connect each bulb directly to your home Wi-Fi, and you’re good to go.
While that’s a bit more convenient for setup time, Philips has demonstrated that a bridge-based system has a clear benefit: it’s easier to upgrade. The company’s Hue bulbs, which come in a variety of sizes and colors and lumen ratings, use the little Hue hardware puck as an intermediary between the smart LED bulbs and the app on your phone. But that extra piece of hardware makes the system able to add features over time without having to replace all your bulbs.
For example, Philips just announced its new Hue 2.0 bridge, which will be sold as a standalone piece of hardware and included in the updated Hue starter pack, supports Apple HomeKit. To smart-homemakers, that means that you can control your lights just by talking to Siri.
According to Philips Hue inventor and head of technology George Yianni, the new bridge will work with all existing Hue bulbs. The older version of the bridge will also continue to work with all bulbs. But in order to get the HomeKit integration, you’ll need the new hub. It’ll cost $60 by itself, but Philips is also offering a program where owners of the existing bridge can trade it in for the new one for $40.
Yianni says that beyond the new bridge, all you need is an iOS 9 device to start talking to your lights through Siri. However, not all of the functions in the Hue app will be supported by Siri commands.
Content
Linking your system to Siri will require a bit of setup in the Hue app for iOS: You can set up HomeKit functionality from within the app, letting spoken commands control individual lights and groups of lights. For example, you can ask Siri to turn the lights to a certain percentage of brightness or activate a certain Hue lighting scene.
The Hue app is still only designed to operate Philips’s bulbs, but Yianni says the new HomeKit integration will help the lighting system interact with other HomeKit-compatible wares. For instance, you could tie a certain thermostat temperature to a certain lighting scheme. Things like that will likely need to be done through Apple’s upcoming Home app, or a similar “hub” built to control several devices from several manufacturers at once.
According to Yianni, the HomeKit compatibility doesn’t mean Philips is locking itself into Apple’s in-home ecosystem. The Android Hue app will still work with all the company’s bulbs, and he says Philips still plans to offer cross-platform compatibility with devices such as the Nest thermostat.
The world of science fiction long foretold of a future where we could speak to our computers. Today, this often takes the form of voice assistants in our homes and in our phones. In this post I explore a little about using Apple’s ‘Siri’ voice assistant to control Philips Hue smart lighting.
In my previous article ‘Controlling Philips Hue with Apple Home” , I explored a little about how you can control your Philips Hue lighting with the ‘Home’ app built into iOS on iPhones and iPads. The Home app is part of the HomeKit mechanism for controlling smart home devices and accessories. This same system is what also enables the use of Apple’s ‘Siri’ voice assistant to control smart home devices too.
Using Siri to control Philips Hue is fairly straightforward, but you first have to have everything setup right. By scanning the code on the underside of the Hue bridge during the original setup process, I was able to ‘pair’ the HomeKit functionality of iOS with the HomeKit chip in the Hue bridge.
From that point forward, any changes I made inside the Hue app were easy to sync over to the HomeKit system – for the most part. When you do add lights, or rename them, you’ll have to either manually update HomeKit via the Home app, or use a ‘settings sync’ feature inside the native Hue app. It’s not the most intuitive of processes, but it works.
With everything setup, you can activate Siri and say things like ‘Turn the living room lights on’, ‘Turn the living room table lamp on’, or even ‘Set the living room table lamp to 50%’. So, lights are easy to turn on or off, whole house, entire room, or individual lights. It’s best to make sure all your lights have intuitive names that are easy to remember.
What about scenes? As you’ll remember from the article on the Home app, Scenes not defined in the Home app don’t work. So, I can say ‘Activate the Cosy scene’, and this worked, since I’d set that scene up. However, on attempting to say ‘Activate the Savannah Sunset Scene’ -a built in Hue scene- I got a message saying Siri ‘didn’t know that one’.
The problem is that whilst the settings sync function between Hue and HomeKit works well, Scenes are one thing that doesn’t get synchronised. So, you’d have to setup all your scenes manually to make this work. I doubt this is a problem over on the Hue side, since virtually everything else has been thought of.
All in all, whether your using Siri or the Home app, the system works, but the problem is always that the functionality in HomeKit is limited compared to the native app. I just can’t see myself using Apple’s system full time. Doing the odd command to turn lights on or off, maybe. It’s also useful that you can bring up the control centre from the lock screen and turn lights on or off quickly.
Of course, the true power of systems like this emerges when you want to control lots of different smart home devices from a single command, so it will be interesting to revisit this topic once we have our smart home developed a bit more.
For now though, I suspect Siri will be serving only light duties for us. I plan to also compare this to Cortana, and dedicated voice assistants like Echo or Google Home (depending on what we choose). Stay tuned, and let me know your thoughts in the comments!


