You don’t need fancy partitioning tools or disk managers to manage partitions on your Mac. You can do so using the built-in Disk Utility tool. But be sure to back up your drive beforehand as these procedures result in data loss.
To open Disk Utility, go to Finder and click on Applications. Then click on Utilities > Disk Utility.
Once you have located Disk Utility, you can follow the sections below depending on the need of your situation. In this article, we explain how to partition, erase, repair file systems and restore images using Disk Utility.
How to partition drives using Disk Utility
After opening Disk Utility, you will see a list of all drives. Select the hard drive in question i.e. the hard drive where you wish to create partitions.
- Click on the Partition tab and then click on the ‘+’ sign
- Use the size controls to personalize the size of the partition you wish to create
- Assign a name to the new partition and click Apply
This will create a new partition on the selected hard drive. In the next section, we will see how to erase a partition.
Erase a partition using Disk Utility
Open Disk Utility and you will be shown a list of all drives. To erase a partition, click on a hard drive and select Erase. Once you select Erase, you have an option to select security features to erase a drive.
Select high security if you want your data to be overwritten multiple times, so data recovery software cannot retrieve it. If not you can select the fastest erase option, which is not very secure, meaning data recovery tools can retrieve data if you select this option. Once the security options are selected, click on Erase to begin the process. Once the process completes, the drive will be erased.
Repair issues with file systems
First Aid feature in Disk Utility is a great tool to check and repair file system errors. You can use this feature when the external device doesn’t work properly or if a file is corrupt and you want to debug the drive. Of course, First Aid can also repair issues with your internal hard drive, for which you will have to access Disk Utility through recovery mode.
- Once you open Disk Utility, drives will be listed. But if you don’t see the drive, click on View > Show all devices
- Select the drive you wish to repair
- Click First Aid and then click Run. If the repair is complete, you will receive a success message. If it reports an error, you will have to further examine. In some cases, running First Aid again may resolve the issue.
Restore disk images
Disk images are a wonderful creation that allows you to make a copy an entire partition. These images can then be restored on to another partition. To create a disk image, follow the steps below.
- In Disk Utility, select the volume of which you want to make a disk image
- Then click on File > New Image
- Then select Image from
Once the image is created, you can also restore it easily by following the steps below. To restore an image, you will need a partition that is empty.
- In the left menu, select the volume you want to restore. This is the volume that is erased and prepared for restore.
- Then click Edit and choose Restore
- In the pop-up window, click on the Image button and select the disk image
- Finally, click on Restore to restore the disk image
You can use Disk Utility to perform disk management functions like partition drives, repair and restore them. It is a powerful tool that can be accessed through recovery when your Mac doesn’t boot or when there are issues with the internal drive.
If you lose data after performing these procedures and no backup is available, you can use data recovery tools such as Yodot to your rescue. Yodot Recovery software can also be used to recover data due to damaged Apple partition map in Mac.
Use the First Aid feature of Disk Utility to find and repair disk errors.
Disk Utility can find and repair errors related to the formatting and directory structure of a Mac disk. Errors can lead to unexpected behavior when using your Mac, and significant errors might even prevent your Mac from starting up completely.
Before proceeding, make sure that you have a current backup of your Mac, in case you need to recover damaged files or Disk Utility finds errors that it can’t repair.
Open Disk Utility
In general, you can just open Disk Utility from the Utilities folder of your Applications folder. However, if your Mac doesn’t start up all the way, or you want to repair the disk your Mac starts up from, open Disk Utility from macOS Recovery:
- Determine whether you’re using a Mac with Apple silicon, then follow the appropriate steps:
- Apple silicon: Turn on your Mac and continue to press and hold the power button until you see the startup options window. Click the gear icon labeled Options, then click Continue.
- Intel processor: Turn on your Mac, then immediately press and hold these two keys until you see an Apple logo or other image: Command (⌘) and R.
- You may be asked to select a user you know the password for. Select the user, then click Next and enter their administrator password.
- From the utilities window in macOS Recovery, select Disk Utility and click Continue.
Select your disk in Disk Utility
Choose View > Show All Devices (if available) from the menu bar or toolbar in Disk Utility.
The sidebar in Disk Utility should now show each available disk or other storage device, beginning with your startup disk. And beneath each disk you should see any containers and volumes on that disk. Don’t see your disk?
In this example, the startup disk (APPLE HDD) has one container and two volumes (Macintosh HD, Macintosh HD – Data). Your disk might not have a container, and it might have a different number of volumes.
Repair volumes, then containers, then disks
For each disk that you’re repairing, start by selecting the last volume on that disk, then click the First Aid button or tab.
In this example, the last volume on the disk is Macintosh HD – Data.
Click Run to begin checking the selected volume for errors.
- If there is no Run button, click the Repair Disk button instead.
- If the button is dimmed and you can’t click it, skip this step for the disk, container, or volume you selected.
- If you’re asked for a password to unlock the disk, enter your administrator password.
After Disk Utility is done checking the volume, select the next item above it in the sidebar, then run First Aid again. Keep moving up the list, running First Aid for each volume on the disk, then each container on the disk, then finally the disk itself.
In this example, the repair order is Macintosh HD – Data, then Macintosh HD, then Container disk3, then APPLE HDD.
If Disk Utility found errors that it can’t repair
If Disk Utility found errors that it could not repair, use Disk Utility to erase (format) your disk.
If your disk doesn’t appear in Disk Utility
If Disk Utility can’t see your disk, it also can’t see any containers or volumes on that disk. In that case, follow these steps:
- Shut down your Mac, then unplug all nonessential devices from your Mac.
- If you’re repairing an external drive, make sure that it’s connected directly to your Mac using a cable that you know is good. Then turn the drive off and back on.
- If your disk still doesn’t appear in Disk Utility, your Mac might need service. If you need help, please contact Apple Support.
Want to create, wipe, repair or copy your hard drive partition on Mac? Then no need to go for a third-party application, as Mac itself has Partition Manager tool named as Disk Utility which helps in creating a partition, erasing, repairing and copying drives. It is a one-stop solution to manage your partitions on Mac drive.
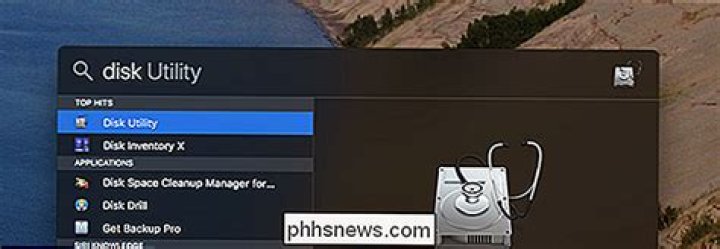
Steps to Access Disk Utility on Mac Hard Drive-
- Open Search by pressing Command + Area and type Disk Utility in search field
- When search results appear, double click on Disk Utility
Use Finder to access Disk Utility.
Once you open Disk Utility, you can use it to create, wipe, repair, and copy your hard drive partition. Here’s how to use Disk Utility for a different task.
Create a Partition using Disk Utility-
- Pick the disk where you want to create a new partition and click Partition
- Choose a present partition in the Volume Scheme list, and click on Add (+)
- Disk Utility separates the partition into two and moves the data from that partition on one of the new partitions.
- If partition has fewer data [ half-full], then it makes two partitions of the same size or else it makes one partition large enough for the data and another from the leftover space
- Then, select how to format the partitions followed by name
- Finally, hit Apply button
Note: In any case, you lose data during repartitioning procedure, make use of Remo Recover Mac to get back data lost after repartitioning in few clicks.
Steps to Wipe a Partition using Disk Utility: –
- Select the drive and then click the “Erase” button
- Click on “Security Options” to choose the number of passes to overwrite the drive with.
Guide to Repair a Partition using Disk Utility:
First Aid function will help you to check the file system for errors and tries to correct them. Select the drive and hit “First Aid” button. And, wait until the process gets completed.
Procedure to Copy Drives using Disk Utility: –
The Restore function helps you to copy one volume to another. And, you can even use disk image feature to copy an entire partition. Pick the drive and then navigate to File > New Image > Image From [Partition Name].
Можно восстановить том из другого тома. При восстановлении одного тома из другого тома создается точная копия исходного тома.
ПРЕДУПРЕЖДЕНИЕ. При восстановлении одного тома в другой все файлы, находящиеся в целевом томе, стираются. Перед восстановлением тома скопируйте нужные Вам файлы из целевого тома в другой том.
В приложении «Дисковая утилита» на компьютере Mac выберите пункт меню «Вид» > «Показать все устройства».
Если Дисковая утилита еще не открыта, нажмите значок Launchpad в панели Dock, введите «Дисковая утилита» в поле поиска, затем нажмите значок Дисковой утилиты .
В боковой панели выберите том, который нужно восстановить, затем нажмите кнопку восстановления .
Этот том стирается и становится точной копией.
Нажмите всплывающее меню «Восстановить», затем выберите том, который хотите скопировать.
Нажмите «Восстановить», затем нажмите «Готово».
Для восстановления тома также можно воспользоваться Дисковой утилитой из Утилиты восстановления macOS Recovery. См. статью на сайте поддержки Apple: Сведения о восстановлении ОС macOS.
macOS on your Mac includes a disk-repairing app, called Disk Utility, which you can use to scan your connected drives for errors, erase a disk, repair disk permissions, check the disk’s structure for physical errors and more.
But what can you do, if anything, should your Mac experience issues preventing it from starting up properly? Not to worry, our friends, because macOS lets you launch a standalone version of Disk Utility from your Mac’s built in recovery partition.
In other words, macOS’ Recovery Mode gives you a chance to repair a malfunctioning startup disk that prevents your Mac from booting properly.
Disk Utility in macOS’ Recovery Mode
The built-in recovery partition on your Mac’s startup disk contains recovery tools, like Disk Utility. Recovery Mode makes it easy to repair your Mac’s disk in situations when the machine won’t boot properly and load the desktop in the first place.
How to repair disk errors in Recovery Mode
1) In the Apple menu, choose Restart.
2) As your Mac restarts, hold down the Command (⌘) – R combination immediately upon hearing the startup chime and hold the keys until the Apple logo appears.
3) Select Disk Utility and click Continue.
4) In the sidebar, select the volume you wish to repair.
5) Click the First Aid button.
6) Click Repair Disk.
7) Two things will happen: either the app will report that the disk appears to be OK (or has been repaired) or you will need to do one of the following:
- If you get “overlapped extent allocation” errors, two or more files occupy the same space on your disk and one of them may be corrupted. Check each listed file to see if you can replace or re-create it. If not, open the file and examine its data to decide if you should delete it.
- If you get “The underlying task reported failure” errors, the disk has not been fully repaired. In that case, run Disk Utility again and try to repair the damaged disk or partition again. If that doesn’t work, back up as much of your data as possible and then reformat the disk and reinstall macOS.
If your Mac’s disk is physically damaged, it will likely need replacing.
What else Recovery Mode is good for?
Aside from diagnosing and fixing disk problems with Disk Utility, these recovery tools also let you get help online in a stripped-down version of Safari, install the version of macOS that was previously installed on this Mac or restore your Mac from a Time Machine backup.
Use Recovery Mode to:
Tip: If the Recovery partition itself has been damaged, enter Internet Recovery Mode instead by pressing Command (⌘) – Option (⌥) – R at boot time.
If Recovery partition is broken, use Internet Recovery
If the recovery system on the startup drive isn’t available—for instance, if you have replaced your startup disk or it has been physically damaged or completely erased—you will not be able to enter Recovery Mode.
That’s when you should take advantage of macOS’ Internet Recovery feature. Available on newer Macs with OS X Lion or later, this mode downloads a Recovery System image from Apple’s servers, and then starts up your Mac from it.
Internet Recovery provides the same utilities and options as macOS’ Recovery Mode on a startup drive, Disk Utility included. As a bonus, starting up from Internet Recovery automatically checks your Mac’s memory and hard drive for hardware issues.
To enter Internet Recovery, restart your Mac and hold down the Command (⌘) – Option (⌥) – R after hearing the startup chime. You will be asked to connect to a Wi-Fi network if your Mac isn’t already connected the Internet via Ethernet.
Depending on your Internet connection and Wi-Fi reception, entering Internet Recovery Mode may take a while. After a Recovery System image has been downloaded from Apple’s servers, your Mac will automatically start up from it so you’ll be able to use the same recovery tools as in macOS’ normal Recovery Mode.
Related tutorials
Check out these resources that cover a myriad of ways you can start up your Mac:
Need help? Ask iDB!
Not sure how to do certain things on your Apple device? Let us know at [email protected] and our future tutorials might cover your specific problem and provide a solution.
Submit your how-to suggestions at [email protected].
One of the old Mac OS X utilities, Disk Utility, has received a makeover in macOS Sierra. The updated app now presents a streamlined appearance while retaining all of its former functionality, and it’s still useful for verifying or repairing disks. This can be useful if you’re running into odd issues with a Mac, so we’ll take a look at the process of verifying and repairing disks with macOS Sierra’s Disk Utility.
Some of the issues you might encounter that indicate a disk that might need repair:
- Multiple apps quit unexpectedly
- A file is corrupted
- An external device doesn’t work properly
- Your Mac refuses to start up
Verifying Disks
Verifying a disk subjects it to a series of checks, all of which are done through a process called “Live Verification”. This means that Disk Utility can check the status of a disk, its catalog file, multi-linked files, catalog hierarchy and more the Mac needing to be started up with another disk drive. It does this by “freezing” the volume, so while you’re running the verification tests you may find that your Mac becomes slow or unresponsive.
To verify a disk, simply launch Disk Utility (found in Applications > Utilities), click on the drive volume you wish to check, then click on the First Aid button in the Disk Utility toolbar. Disk Utility responds by stating what it’s about to do:
Click the blue Run button to begin the process of verifying the disk. Disk Utility informs you of what’s about to happen, specifically noting that apps will become unresponsive during the tests.
Click the blue Continue button, and Disk Utility begins to perform its battery of tests on the hard drive. The process usually runs quickly, taking only a few minutes to verify a large (2 TB) boot drive. You’ll get a notification that the First Aid process is complete (see image below), with either a green check mark indicating that everything appears to be OK or a red X indicating that there are some issues that need to be repaired. To repair a disk, it’s necessary to boot from another drive, then run Disk Utility again. We’ll cover that in the next section of this post.
Note that the Live Verification process only works on volumes that have been formatted as “Mac OS Extended (Journaled)”. If you run First Aid on a volume that is not journaled, Disk Utility responds with an error message saying “ERROR: could not freeze volume (Operation not supported). In addition, you may not be able to interrupt the Live Verification through First Aid, so it’s best to let it continue to run until completed. Finally, an alert message that says “Incorrect size for file temp” is no cause for alarm.
Repairing a Disk
If First Aid and the Live Verification process indicate that repairs are required on a volume, it’s time to boot from another disk drive and then run Disk Utility again. Fortunately for Mac users, there’s a built-in “boot disk” in the guise of the Recovery Partition.
To boot from the Recovery Partition, restart your Mac and hold down the Option key. When the Mac restarts, you are greeted by icons for all of the available drives. In the example below, there’s a Sierra drive, a Windows drive (Boot Camp), and a drive designated “Recovery-10.12”. macOS Sierra is also known as macOS 10.12, so this is the Recovery Partition for our Sierra boot drive.
Use your mouse, trackpad, or keyboard arrow keys to highlight the “Recovery-10.12” drive, then press Return. Once the system has booted, four macOS Utilities are listed, one of which is Disk Utility (see image below). Click Disk Utility to select it, then click the Continue button. The familiar Disk Utility window appears. Click on the drive requiring repairs, then click First Aid again. As before, Disk Utility will take the volume through the Live Verification process. When it finds errors on that volume, it can now repair them since you’ve booted from another disk.
Should you require additional detail not found in this post, be sure to check these two Apple knowledge base articles:
Further reading on macOS Sierra:
Disk Utility’s restore function lets you create a bootable clone
- Tweet
- Share
Disk Utility has always been able to create clones, although the app refers to the process as Restore, as in restoring data from a source drive to a target drive. The restore function isn’t just for drives. It will work with just about any storage device that you can mount to your Mac, including disk images, hard drives, SSDs, and USB flash drives.
While it’s still possible to create an exact copy (a clone) of any drive connected directly to your Mac, changes to Disk Utility have created extra steps when you use Disk Utility’s Restore function to clone your startup drive.
But don’t let the idea of extra steps get in the way, the process is still pretty simple, and the added steps actually help ensure a more accurate clone of the startup drive.
Instructions in this article apply to devices running macOS 10.11 (El Capitan) and later.
How Restore Works
The Restore function in Disk Utility uses a block copy function that can speed up the copy process. It also makes an almost exact copy of the source device. What “almost exact” means is that a block copy moves everything in a data block from one device to the other. The results are almost an exact copy of the original. A file copy copies the data file by file. While the information remains the same, the location of the file on the source and destination devices will likely be different.
Using a block copy is faster, but it does have some limits that affect when it can be used, the most important being that copying block by block requires that both the source and destination devices be first unmounted from your Mac. This ensures that block data doesn’t change during the copy process. Don’t worry, though; you don’t have to do the unmounting. Disk Utility’s Restore function takes care of that for you. But it does mean that neither the source nor the destination can be in use when you use the Restore capabilities.
How to Restore a Non-Startup Volume
You can’t use the Restore function on the current startup drive, or any drive that has files in use. If you need to clone your startup drive, you can make use of either your Mac’s Recovery HD volume or any drive that has a bootable copy of OS X installed.
Launch Disk Utility, located at /Applications/Utilities.
The Disk Utility app will open, displaying a single window divided into three spaces: a toolbar, a sidebar showing currently mounted drives and volumes, and an info pane, showing information about the currently selected device in the sidebar.
If the Disk Utility app looks different from this description, you may be using an older version of the Mac OS. You can find instructions cloning a drive using an earlier version of Disk Utility.
In the sidebar, select the volume to which you want to copy/clone data. The volume you select will be the destination drive for the Restore operation.
Select Restore from Disk Utility’s Edit menu.
A sheet will drop down, asking you to select from a drop-down menu the source device to use for the Restore process. The sheet will also warn you that the volume you selected as the destination will be erased, and its data will be replaced with data from the source volume.
Use the drop-down menu next to the “Restore from” text to select a source volume, and then click the Restore button.
The Restore process will begin. A new drop-down sheet will display a status bar indicating how far along in the Restore process you are. You can also see detailed information by clicking the Show Details disclosure triangle.
Once the Restore process is complete, the drop-down sheet’s Done button will become available. Click Done to close the Restore sheet.
Restore Using a Startup Drive
When you use the Restore function, both the destination and the source must be able to be unmounted. Your startup drive can’t be active if you want to restore it. Instead, you can start your Mac from another volume that contains a bootable version of the Mac OS. The one you use can be any volume attached to your Mac, including a USB flash drive, an external, or the Recovery HD volume.
Why Use Disk Utility’s Restore Function?
Disk Utility is free and included with every copy of the Mac OS. And while the various cloning apps have a lot more features, if you don’t have access to third-party apps, using Disk Utility will create a perfectly usable clone, although it may require a few more steps and lacks some nice features, such as automation and scheduling.
Sue Wayne
Jul 05, 2021 • Filed to: Solve Mac Problems • Proven solutions
Apple claims that its Mac OS is fully equipped to assist its users for day-to-day PC activities, and they seem to have proven the same over the years. Since Mac users save a lot of important data on it, it is necessary to keep all such information secure. Mac Disk Utility does exactly that with the help of its “Restore” option. This function teaches you how to Clone a Mac’s Drive with Disk Utility.
In this article, learn how to copy all the data and clone a Mac’s Drive (internal/external) easily. Read and know more about Mac Disk Utility, its “Restore” function, how to clone a Mac’s Drive with Disk Utility, and a simple way to В recover your Mac’s Drive.
- Part 1: Why You Need to Clone a Mac’s Drive?
- Part 2: How to Clone Mac’s Drive Using Disk Utility?
- Part 3: How to Recover Mac’s Drive Data?
Part 1: Why You Need to Clone a Mac’s Drive?
“What is the need to clone a Mac’s Drive?” This thought must have crossed your mind atlas once while using Mac. To be precise, cloning of hard drives protects your important data which is under possible risk of physical destruction, loss, etc.
No matter how new or of what quality your hard drive is, you cannot say for sure that it will last forever and never crash or suffer from a system failure. Old hard drive or one suffering from mechanical, firmware, or electrical error can permanently destroy your data, such as photos, documents, videos, music, and other files. Also, if important personal documents and business files are misplaced in the process, retrieving them is next to impossible.
Therefore, to prevent these and many more situations that may arise due to data loss, we recommend that you always know how to Clone a Mac’s Drive using Disk Utility. Mac Disk Utility and its “Restore” functions can keep your data, important information, and files secure by literally copying it from your Mac Drive.
Difference Between Time Machine Backup and Cloning Hard Drive
If you’re wondering whether to use Time Machine or Mac Disk Utility to clone a Mac’s Drive, let us clear the confusion for you. Time Machine is a built-in application to back up and make an up-to-date copy of the data you save on the Mac. Its unique feature is that it makes real-time backups to recover files easily whenever needed. When set-up for the first time, Time Machine performs a full backup of the Mac and its contents. Time Machine keeps, hourly, daily and monthly backups all categorized separately.
If Time Machine can do so much, then why consider using Mac Disk Utility?
To start the discussion, Mac Disk Utility is free and also comes built-in with every Mac OS version. It has various new features that make it more suitable than the Time Machine. Say, for example, its “Restore” option does something what is called block copy and make the entire cloning process swifter. It is also capable of making an almost cut to cut an exact copy of the contents of the Drive. No important files, documents, or data are left behind using Mac Disk Utility. It works in blocks and does not involve file to file transfer.
Some changes have been introduced in the Mac Disk Utility toolkit which makes more accurate cloning and copying data from the Drive.
Part 2: How to Clone Mac’s Drive using Disk Utility?
Curious to know how to clone a Mac’s Drive with Disk Utility? Follow these simple steps and you’re good to go:
- Open Mac Disk Utility on your Mac from Utilities or Applications.
- Click “Erase” from the top of the Disk Utility interface.
- Now chose a media on the left panel to make it your backup drive.
- At the drop-down list which has “Format” options, choose Mac OS Extended (Journaled). Then hit “Erase” again and wait for the drive to remount on Mac.
- Then at the Mac Disk Utility interface, click “Restore”.
- Now comes the tricky bit. Select the target drive, drag it and drop it at the “Source” field.
- Now drag and drop the destination Disk/Drive and leave it at the “Destination” field.
- Hit “Restore” once and for all. The contents of the drive will be copied and saved on the destination drive.
Part 3: How to Recover Mac’s Drive Data?
What does one do if some data is lost during cloning the mac’s Drive? Don’t worry. The loss isn’t permanent and the destroyed data can be recovered with the help of В Recoverit for Mac. It is a recovery tool for MacBook, iMac, Hard Drives, Flash Drives, Memory Cards, phones, cameras, and camcorders. It can instantly retrieve the lost contents from the Mac Drive and provide reliable data recovery solutions. It can recover documents, images, videos, audio files, emails and archives files.
The steps given below will help you use Recoverit for Mac to recover Mac’s Drive:
- Download, install and launch Recoverit hard drive recovery software. Now choose the target drive where the data gets lost, and click “Start” to recover lost data.
- And then the data recovery tool will set in motion an all-around scan to search the lost files.
- Finally, you can preview the whole scanned results, select the ones which need to be restored, click “Recover” as shown below, and save the recovered data in another drive/disk to keep it secure for future.
Conclusion
The bottom line, we have attempted to answer a commonly asked question on online forums, i.e., how to clone a Mac’s Drive with Disk Utility. We hope you will find this red useful and now be able to clone your Mac’s drive and keeps its contents safe.
Also, the Recoverit drive data recovery toolkit is a safe, effective, and trustworthy medium to retrieve your lost documents and file. So go ahead and follow the instructions in this guide to clone Mac’s drive or В recover hard drive data В deleted accidentally during its process.
Chris Hoffman is Editor-in-Chief of How-To Geek. He’s written about technology for over a decade and was a PCWorld columnist for two years. Chris has written for The New York Times, been interviewed as a technology expert on TV stations like Miami’s NBC 6, and had his work covered by news outlets like the BBC. Since 2011, Chris has written over 2,000 articles that have been read nearly one billion times—and that’s just here at How-To Geek. Read more.
Think you can just plug a standard Linux live USB drive into your Mac and boot from it? Think again. You’ll need to go out of your way to create a live Linux USB drive that will boot on a Mac.
This can be quite a headache, but we’ve found a graphical utility that makes this easy. You’ll be able to quickly boot Ubuntu, Linux Mint, Kali Linux, and other mainstream Linux distributions on your Mac.
The Problem
Apple’s made it difficult to boot non-Mac OS X operating systems off of USB drives. While you can connect an external CD/DVD drive to your Mac and boot from standard Linux live CDs and USBs, simply connecting a Linux live USB drive created by standard tools like Universal USB Installer and uNetbootin to a Mac won’t work.
There are several ways around this. For example, Ubuntu offers some painstaking instructions that involve converting the USB drive’s file system and making its partitions bootable, but some people report these instructions won’t work for them. There’s a reason Ubuntu recommends just burning a disc.
rEFInd should allow you to boot those USB drives if you install it on your Mac. But you don’t have to install this alternative UEFI boot manager on your Mac. The solution below should allow you to create Linux live USB drives that will boot on modern Macs without any additional fiddling or anything extra — insert, reboot, and go.
Use Mac Linux USB Loader
A tool named “Mac Linux USB Loader” by SevenBits worked well for us. This Mac application will allow you to create USB drives with your preferred Linux distro on them from within Mac OS X in just a few clicks. You can then reboot and boot those USB drives to use the Linux distribution from the live system.
Note: Be sure to move the Mac Linux USB Loader application to your Applications folder before running it. This will avoid a missing “Enterprise Source” error later.
First, insert the USB drive into your Mac and open the Disk Utility application. Check that the USB drive is formatted with an MS-DOS (FAT) partition. If it isn’t, delete the partition and create a FAT partition — not an ExFAT partition.
Next, open the Mac Linux USB Loader application you downloaded. Select the “Create Live USB” option if you’ve already downloaded a Linux ISO file. If not, select the “Distribution Downloader” option to easily download Linux distribution ISOs for use with this tool.
Select the Linux distribution’s ISO file you downloaded and choose a connected USB drive to put the Linux system on.
Choose the appropriate options and click “Begin Installation” to continue. Mac Linux USB Loader will create a bootable USB drive that will work on your Mac and boot into that Linux distribution without any problems or hacks.
Before booting the drive, you may want to change some other options here. For example, you can set up “persistence” on the drive and part of the USB drive will be reserved for your files and settings. This only works for Ubuntu-based distributions.
Click “Persistence Manager” on the main screen, choose your drive, select how much of the drive should be reserved for persistent data, and click “Create Persistence” to enable this.
Booting the Drive
To actually boot the drive, reboot your Mac and hold down the Option key while it boots. You’ll see the boot options menu appear. Select the connected USB drive. The Mac will boot the Linux system from the connected USB drive.
If your Mac just boots to the login screen and you don’t see the boot options menu, reboot your Mac again and hold down the Option key earlier in the boot process.
This solution will allow you to boot common Linux USB drives on your Mac. You can just boot and use them normally without modifying your system.
Exercise caution before attempting to install a Linux system to your Mac’s internal drive. That’s a more involved process.


