If Christmas is all about making memories, capturing them is often half the fun. And though your smartphone makes sharing photos with friends and family extremely easy, the reality is you’ll get much better photos using a traditional DSLR camera. Fortunately, the Canon EOS Rebel T6i’s Wi-Fi functionality means you don’t have to choose between the convenience of sharing and the best image quality possible.
Seamless Sharing
With the EOS Rebel T6i, you can share where and what you want, with streamlined connectivity directly from the camera (no computer required!). Email photos and videos to your loved ones, near and far. Upload holiday pictures and video directly to Facebook and Twitter with the tap of a button. Send favorite shots wirelessly to a nearby networked Canon PIXMA Printer or PictBridge-compatible printer, then create and mail high quality prints.
Moving Memories
This camera puts holiday slide show direction in your hands, too. At the end of the day, when the festivities are over and your family is winding down, fire up your Canon EOS Rebel T6i and wirelessly transfer still images and videos to compatible media players and smart TVs. Together with your loved ones, you can recreate your memorable holiday moments with a one-of-a-kind holiday slideshow. All that’s missing is some hot cocoa and holiday cookies.
There’s an App for That
The Canon Camera Connect app turns your Android or iOS mobile device into a remote control for your camera, giving you an additional screen for composing your shot, zooming and focusing, and setting self-timers. And while you can certainly share to your network directly from the camera’s digital display, the Camera Connect app also pairs the EOS Rebel T6i with your Android or iOS mobile device and transfers images wirelessly, too. It’s a great way to get in some last minute edits, add a photo filter or create a collage before uploading and sharing your images.
Hashtag It
Now that your camera has taken your holiday photo sharing to a new level, it’s time to get all of those pics organized and keep the holiday memories going. How do you do it? With hashtags! Trendy social networking identifiers (like #TeamCanon) will help you round up all of the holiday photos you and your guests take, and make it even easier to share the collection with others. Or create your own fun, festive hashtag that’s easy to remember and unique to your family, and include it in all of your holiday photo posts. Then encourage your friends and family to hashtag their own photo updates, and invite them to tag themselves in yours so your photo sharing reach grows even bigger.
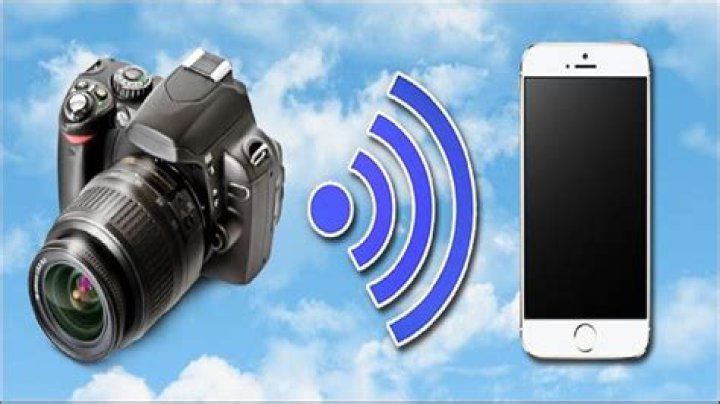
Here are the fastest ways to get the photos you take on your camera onto your phone.
For most people, the barely discernible disparity in quality of photos between smartphone and point-and-shoot has removed the need for a dedicated camera.
But for professional photographers or those who need that extra bit of quality, be it depth of field or low-light photography, a dedicated shooter is the way to go.
When using a dedicated camera, however, you run into a question of how to get those high-quality images off the camera and directly onto your phone. Here are the best ways to do just that.
Wireless
Most newer cameras come with wireless transfer capabilities, typically using a local Wi-Fi connection. When enabled, the camera will emit a wireless network. Connect to that network using your phone and the companion application, and you can remotely control or change settings on the camera and you can download any of the images or videos you’ve take directly to your phone.
The Panasonic Lumix GH4 I use has this ability, and it works with both Android and iOS devices. Any Wi-Fi or Bluetooth-enabled GoPro will have the same capabilities, and many dSLRs and point and shoot cameras are capable of this, as well.
Wireless SD cards
That said, not all cameras have wireless transfer abilities. It’s with these cameras that companies like Eyefi , which makes SD cards with Wi-Fi capabilities, flourish. Effectively, an Eyefi SD card enables wireless photo transfers on any camera that uses an SD card for storage.
As novel as they are, though, there are some drawbacks. Primarily, they cost several times the price of similar capacity SD cards without Wi-Fi. A 32GB SD card from Sandisk with fast read and write speeds, can be found online for around $12; according to Eyefi, its 32GB mobiPRO is $99.99, £58.33 or AU$112.99. On top of that, Wi-Fi cards will cause some pretty significant battery drain on your camera and the largest capacity currently available is 32GB.
When wireless isn’t an option
In most cases, as old fashioned as it may seem, a wired adapter is going to be the most reliable solution. You don’t have to worry about the reliability of the connection, plus read and write speeds are typically much higher, meaning they have less of an effect on your phone’s battery.
Android
For Android devices, you will need a USB On the Go (OTG) adapter — a USB Type-C or Micro-USB to USB adapter which can be found online for cheap. You will also need a USB connector for your camera or an SD to USB adapter.
To transfer photos from the camera to your Android device:
- Plug the cable into the Android device.
- Attach either the camera or the SD card adapter to the adapter.
- On the Android device, pull down the notification shade, tap on the notification that says Touch for more options (exact wording may vary, depending on the phone). In the pop-up window, choose Photo transfer (PTP).
- Pull down the notification shade one more time and tap Explore.
You should now be able to view all images saved on the SD card and transfer them to the local storage on the Android device.
iPhone
The process for transferring photos to an iPhone or iPad from a camera is very similar, only you will need a different adapter.
If you’re using the camera to connect with the camera directly, you can save yourself some cash by buying the old Lightning to USB Camera Adapter from Apple for $29, £25, AU$45.
To use it, plug it into the Lightning port on your iOS device, put the camera into USB mode, and using the included data cable for the camera (typically a USB to Mini-USB or Micro-USB), plug the camera into the Lightning to USB adapter. The Photos app will launch, showing all the images and videos on the camera and from there, you can import and delete the camera contents.
Alternatively, you can use an SD card reader to import the photos and videos directly from the SD card. To do this, however, you will need the original Lightning to USB Camera Adapter and a powered USB hub or the newer Lightning to USB 3 Camera Adapter, which retails for $39, £29, AU$59. To import photos using an SD card reader:
- First, plug the Lightning to USB or Lightning to USB 3 adapter in to the iPhone or iPad.
- If you’re using the Lightning to USB adapter, attach a powered USB hub to the adapter and connect it to a power source.
- If you’re using the Lightning to USB 3 connection, connect the adapter to a power source using the Lightning port.
- Next, unlock the iOS device and attach the SD card adapter to the Lightning to USB 3 adapter or powered USB hub.
- After a few seconds, the Photos app will appear, displaying the content on the SD card. You can then import or delete photos.
Regardless of which method you use, after you import the photos using iOS, you can choose to delete the photos you’ve imported from the camera to free up space or keep them.
Step-by-step set-up guides
Article revised October 2019
All Z series Mirrorless cameras, select Nikon DSLRs and many COOLPIX compact digital cameras have wireless connectivity built-in.
Using these cameras, you can seamlessly transfer images from your Bluetooth- or Wi-Fi ® -enabled camera to your compatible smartphone or tablet for easy sharing via email, text or uploading to an image sharing site. And a great feature of Nikon cameras that feature wireless connectability is that you don’t need to be at a Wi-Fi hotspot. The camera and your smart device create the connection.
Older camera models may utilize the Wireless Mobile Utility app. Newer model cameras use the SnapBridge app. Check your camera’s user’s manual before you begin setting up the wireless connection between your camera and smart device to make sure you’ve downloaded the correct app to your smartphone or tablet.
Although your smartphone probably has the capability of shooting photos, your Nikon digital camera will take better photos. This is because Nikon digital cameras utilize larger image sensors, and powerful image processing engines. The camera’s sensor is designed to give you a higher resolution, wider dynamic range, and the ability to shoot in low light and use high ISOs—all of which allow for the generation of high quality image files. Nikon digital cameras also utilize great NIKKOR lenses, as well as many features that allow you to be creative with your photography.
What types of devices can I connect my camera to wirelessly?
Nikon mirrorless cameras, DSLRs and COOLPIX models allow you to connect to smart devices: smartphones and tablets. Nikon Z series mirrorless cameras can also connect to personal computers to download directly via Wi-Fi.
Once on your smart device, you can upload images to image sharing or SNS websites, or send them to friends and family via email or text messaging.
What file types/sizes should I set the camera to?
The first question you need to ask yourself is what will you be doing with the photos that you take? Will you be printing them or just using them digitally? Are you only taking snapshots that you are going to share on social media sites or do you want the highest possible resolution from your camera?
Your Nikon camera has a high resolution image sensor and it can create large files. If you want to take photos using the maximum resolution of the camera, the fastest and simplest way to get these images to your computer or smart device is via a card reader or by connecting the camera to your computer via USB and downloading the files. Wireless transfer in these instances is not the ideal solution. It is a great choice for smaller files and quick downloads of a few shots.
For folks who want to shoot using the highest resolution in your camera, set the app up so that it only downloads the recommended size or even smaller VGA size image while recording the high res. image to the media card in the camera. Then you can eventually download the full sized files to a computer.
If on the other hand, you only want to send a few images to your smartphone or tablet and don’t need a large file size, then set the camera to record images in JPEG normal or basic. You can also choose to record images in JPEG fine and select the smaller sizes for download via the app. This gives you the option, should you change your mind to download the full size files from the media card in the future.
The D3400 DSLR only features Bluetooth connectivity to download images.
You can also share video with Nikon mirrorless Z series cameras and DSLRs.
Remote Control
You can even use your Android™-powered smartphone or tablet, or iPhone ® or iPad ® as a remote to shoot photos with—allowing you to get into the shot along with your other subjects, or even place the camera in a location to capture wildlife while you snap the shutter from a remote spot far from the wild animals. What’s really fun is that you actually see the same image the camera sees on your smartphone or tablet’s LCD screen—allowing you to shoot at precisely the right moment that you want. (Check your Camera’s User’s Manual to see if your camera has this capability The D3400 does not offer this feature.)
How to Use Nikon Built-in Wi-Fi
In order to use the Wi-Fi feature of Nikon cameras that have built-in Wi-Fi, you’ll need to download the free app that your camera uses, either the Wireless Mobile Utility or SnapBridge app. For folks using Android™-powered devices, download the app from the Google Play™ Store and install it on your Android™-powered smart device. For folks using an iPhone ® or iPad ® , download the app from the iTunes Online Store ® .
Insert a media card into the camera. You must have a media card in the camera for the Wi-Fi menus to be fully accessible. For COOLPIX cameras, the battery level must also have at least a 50% charge for the Wi-Fi to work.
Connecting a compatible camera to a smart device that utilizes the SnapBridge app:
We’ve put together a video tutorial for iOS users, and another for Android-powered devices. These videos show you how to set up the camera and smart device using step-by-step instructions.
S haring your photos and videos with the Nikon Z 50 is quick and easy.
All you need is your camera, compatible smartphone or tablet and the free Nikon SnapBridge app which can be found on the Apple App store and Google Play store. Just download the app onto your iPhone ® or iPad ® or smart device running on the Android™ operating system and follow the prompts to pair the camera via Bluetooth and Wi-Fi ® .
Once you pair the Z 50 and your smartphone or tablet, you can download photos and videos to your device for speedy sharing to your favorite social media sites or by text or email. The SnapBridge app even lets you control your camera remotely so you can take photos or start and stop video capture. There are options for downloading a recommended smaller sized image file or the full sized image.
Nikon’s even got an image sharing site, Nikon Image Space, that gives you 20 Gigs of storage free when you sign up for a Nikon ID and register your Nikon camera.
Download to Computer Too
You can even download photos and videos to your Mac or Windows-PC with the free Nikon Wireless Utility software. You even have the choice of connecting directly to your computer or to your home network. Check out your camera’s user’s manual for step-by-step instructions on setting it up.
Wired Connectivity & Other Options
There are a couple other Z series connectivity options to get your images and video from the camera to computers and smart devices. You can use an inexpensive third-party card reader to download files, especially large video files or RAW NEF image files. There are card readers made for connecting to computers and others that connect to your smartphone or tablet. This is, by far, the quickest and easiest way to get the files out of the camera and onto your device. Lastly, if you’re just looking to download images to your computer over a wired connection you can connect the camera via USB to a Mac or Windows-based PC for image and video downloading.
Matt Gray has created the holy grail for Game Boy Camera enthusiasts.
As beloved as the Game Boy Camera remains decades after its 1998 debut, it’s still saddled with a big technological hurdle: getting the photos off the device for archival and sharing purposes. A myriad of solutions have been created over the years , from cables to cartridge adapters, but none as simple to use as Matt Gray’s wireless adapter .
When it first debuted, the only way to really preserve the black and white, pixelated, 128×112-pixel images the Game Boy Camera snapped (it could only hold 30 shots before you needed to permanently delete them) was through the Game Boy Printer accessory, which created hard copies on thermal paper that doesn’t exactly stand the test of time. Companies like Mad Catz created special link cables and Windows apps that could pull images off the console, but they’re extremely hard to come by now, and who wants to run to their laptop to dump photos when we all carry around extremely sophisticated pocket computers?
Gray’s Game Boy Camera Fast Wifi Adapter is powered by two specific pieces of hardware hidden away inside a custom 3D-printed enclosure: a Raspberry Pi Zero W and a GBxCart RW which is a device that emulates the original Game Boy’s cartridge slot allowing ROM files, save games, and other data stored on game carts—like photographs—to be backed up to a computer.
Using the adapter looks incredibly easy, and it doesn’t even require the Game Boy hardware. The camera simply slots into the top of the adapter which pulls the images from the camera roll and makes them available over wifi on a website that can be accessed from a smartphone’s web browser, or really any device imaginable that can join a wireless network and load a web page.
Although Gray could easily make a small fortune mass-producing their wireless Game Boy Camera adapter, they don’t appear to have any plans to put them into production, unfortunately. They have, however, shared a thorough breakdown of how it was built on GitHub , including downloads for the custom software they wrote, and even the model files for the 3D-printed enclosure.
Is there any Canon DSLR camera that can transfer photos directly from the camera to a server via FTP or to Dropbox wirelessly ?
Anything like that ?
3 Answers 3
Pretty much all of the 1-series have an ethernet port that allows FTP over ethernet. The two most recent models are the EOS 1D X Mark II and the EOS 1D X Mark III. But that requires a wired connection to a network host.
There are plenty of recent Canon models in several classes and price ranges that have WiFi capability. Some require an external WiFi adapter. Others have Wi-Fi built in.
The Canon EOS 1D X Mark II and C300 Mark II can use the Canon WFT-E8A Wireless File Transmitter¹ to log onto a Wireless LAN (IEEE 802.11a/b/g/n/ac) and use FTP or other transport protocols to wirelessly transmit images.
The (discontinued) Canon EOS-1D X and the (discontinued) EOS C300, EOS C300 Mark II, EOS-1D C and EOS C500 Digital Cinema Cameras can use the Wireless File Transmitter WFT-E6A¹ which supports the 802.11n protocol.
The Canon WFT-E7A Wireless File Transmitter (Version 2)¹ is the current unit for the EOS 7D Mark II. The earlier version of the WFT-E7A worked with the previous EOS 5D Mark III. There are reports that the V2 (which only seems to be a firmware update) also works with the EOS 5Ds/5Ds R and EOS 5D Mark IV.
There were also various WFT units sold in the past for use with previous 1 Series models (1D Mark IV, 1Ds Mark III, etc.) and 5 series (5D Mark II, 5D Mark III) with varying levels of capabilities.
¹ Suitability depends upon what country one is in. The WFT-E6B, for example, is sold for use in the UK and uses different radio frequencies than the WFT-E6A. Please check with Canon customer service in your world area to determine which version will work with wireless networks in your location.
Unfortunately, to provide images directly to a remote server wirelessly via built-in WiFi on other Canon models, one still needs an intermediate device with the ability to connect to the WiFi network hosted by the camera on one hand and a separate ability to connect to “the internet” on the other hand. Other than bodies that use an external WFT module, none of Canon’s other bodies allow the camera to log onto a WiFi network hosted by another device. All WiFi connectivity using internal WiFi connectivity is only via a network hosted by the camera.
Some of the newer models with Bluetooth are able to use Bluetooth (which has a fairly limited range) to automatically connect to a device such as a phone or tablet. But the actual transfer of images is done via WiFi after the Canon Camera Connect App installed on the Bluetooth device tells the device to switch its WiFi connection to the camera’s network. Current models with Bluetooth include the EOS M5, EOS M6, EOS Rebel T7i/800D and the EOS 77D.
Due to limited battery power available and bandwidth issues with wireless connections, one is usually limited to transferring only JPEG images.
You can transfer photos from an Android phone to your Windows 10 PC with the Your Phone app. iPhone users have to rely on third-party options.
If you need to send photos from your phone to a computer, you can use email, Google Photos, or even a direct cable connection. However, you may find it quicker and more convenient to transfer them wirelessly from phone to PC.
Microsoft once offered an app called Photos Companion, which allowed iPhone and Android users alike to transfer photos to Windows 10 PCs, but it has been discontinued. In its place, Android users can use Microsoft’s Your Phone app, while iPhone users will need to find third-party options that can perform the task.
Your Phone
To get started with Your Phone, first open Settings > Phone and click the Add a phone button in Windows 10.
The Your Phone desktop app will open, and ask you to choose your phone type. Choose Android and click Continue. Your Phone will ask you to confirm your Microsoft Account. Click Continue.
Now install the Your Phone Companion app on your Android phone. Open the app and link your phone with your PC by either signing into your Microsoft Account or scanning the QR code. Scanning the code is quicker, so tap the Is there a QR code on your PC? link and tap Continue at the next screen.
Back at the Your Phone desktop app, check the box for Yes, I finished installing Your Phone companion. Click the Open QR Code button.
A QR code will display on your desktop. Use your smartphone camera to scan the QR code.
In the mobile app, tap Continue and then grant the necessary permissions for Your Phone to access your contacts, phone calls, media, and messages. Tap Continue.
Choose to allow the app to run in the background for now. You can always change this later. Tap Allow to let your phone connect to your Windows PC. At the next screen, tap Done. The next screen confirms that your phone and PC are linked.
On your PC, tap the Let’s Go button. You should then see your linked phone listed in the Your Phone app.
In the Your Phone app, click Settings > General and turn on the switch under Allow this app to show photos from my phone, if it’s not already enabled.
Your last 25 photos and screenshots should automatically appear on the main screen in the app. If not, click the entry for Photos and then select the See photos button. Click on any photo to open it. For more settings, right-click on an image to open a pop-up menu with options to copy, share, or save the photo to your computer.
Now, let’s look at a few third-party photo transfer apps for the iPhone, iPad, and in some cases, Android devices.
Photo Transfer App
Photo Transfer (iOS, Android) allows you to move photos from your iPhone or Android device to your computer via Wi-Fi. If you’re using the free version of the mobile app, you can transfer up to 10 photos at a time. For $6.99, the paid version kicks in more features, such as no transfer limits and full-resolution transfers.
Install the app on your phone and use the dedicated web page to transfer photos onto your computer. Open the app on your phone and click the Send button. A variety of options are available for sending photos, but try the one to send photos over Wi-Fi. If you’re using a Windows PC, tap the Windows icon. The next screen tells you to run the Photo Transfer App on your computer or use your web browser.
If you plan to use the software on a regular basis, I suggest installing the free Windows or Mac version on your computer, as it’s easier to use than the web page. Open the app on your computer, click the Discover Devices button, then select your phone. You can select either Wi-Fi or Bluetooth to run the transfer.
On your phone, authorize the connection. Your phone’s photo albums and libraries should appear in the app on your computer. You can now browse through your photos. Right-click a specific photo to download it to your computer, delete it from your phone, or download and delete it. You can also select multiple photos to download or delete in one shot.
PhotoSync
PhotoSync (iOS, Android) also uses mobile and desktop apps. You can transfer photos to a Windows or Mac computer, a network-attached storage device, or an online storage site such as OneDrive or Dropbox. The basic app is free but limits your photos to low-quality JPG images. For a one-time purchase of $13.99 or a subscription of 99 cents a month or $2.99 a year, you’ll get higher quality image transfers and other bonus features.
Download the app onto your phone and then install the free PhotoSync Companion for your Windows PC or Mac. Fire up the mobile app, and it automatically displays your camera roll. Select the photos you want to transfer. Tap the red transfer circle in the upper-right corner. You can now opt to transfer all the photos in your library or just the selected images.
Choose the destination, such as your computer, another phone or tablet, or a storage site. If you select your computer, make sure the companion app is running on your Windows PC or Mac. In the mobile app, tap the name of your computer. Your photos are then transferred, and PhotoSync creates a subfolder under your Pictures folder. That folder then opens automatically for you to view the transferred photos.
WiFi Photo Transfer
The free WiFi Photo Transfer app (iOS only) generates a local web page on your network from which you can view and download photos from your phone. Fire up the app on your phone and enter the URL displayed on the screen into your desktop browser.
The page shows all the photo libraries from your phone with your most recent photos at the top. Click the Recents link to see all your latest photos. Click the Download in .zip button. Select one or more photos and click the download selected pictures button. The photos are downloaded in a single zip file that you can then unzip on your PC.
Connecting your devices with a cable is the fastest and most reliable way to transfer files between them. Now that most Android devices have either USB Type-C or a Micro-USB port that supports USB OTG, phones are capable of importing media files directly from a camera using a simple (and cheap) adapter.
This nifty feature allows you to shed your laptop for a tiny plug that you can use on the go. A photographer, for example, can now take high-quality photos with a DSLR and transfer them to his or her phone via USB cable, where they can then post artwork to social media sites like Instagram directly.
If that sounds like something you’d like to try, I’ll show you how it works below. But as I mentioned, this method requires one of two adapters, depending on whether your phone uses USB Type-C or Micro-USB. If your phone didn’t come with one of these adapters in the box, though, it’s nothing to worry about, as you can get everything you need for less than $10.
Requirements
- Android device with a USB Type-C port or USB OTG-compatible Micro-USB
- Digital camera with USB cable
- USB-C to USB-A adapter or USB OTG cable for Micro-USB devices
Step 1: Plug Your Camera into Your Phone
First off, make sure your camera is on. After that, it doesn’t matter if your phone has a USB Type-C port or Micro-USB because the adapters will work the same way. So plug in your camera’s USB cable, then attach the other end to your adapter. From there, simply plug the smaller end of the adapter into your smartphone.
Step 2: Access Photos
For most devices, a dialog will pop up immediately after you plug your camera into your phone, giving you a selection of apps with which to browse the camera’s storage. Tap on Camera Importer and it will instantly scan and preview all the photos and videos inside the camera’s storage.
If the dialog didn’t pop up automatically, swipe down from the top of your screen and tap on the USB notification to specify what you want to use the USB connection for. From there, select “Transfer images” on the popup, then tap the notification that says “Select to import files,” and Camera Importer should now open to scan and load all the photos found on the camera.
Step 3: Transfer Photos to Your Phone
After your phone has finished scanning your camera’s contents, you can now pick which photos and videos you wish to keep on your phone. Some phones won’t recognize RAW image files from certain camera models, but at the very least, all of the JPG images and video files on your camera should be discovered.
We tested out phones running various versions of Android; Phones like the Nexus 6P, Pixel, and Galaxy S7 Edge worked without a hitch for all file types, while the Nexus 7, HTC One 8, and LG G3 only saw JPG and video files running on their latest software. Basically, your mileage may vary.
So from here, simply tap the photos and videos to select them, then press the “Import” button in the upper-right corner after you’ve made your selection.
Once the photos and videos have been imported, you’ll find them on your phone’s SD card or internal storage partition in a folder named after your camera’s make and model. Most gallery and photo apps should automatically find this folder, so sharing the picture will be incredibly easy. How many photos have you imported using this method so far? Let us know in the comment section below.
Keep Your Connection Secure Without a Monthly Bill. Get a lifetime subscription to VPN Unlimited for all your devices with a one-time purchase from the new Gadget Hacks Shop, and watch Hulu or Netflix without regional restrictions, increase security when browsing on public networks, and more.


